1 / 3
0 likes | 18 Views
Learn how to use stitch markers effectively for knitting projects. This guide covers different types of stitch markers, step-by-step instructions for placing them, and tips for marking pattern repeats, rounds, color changes, and more. Maximize organization and prevent mistakes with these versatile knitting tools.<br>Visit:https://knitprogo.wixsite.com/knitpro/post/how-to-knit-placing-a-stitch-marker

E N D
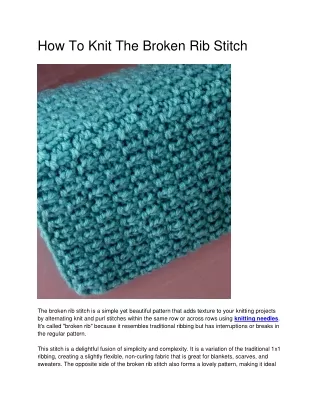
How to Knit Placing a Stitch Marker Knitting can be a beautiful mess when you start losing track of rounds or stitches that go in an ashtray. But with stitch markers, you hold the power. These versatile tools, usually made of plastic and metal, become your ultimate companions when you knit. They make your knitting sessions frustration-free and organized, allowing you to take control of your knitting maneuvering. Types of Stitch Markers There are delightful varieties of stitch markers to suit your preference and project needs. Here are the most common types:
Removable stitch Markers: These are classic loop-shaped with a small opening that allows you to add or remove them from your needles mid-project. They are perfect for marking pattern repeats or colorwork changes. Locking Stitch Markers: These secure markers have a locking mechanism that prevents them from accidentally slipping off your knitting needle. They are ideal for working with double pointed needles or intricate cable patterns. Ring Stitch Markers: Ring stitch markers are simple closed loops that offer a smooth, snag-free experience. Knitpro offers a range of vibrant-colored ring stitch markers. They also come in different shapes and sizes, such as simple rounds or squares. Try KnitPro’s unique heart-shaped Amour, Linea, and Zooni stitch markers in beautiful, colorful shades. How to place a stitch marker while knitting? It’s a very simple process. All you have to do is follow the below-mentioned steps; 1.First, identify the spot where you want to place the marker according to your pattern instructions. 2.Slide the opening of the removable stitch marker onto your right-hand knitting needle between two stitches. 3.Knit the stitch in front of the marker as usual. 4.Slide the marker over the knitted stitch, so it now sits between the newly knitted stitch and the next stitch on the needle. Why use Stitch Markers? Knitting accessories are hard work savers. There are several reasons why stitch markers are an essential part of any knitter's toolbox. Mark Pattern Repeats: Stitch markers help you identify and maintain consistent repeat sections, especially for complex lace or a cable pattern. No more counting stitches endlessly or accidentally skipping a crucial step.
Identify Rounds: When you're knitting garments in the round on your double pointed or circular knitting needles, stitch markers are your guideposts. They help you distinguish between the beginning and end of each round, ensuring a seamless, continuous flow in your projects. Monitor extended Cast-ons: They can be really helpful when you have to cast on nearly or more than 100 stitches by inserting a detachable stitch marker every 50 stitches. Armhole shaping: Armhole shaping in the garment involves increasing and decreasing stitches at specific points with your knitting needles. Stitch markers ensure you don't lose track or misshapen armhole. Colorwork Changing: Stitch markers act as visual flags when you employ multiple colors, highlighting where you need to switch colors and preventing unwanted color bleed. Catch up on Mistakes: Did you make a mistake a few rows back? A strategically placed stitch marker can help you identify the exact spot where you should fix it. Tips for Using Stitch Markers Effectively Read your pattern carefully: Your knitting pattern will specify where and when to use a stitch marker with knitting abbreviations like “PM” (place marker) and “SM” (slip marker). Use contrasting colors: If using removable stitch markers, choose contrasting colors that stand out against your yarn. This makes them easier to spot, especially on busy patterns. Don’t overload: While stitch markers are helpful, too many can clutter your knitting needles and be confusing. So, it's always wise to use them strategically and remove them when no longer needed. Experiment and find your flow as you gain experience. Try different types of stitch markers, such as wool needles, blocking tools, row counters, etc, and discover what works best for you and your knitting style. Source:https://knitprogo.wixsite.com/knitpro/post/how-to-knit-placing-a-stitch-marker


![Download Book [PDF] 200 Ripple Stitch Patterns: Exciting Patterns To Knit And Crochet For Afghans,](https://cdn7.slideserve.com/12390778/slide1-dt.jpg)