Access: oprtool.ab-inbev
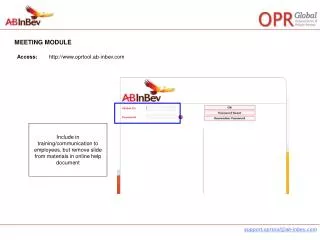
Access: http://www.oprtool.ab-inbev.com. Include in training/communication to employees, but remove slide from materials in online help document. Access: People Manager Actions: Create an OPR Meeting Include meeting participants Execute OPR meetings

Access: oprtool.ab-inbev
E N D
Presentation Transcript
Access: http://www.oprtool.ab-inbev.com Include in training/communication to employees, but remove slide from materials in online help document
Access: People Manager Actions: Create an OPR Meeting Include meeting participants Execute OPR meetings Assign People administration responsibilities to meetings
TO CREATE A MEETING Access: Include / Modify Steps: To create a meeting select NEW Complete the meeting information: Year, Name, Date and Time Meeting Type: Local, Regional, Functional, Zone, Global or Visualization* • Standardization - Name of the Meeting: • Always start with the Zone (APAC, CEE, GHQ, LAN, LAS, NA or WE) • Unit (Brewery X, Region X, ZHQ, etc) • For the ZHQ include the function (sales, supply, people, etc. • Name of the meeting (use a name that is easy to identify the audience of the meeting • IMPORTANT! • Meetings will be automatically seen by the Zone and Global talent Management Team. • *“Visualization” meetings are not editable, this meeting type should be used only to view results.
INCLUDE PARTICIPANTS IN A MEETING Access:Addparticipants to a meeting youhavealreadycreated. To include participants to berated in a meeting, select “InsertEmployee” Note: Meeting participants are the employees that the managers will discuss/rate during the meeting.
INCLUDE PARTICIPANTS IN A MEETING Access: Search according to the ID, position, band, or Location/Unit When you find the name of the participant that you want to include, select the employee and select “Save” Detail: It is not possible to include employees in a meeting who are already in another meeting, inactive or located in a different Location/Unit. TIP! If you want to delete someone from the meeting, unflag the name and select “Save”. TIP! If you do not include a filter and select “Search”, all the names in the Location/Units you can access will be listed.
GIVE ACCESS TO THE MEETINGS Access: Search for a meeting you previously created Select Responsible Detail: Provide access to a meeting to a person who will facilitate the meeting. You cannot assign access to a person who is not in your Unit. ATTENTION In the Exclude option you can eliminate an existing meeting. Be certain that you want to delete a meeting before you select this option. All information will be lost!!!
GIVE ACCESS TO THE MEETING Access: Search by the employee’s Global ID. When you find the name of the participant that you want to include, flag the name and select “save” Detail: It’s impossible to include an employee who is already in the list Attention Only give this access to the person that will facilitate the meeting (usually a People rep). It is not necessary to assign the manager - can view their employees without this access being assigned. Important! You can only assign responsibility to a person who is in your Unit.
MEETING EXECUTION STEP BY STEP • Confirm that all employees in your Unit are listed. Generate a report with your Unit name and active employees. The system will generate a list with all employees listed in your Unit. • Create the OPR meeting • Schedule the meetings. • During the meeting, assign someone to update the website (note-taker – usually a People rep) • After rating all the participants, use the option GRID to see who is allocated in each rating and adjust if necessary, then go to the option SHAPE to view the comparison between the Ideal and Real Shapes. • Define the actions and timeline for each meeting. • Prepare the Succession Plan (ready now, 1-2 years and 2+ years). Each person could appear one or more times in the Succession Plan.
Access: Execute / Select an OPR Meeting Action: Review, print profiles, update ratings and actions.
Access: Execute / Select an OPR Meeting Action: Review, print profiles, update ratings and actions. TIP! You can group and ungroup selecting +ID for all the participants individually. Meeting ungrouped. Attention that now you have the symbol (-) to re-group.
Select the name of the employee to access the profile. TIP! The profile can be printed by selecting right-clicking the mouse or selecting the Print option at the right bottom of the page.
On Evaluation you can see the preliminary OPR rating assigned by the line manager and ratings from later meetings (if applicable). Only the field of the current meeting will be available to update. The previous OPR ratings are recorded for tracking purposes. After defining the OPR rating you should complete the Action, the action completion deadline, and the employee comments. ATTENTION It’s required to complete the “Comments” field comment with the information discussed during the meeting for each employee. TIP Record comments about the employee according to the “Four A’s”: Achievement, Ability, Ambition, and Alignment with the culture ATTENTION For the ratings 4A, 1A and 1B, a deadline must be specified.
After complete all the rating process, you can select General Information to verify the gender, time in company and time in position’s distribution from the employees evaluated in this meeting . If necessary, you can return to the meeting to check out more information on each employee.
By clicking the Competencies button, you’ll have access to a graphic with the averages per band, the top 3 results and the top 3 bottoms from the employees being evaluated during the session. TIP: Click the name of the employees to see their Profiles!
By clicking the Overview button, you’ll have access to a tab which exhibits the employees’ distribution by rating. You can change and save the ratings in this tab if necessary. TIP: You can search the employees per band level if you want! Just select the band level in the drop-down and click Search.
After completing all the OPR ratings, required notes/deadlines, and validating the GRID, select SHAPE to verify the distribution of ratings. There is a action plan (PCS) available that should be completed always that you have a GAP between the Ideal Shape and the Real Shape. Important! Don’t forget to save your P/C/S before leave the screen.
Select the option SUCCESSION to complete the succession plans for the meeting. Select the position and name of the person for the succession plan. Only the employees with OPR ratings 4A, 4B, 3A and 2 will be available. Make sure to complete the timeline for each specific position/name. You can include as many succession lines you need using the option (+). Important! All employees rated 4A and 4B should be included in the succession plan. Timeline Ready now (1 to 12 months) 1-2 years 2+ years