Basic Lighting
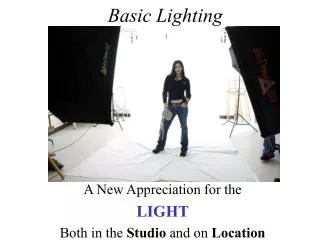
Basic Lighting. A New Appreciation for the LIGHT Both in the Studio and on Location. The Nature of Light. All light has certain qualities, whether it comes directly from the sun , already exists in a room, or is brought into the room by the photographer.

Basic Lighting
E N D
Presentation Transcript
Basic Lighting A New Appreciation for the LIGHT Both in the Studio and on Location
The Nature of Light All light has certain qualities, whether it comes directly from the sun, already exists in a room, or is brought into the room by the photographer. The light used, whether it be sun, photoflood, or flash is not as important as what that light is doing to the subject. Electromagnetic Spectrum-Visible Light- Color begins with and is derived from light. Where there is little light, there is little color; where the light is strong, the color is likely to be intense. Every ray of light coming from the sun is composed of rays that vibrate at different speeds. The sensation of color is aroused in the human mind by the way our sense of vision responds to the different wavelengths of light that affect it.
MOOD / EMOTION Light is the primary catalyst for creating a mood in a photograph. By mastering the photographic applications of light the photographer can control the viewer's visual response to his image.
Effective Use of Light Proper use of light can help the photographer convey a variety of different emotions. Harsh relationships between light and dark values communicate a feeling of mystery and drama to an image. A more subtle lighting ratio may convey a feeling of peace and tranquility . High Key lighting is ethereal and glamorous where as direct light is harsh and abrasive.
Flash Calibrations We learned the capabilities of our flash and the Inverse Square Law. As light travels it dissipates, weakens and spreads out - therefore you must compensate through exposure and/or flash to subject distance.
Three Types of Light There are three basic types of light used in the studio. Each one communicates a different mood. Direct Light Hard Light (Tungsten) - Snoot - Bare Bulb - Barn Doors Direct (side)light will enhance the texture of your subject. Diffused Light Umbrella - Soft Box - White Cards - Mylar Diffused light fills in shadows of the subject and is less harsh and abrasive. Diffused light from above (soft box) will enhance the 3-D quality of the subject (gradation) Reflected Light Specula fill - Silver/Gold Cards - Mirrors - Reflectors Help emphasize specific parts of the subject and also fill shadows and lower light ratio. Direct or Diffused light from behind will emphasize the shape of the subject!
Lighting Theory Texture = Side Light Shape = Back Light Form/Weight/3D = Top (Gradation)+Side
Concept Dictates Lighting!!! Previsualization is the catalyst for exposure determination and positioning and direction of the light.
Painting with Light! Put the shutter on BULB and start popping strobes, flashes sparklers or flashlights… See what happens…
Love those Light Ratio’sRelationship between Main and Fill Light 1•1 = 0 stop difference 2•1 = 1 stop difference 4•1 = 2 stop difference 8•1 = 3 stop difference 16•1 = 4 stop difference Main & Fill Side of Subject
Portraits and Posing The photographer must learn some basic poses and remember YOU are in charge of the portrait session - gain rapport with your model and DIRECT him/her into the pose you want them to be in.
Broad / Short / Butterfly When setting up for a portrait remember to build your lighting set-up one light at a time so you can see the effect on your subject. Use a 3:1 or 4:1 Ratio / The subjects head is often positioned at a slight angle to the camera--turned just enough to hide one ear. When using short or narrow lighting place the main light on the side of the face away from the camera. This is the most common lighting, used with oval faces as well as to thin down a round face. When the side of the face turned towards the camera is illuminated by the main light you have a broad lighting set-up. This type of lighting tends to widen the facial features so it is used mainly with thin or narrow faces. With butterfly or glamour lighting the main light is placed high directly in front of the face. Position the main light high enough to create symmetrical shadows under the nose but not so high that the upper lip or the eye sockets are excessively shadowed.
High Key Lighting 2 Stop difference between light on background and subject! Make sure light on backdrop is even with 2 tenths of stop.
Rim & Rembrandt Lighting Back light towards subject (rim) and inverted triangle on fill side of face under eye (rembrandt)
Outdoor RimThis assignment was hard! You need some LUCK on this one! Direct sun (10-2) behind subject - meter the bright sky!
Styrofoam Ball If you can photograph a white ball on a white background and hold texture and highlight detail and keep the balls white you can shoot any still life.
Eggs, Eggs and more Eggs! How Creative can you BE??? Was this assignment FUN or what?? “Some of the BEST Egg Projects Yet”
Synchro Sun Lighting Balance sunlight (main) with strobe light (fill) - must balance ambient and strobe reading to achieve desired light ratio’s.
Critiques The critique is where the learning comes full circle. We come together, share the work, discuss photographic technique’s addressed and demonstrated in the assignment and grow from the dialogue and constructive feedback. Must learn to be critical of our own work!
Field Trips... Learning to see the LIGHT!!
It’s all about seeing... Whether you are shooting in thestudio or on location it is important to develop a heightened awareness (sensitivity) to the LIGHT. Ask yourself…what is it doing to my subject and how do I expose for it to in order to achieve my previsualized results.
New Awareness of the Light A Heightened Awareness of LIGHT will make you a better photographer and enable you to MAKE pictures instead of TAKE Pictures.