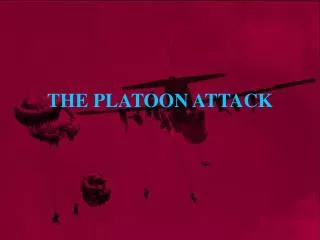
THE SECTION ATTACK
THE SECTION ATTACK. Aim. To show you how a section will work in a quick attack To demonstrate to you the drills and procedures used by the section when in battle To give you the theoretical background for when you practice in the field. BATTLE DRILLS.
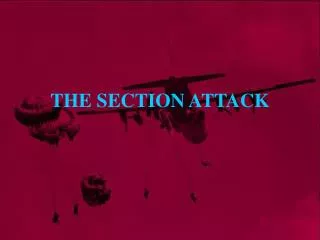

THE SECTION ATTACK
E N D
Presentation Transcript
Aim • To show you how a section will work in a quick attack • To demonstrate to you the drills and procedures used by the section when in battle • To give you the theoretical background for when you practice in the field
BATTLE DRILLS “Standard methods of executing specific tactical operations at company level and below. Their object is to enable low level tactical operations to be executed with the minimum of orders, following simple and well understood formats and thereby saving time.”
WHAT DID ALL THAT MEAN? • The less decisions you have to make, and less you have to think about it, the more efficiently you will act • Ultimately, battle drills lessen the need for orders from commanders
Battle Preparation Reaction to Effective Enemy Fire Locating the Enemy Winning the Fire Fight The Attack Reorg SECTION BATTLE DRILLS
Drill 1 - Battle Preparation PAWPERSO Section Battle Drills
PAWPERSO PROTECTION Sentries All - round defence Section Battle Drills • Drill 1 - Battle Preparation
PAWPERSO AMMUNITION Rifleman: LSW Gunner: Clean Properly distributed- mags and grenades Smoke grenades Section Battle Drills • Drill 1 - Battle Preparation
PAWPERSO WEAPONS Personal weapons Clean Serviceable Properly oiled Sights set at 300m Test fire weapons if poss Section Battle Drills • Drill 1 - Battle Preparation
PAWPERSO PERSONAL CAMOUFLAGE AND CONCEALMENT Cam cream Break up outline Scrim-net, face veil Section Battle Drills • Drill 1 - Battle Preparation
PAWPERSO EQUIPMENT Individual webbing, bergans, daysacks etc Check own kit eg pouches closed, bayonet secured etc Section Battle Drills • Drill 1 - Battle Preparation
PAWPERSO RADIOS Functioning correctly Spare batteries Frequencies & callsigns Section Battle Drills • Drill 1 - Battle Preparation
PAWPERSO SPECIALIST EQUIPMENT Equipment specific to operation Demolitions Scaling eqpt, ladders, ropes etc Section Battle Drills • Drill 1 - Battle Preparation
PAWPERSO ORDERS Prelims Situation Mission Execution Service Support Command and Signal Section Battle Drills • Drill 1 - Battle Preparation
Fire only effective if causing or about to cause casualties RTR Return Fire Take Cover Return Appropriate Fire Use Smoke on en or as cover Fire & manouevre into cover Drill 2 - Reaction to Effective Enemy Fire Section Battle Drills • IF ENEMY NOT SEEN MOVE TO DRILL 3
Can’t fight him if you can’t find him Must locate enemy as quickly as possible or initiative will be lost Three stages to this drill Drill 3 - Locating the Enemy Section Battle Drills
Range: Crack and thump - each second represents 600m Why things are seen: Shape, shine, surface silhouette, shadow, spacing, movement Allow about 30 secs Drill 3 - Locating the Enemy Stage 1 - Observation Section Battle Drills
Sect Cmd will give fire control order to two riflemen Fire into likely cover, while rest of section watches their arcs Try elsewhere if no fire returned Drill 3 - Locating the Enemy Stage 1 - Observation Stage 2 - Fire Section Battle Drills
Sect Cmd orders 2 men to get up and double about 10m If no fire drawn after 2 attempts, section is out of contact Continue advance cautiously Drill 3 - Locating the Enemy Stage 1 - Observation Stage 2 - Fire Stage 3 - Movement Section Battle Drills
If you locate the enemy: “Watch my tracer!” If no tracer, use one of the methods you have been taught: Clock ray, Direct method, Hand angles, Reference points Drill 3 - Locating the Enemy Section Battle Drills
Heavy fire brought to bear on en to neutralize him Sect Cmd must give a fire control order Once enemy suppressed 2iC controls fire Sect Cmd can make his combat estimate Drill 4 - Winning the Fire Fight and Suppressive Fire Section Battle Drills
Quick Battle Orders Section Mission - “Destroy that en position” Concept of Ops - “Section will go right flanking” Fire Team Tasks - “C assault, D fire support” Drill 5 - The Attack Section Battle Drills
Limit of Exploitation - “No further forward than en position” “Any questions? - Move now” Drill 5 - The Attack Section Battle Drills
The Assault Fire and manoeuvre from contact onto position Sect comd usually leads assault fire team 2iC controls fire support fire team Drill 5 - The Attack Section Battle Drills
When nearing the objective, the assaulting fire team breaks into pairs One pair - point of fire Other pair - assault pair Drill 5 - The Attack Section Battle Drills
The Fight Through Assault fire team fights through using F & M Bunker-busting drill Drill 5 - The Attack Section Battle Drills
Must be done asp Sect vulnerable to counterattack Sect cmd must: Allot arcs Check cas and ammo, PWs Redistribute ammo Shell scrapes Fire sp rejoins Drill 6 - Reorganization Section Battle Drills
Riflemen must check wpns, eqpt, ammo, grenades and reload mags Section Cmd responsible for operational reorg - arcs, positions etc Sect 2iC - admin - ammo, cas etc Drill 6 - Reorganization Section Battle Drills