Download
1 / 53
530 likes | 714 Views
2 nd grade clay chalice. To celebrate our First Communion To make a ceramic chalice that is really usable. To learn about the 5 steps of sticking clay together (slip, scratch, stick, stitch, smooth) To combine 3 clay hand building techniqes: slab, coil, and pinchpot. Per table & room.

E N D
2nd grade clay chalice • To celebrate our First Communion • To make a ceramic chalice that is really usable. • To learn about the 5 steps of sticking clay together (slip, scratch, stick, stitch, smooth) • To combine 3 clay hand building techniqes: slab, coil, and pinchpot.
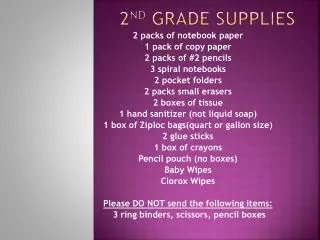
Per table & room • Old pencil to poke a hole • Jar of slip (clay the consistency of yogurt ) • Alphabet stamps
Clay supplies Cloth 2 Sticks Rolling pin Tools 2 Damp paper towels Parmesan cheese lid for cutting a circle jar of water and slip for your table…
Divide your clay into 3 pieces • Cover 2 of them ( and any clay you are not working with) with the wet paper towel
Spreading Clay • Begin with a smooth flat surface. Place newspaper or cloth over the surface to prevent the clay from sticking to your work surface. Spread the clay out by patting it with your whole hand.
Rolling Clay • roll out until the clay is the same thickness as your sticks.
cut out the circle base • Turn it over by lifting the cloth and peeling the cloth away from the clay • Put your initials and a mark for your homeroom on it • Put a hole in the middle
Put your initials , homeroom mark on the bottom. Poke a hole in the middle. Flip it.
to let the air escape from the stem • Poke a hole in the bottom till you can see the hollow stem
Take second piece of clay • Roll out a coil to make a “rope” the size of a pencil
To stick pieces together • Slip • Scratch • Stick • Stitch • smooth
Make a circle on the base to mark where you will coil your “rope” • Scratch both surfaces with a wet tool to make them rough and gooey (scratching and slipping). • Coil the “rope” (stack the circles) onto the base, scratching, slipping, and jiggling (sticking) them in place as you go. • You can smooth the coils
Make a pinch pot • Roll the last piece of clay into a ball • Wet your thumb and press into the ball almost to the bottom • Keep your thumb on the inside • Keep turning and pinching • Don’t let it get too thin
Attach the pinch pot to the chalice stem • Remember slip, scratch, stick, stitch, smooth • Decorate with texture • *if you are going to attach jewels, make an indention for it (smooth and a bit too large)
Fire and glaze • Chalices dry for 7 days and then are fired in the kiln. • Choose a glaze color (*only one: yellow orange would be good) • Cover all the surface except the very bottom so it doesn’t stick to the kiln shelf • Clean off the bottom if you get glaze on it. • *Go over name with underglaze pencil. • Fire again.
Glaze Caution • Glaze is a brushed on glass coating. Keep your fingers away from your face. Do not touch your eyes. Wash your hands as often as you want. Put a paper towel under the jar and your artwork. Protect and wipe surfaces with paper towels.
Glaze color and shine… • Glazes turn shiny and brighter only when they are fired again, and some colors don’t look even look the same color. • Look on the label to see what color it will end up being.
Glazes MUST be kept pure. Use only glazing brushes. Wash the handles and bristles of your brush before and after you use them. Use the brush only for one glaze color. Do not mix colors on your brush. Make sure to put the correct lid back on the jar. GLAZE IS EXPENSIVE
GLAZING with a brush: • Keep the brush loaded with glaze. 1 coat will be rough and will show brush strokes. 2 coats will be smooth and thick. 3 coats is the limit. • Get it in all the textured parts. • Be sure to wipe the brush on the edge of the jar so it doesn’t drip. • If bristles come out of your brush, just leave them. They will burn up in the glaze firing.
The bottom and spots for embellishments • Glaze sticks the clay piece to the kiln shelf. Do not glaze the bottom of your piece. Paint everywhere else. • Do not paint where you want to glue embellishments on. • If you get glaze on the bottom, scrub it against a wet rag. • With underglaze pencil, write your name and homeroom on the bottom of the piece before you put it on the “finished” tray.
CLEAN UP • Use paper towels. • Keep brushes in good shape. Store with bristles up. • Dried up glaze can glue the lid on. Clean the jar threads with paper towel before screwing the lid back on the jar of glaze.