Download

1 / 26
270 likes | 448 Views
“Impressive”. Evidence. Presentation developed by T. Trimpe 2007 http://sciencespot.net. What is impression evidence?. Impression evidence can be defined as objects or materials that have retained the characteristics of other objects through direct contact.

E N D
“Impressive” Evidence Presentation developed by T. Trimpe 2007 http://sciencespot.net
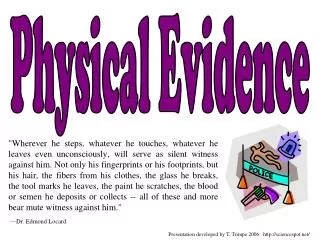
What is impression evidence? Impression evidence can be defined as objects or materials that have retained the characteristics of other objects through direct contact. Impressions are created when one object is pressed against another material with enough force to leave an impression of the object. Shoeprints, tool marks,tire tracks, bite marks, and marks on a fired bullet are several examples of impression evidence. Sole- the pattern on the bottom of a piece of footwear Impressions may be found in or on many different types of materials. The quality of the impression depends on the object making the impressionandthe surface conditions, such as how hard or soft it is and what type of material it is (soil, mud, dust, concrete, grass, skin, etc.) CSI & Impressions Images: http://upload.wikimedia.org/wikipedia/commons/archive/6/61/20070917141644!Shoeprint(forensic).jpg and http://www.topmark.co.nz/images/content/tmpics01/gallery-s/SilipressionTeethMold.jpg
Types of Impressions Latent Impression- Hidden Impression requiring special techniques to be visible Patent Impression- Two-Dimensional (2-D) impressions that are already visible Plastic Impression- Three-Dimensional (3-D) impressions cast in soft materials, such as soil and snow or blood.
Collection Methods Investigators analyze the impression evidence to find unique characteristics to link shoes, tires, tools, and other objects found in a suspect’s possession to evidence at a crime scene. Collection of impression evidence can be accomplished using several methods: 2-D: This type of impression is documented using photography. Some impressions may be dusted with fingerprint powder to be photographed or lifted with tape. They may also be collected using an electrostatic dust lifting process. 3-D: This type of impression can be documented using photography as well as by casting, which involves using dental stone or a similar substance to preserve the dimensional characteristics of the print. Example of Shoe Print in Bio-Foam Impression Foam Images: http://www.evidentcrimescene.com/cata/cast/dscasting.html
Tire Track Evidence • Tire tracks are important in forensic investigations and are usually found in road accident scenes or in the access and escape routes of other crime scenes. Tracks help investigators identify the type of vehicle that left them. Investigators may make ink prints of a tire or plaster casts of a track. They will also take photographs that can later be used to prove a match. • Features to analyze: • Tread pattern • Width & depth of the tread pattern • Unique characteristics due to the wear pattern or defects Tire databases are available help investigators determine the brand and model of the tire that left the impression , which can be used to determine the type of vehicle that made the tracks. Images: http://www.suite101.com/view_image.cfm/454216, http://www.ronsmithandassociates.com/FWTTS.htm.
Tread Pattern- the unique Design of a tire’s surface
Anatomy of a Tire Tread/Track Tire Groove- A depression in the tread pattern Tire Rib- a ridge running down the tread area around the circumference of the tire Tire Ridge- elevated area on the tread pattern (Everything that is not a groove)
Anatomy of a Tire Tread/Track Track Width- The distance from the center of the tread pattern on the left tire to the center of the tread patter on the corresponding right tire. Wheel Base- The distance from the center of the front axle on a vehicle to the center of the rear axle. Turning Diameter- A measure of how tight a circle can be driven by a vehicle
Tool Mark Evidence Tool Mark- any impression, scratch, or abrasion made when contact occurs between a tool and another object Certain defects or patterns may be left on a tool when it is made or used, which can be used to find matches between evidence at a crime scene and tools or objects found at a suspect’s home. • Tool marks can be classified two ways: • Impressions – As a tool hits a softer surface, the shape of the tool and imperfections in its surface may be left behind as an impression. • Scratches – As a tool moves across a surface, it may leave ridges or striations behind. • NOTE: Some tool marks are a combination of both types. • Features to analyze: • Dimensions of the impression • Ridges or striation patterns • Defects, such as nicks and chips • Paint chips or metal shards left on a tool Images: http://geradts.com/html/Documents/structured_files/image004.jpg and http://www.maine.gov/dps/msp/criminal_investigation/crimelab/images/toolmarks1.jpg
Other Mark Evidence Abrasion Mark- A mark produced when a surface slides across another surface Cutting Mark- A mark produced along the edge as a surface is cut Indentation Mark- A mark or impression made by a tool on a softer surface
Shoe Print Evidence • Investigators can analyze a shoe print to determine its class, or the type and brand of shoe. They will also look for individual characteristics, such as wear patterns and specific damages or defects. • Databases of shoe prints are available for investigators to help them determine the brand of shoe to provide leads for a case. • Depending on the quality of the impression, investigators may be able to determine a person’s speed (walking vs. running) as well as estimate the size of a person based on the impression’s depth. • Features to analyze: • Tread patterns, size, and depth • Wear patternscaused by the way a person walks • Material defects or damage (nicks, cuts, etc.) • Other trace materials, such as soil, tar, rocks, and paint that would indicate where a person has been STAMP Database Shoe Print in Bio-Foam Impression Foam Images: http://www.stampmatch.com/results.html and http://www.fosterfreeman.com/products/shoeprints/solemate/solemate.html
Bite Mark Evidence • Investigators can analyze bite marks for characteristics to help them identify victims or suspects as well as to exclude others. Marks can be left on a victim’s skin or other objects, such as Styrofoam cups, gum, or foods. Saliva or blood may be left behind that can be tested for DNA. Dental records including x-rays can also provide useful information, especially when attempting to identify a victim. • Features to analyze: • Type of bite mark (human or animal) • Characteristicsof the teeth (position, evidence of dental work, wear patterns, etc.) • Color of area to estimate how long ago the bite occurred (old or recent bite) • Swab for body fluids for DNA tests Bite Mark Evidence Video Did you know? The most famous incident where bite mark evidence led to a conviction, was in the case of the notorious serial killer, Ted Bundy. He was responsible for an undetermined number of murders between 1973 and 1978 and was finally tied to the murder of Lisa Levy through bites that he had inflicted on her body. Images: http://www.forensicdentistryonline.org/Forensic_pages_1/currentopic1.htm, http://www.trestonedental.co.uk/images/0303.jpg
It’s time to investigate some “impressive” evidence! Image: http://www.sxc.hu/photo/442696
Tool Mark Challenge Forensic Science Activity T. Trimpe 2007 http://sciencespot.net
Goal: Your group will need to examine and document the tool marks made by each of the tools. Tool Marks Lab At each station, you will need to: 1 – To prepare for the lab, roll the modeling clay into a flat circle that fits inside the plastic plate. Make several impressions of each tool in your slab of modeling clay. 2 – Use the ruler to record the measurements for each tool and its impression surfaces. 3 – Document any unique characteristics you notice on each tool or its impression. Write your observations on your worksheet. 4 – After you have documents both of the tools at that station, roll the clay into a ball to prepare for the next group and wait until it's time to rotate to the next station. • Features to analyze: • Dimensions of the impression • Ridges or striation patterns • Defects, such as nicks and chips • Paint chips or metal shards left on a tool Image: http://www.maine.gov/dps/msp/criminal_investigation/crimelab/images/toolmarks1.jpg
Tool Mark Challenge Work with your investigative team to identify the crime scene tools. Compare the tool marks you made earlier and match them to the crime scene tools. Once you have identified all the tools, have your answers checked by your teacher. Keep trying until you have them all correct! On your mark? Get set? Go!
Bite Mark Identification Presentation developed by T. Trimpe 2010 http://sciencespot.net
Part 1: Make an Impression 1 – Fold the Styrofoam plate in half. 2 – Label one side MAXILLA and the other MANDIBLE. 3 – Gently bite down on the plate to leave your bite mark impression. 4 – Place a sheet of the plastic film over the impression and use a permanent marker to recreate the pattern to match that of your bite mark. 5 – Use a ruler to make the measurements shown and record in the table below along with any notes regarding unique characteristics you observe in the teeth. Maxilla Mandible Maxilla Mandible Width Depth http://forensicfact.files.wordpress.com/2008/05/cast_negative_resized_copy.jpg
Part 2: Tasty Testing 1 – Use the various pieces of candy to make bite mark impressions. 2 – Record your observations for each one as well as provide a rating of the impression quality using poor, fair, or good.
Tire Track Challenge Forensic Science Activity http://pro.corbis.com/images/CB001940.jpg?size=572&uid={D27A89DF-00BB-4028-AA57-7A908AF0511D} T. Trimpe 2007 http://sciencespot.net
Your group will need to document the tread patterns for each vehicle. Tire Track Lab Step 1: Get a large piece of white paper from your teacher, an ink pad, paper towels, and a ruler. You will also need a pen or pencil. Step 2: Gently roll a car over the ink pad several times to cover all the sides of the tires. Step 3: Gently roll the car on the white paper for a length of 5-6” and label the tracks with the car’s letter. Caution: You will want to apply enough pressure to get a good impression, but not too hard that you cause damage to the vehicle, its tires, or the ink pad. Step 4: Roll the car on a piece of paper towel to remove excess ink and then pass it along to another group. Step 5: Analyze the tire tracks to identify unique characteristics, such as blank spots, evidence of tire wear, width of the track, etc. Use a highlighter to mark each characteristic you find.
Tire Track Challenge Work with your investigative team to identify each set of tracks shown on your worksheet. Compare the tracks you made earlier and match them to the suspect tracks on the worksheet. Once you have identified all the cars, have your answers checked by your teacher. Ready? Set? GO!