AVR32 UC3 EVK1100 Control Panel Tutorial
280 likes | 719 Views
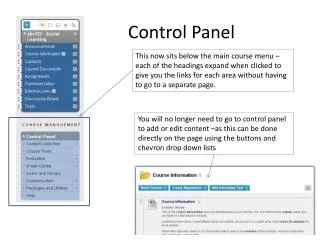
AVR32 UC3 EVK1100 Control Panel Tutorial. Agenda. What is the Control Panel? Control Panel Interfaces Description. Control Panel Use Case Ethernet Shell through RS232 USB Device USB Host. Demo is a Control Panel... 1/4. Control Panel

AVR32 UC3 EVK1100 Control Panel Tutorial
E N D
Presentation Transcript
Agenda • What is the Control Panel? • Control Panel Interfaces Description. • Control Panel Use Case • Ethernet • Shell through RS232 • USB Device • USB Host
Demo is a Control Panel... 1/4 • Control Panel • Is an example of implementation of a real-time application that controls and monitors the EVK1100 sensors and actuators.
Demo is a control panel... 2/4 • The control panel is based on the freeRTOS operating system. • FreeRTOS is a light Real Time Operating System. • Support AVR32 UC3 microcontrollers. • Multitasking: allows you to manage several programs or tasks on a single MCU. • Real-Time Control: complex timing becomes the responsibility of the RTOS. • Inter-Task Communication: allows tasks in your system to communicate between each other.
Demo is a control panel... 3/4 • It is based on freeRTOS.org OS and use most of the UC3 Software Library: • USART • SPI (Dataflash, LCD) • MACB (Ethernet) • Timer / Counter • Interrupt controller • PWM • ADC • Flash • Power Manager • GPIO • USB: mass storage class with device and host • MAC (Ethernet): TCP/IP Stack with HTTP protocol • FAT12/16/32
Demo is a control panel... 4/4 • Ongoingsensors data logging • Temperature, potentiometers, keys… • Log data in Data-Flash (SPI) or MMC/SD (SPI) if present. • Web server • Check data log, remote configuration through HTTP! • USB Host Mass Storage • Plug your USB key to download the data log. • USB Device Mass Storage • Plug the control panel to your PC to access the data log.
Control Panel Interfaces Laptop USB Key Network Memories (Dataflash, MMC) Actuators & Sensors
Hardware Requirements • For this tutorial, you will need: • EVK1100 evaluation kit loaded with the control panel firmware. • The control panel firmware can be found in the UC3 Software Library: \AT32UC3-1.0.0\APPLICATIONS\EVK1100-CONTROL-PANEL\AT32UC3A\GCC\uc3a0512-ctrlpanel.elf • Power supply (8 to 20V) • A JTAGICE mkII emulator • A Ethernet cable • A miniB plug to STD-A plug USB cable • A miniA plug to STD-A Receptacle OTG cable • A RS232 null-modem serial cable
Power Up • Power up the EVK1100 with an external power supply • Configure your AC adaptor polarity switch to match the board's. • Set it to provide from 8 to 20V. • Plug it to the board's power supply jack. • Set the board's POWER switch to EXT. Power Supply Selector
Board MMI description 1/2 • The board MMI of the Control Panel is made with the LCD and the joystick. The joystick is dedicated to act on the menu line . • The first line of the LCD is an arbitrary date in the format: month/day/year hour:min:sec. • The second line is the connectivity information line: when the Control Panel is plugged to an Ethernet network, its IP address is displayed on this line. • When the Control Panel is acting as a USB Mass Storage device or host, a sort of a USB sign is displayed on the last column of this second line.
Board MMI description 2/2 • The third line is the menu line : the default "Press -> Mass Storage" menu message means "press the joystick to set the Control Panel as a USB Mass Storage device". • The fourth line is the user message zone.
USE CASE 1 Accessing the Control Panel acting as a Web server
USE CASE 1 • In this scenario, you are a local user who wishes to access the Control Panel through its Web-server interface. • Take the getting started sheet in the EVK1100 box and follow the instructions. • At the end, the Web-server entry page should appear:
USE CASE 2 Accessing the Control Panel acting as a USB Mass Storage device
USE CASE 2 • Accessing the Control Panel acting as a USB Mass Storage device • Press the joystick to switch the Control Panel to USB device mode. • As mentioned on the LCD on line 3 "Press -> Mass Storage", press the joystick to switch to Mass Storage device mode. • Once the joystick has been pressed, you may plug a USB host to the EVK1100 board : note that the message on the LCD on line 3 has changed to "Waiting for Host“.
USE CASE 2 • Accessing the Control Panel acting as a USB Mass Storage device • Note that while the Control Panel is in USB device mode, the Web server is considered to be in maintenance mode. An access to the web server while the Control Panel is acting as a USB device will return the following web page.
USE CASE 2 • Connect the PC to the EVK1100 board USB plug. • Use the miniB-plug-to-STD-A-plug USB cable to connect the EVK1100 board and the PC. • The LCD screen line 2 and 3 should change. • Line 2 of the screen(the status line) should display the USB icon meaning that a USB connection is up and running. • Line 3 of the screen(the menu line) should display the information string "USB Mass Storage" meaning that the Control Panel is acting as a USB Mass Storage device. • Access the Control Panel Mass Storage memory. • There is no menu on the EVK1100 board in this mode. The Control Panel acts as a regular USB Mass Storage key in this mode. The PC sees the Control Panel as a removable disk: it has full access to the Control Panel file system.
USE CASE 2 • Assignment • Open the index.htm file with a text editor (Notepad) and change the text below the section: • <h2>Description</h2> • Change the text by adding the date of today. • Save the file.
USE CASE 2 • Unplug the USB disk from Windows. • Reload the web server page from your internet browser. Your text here!
USE CASE 3 Accessing the Control Panel through its shell interface on USART_0
USE CASE 3 • Accessing the Control Panel through its shell interface on UART_0 • Connecting to the shell. • With a male-female serial cable, join your laptop COM port to the Control Panel's UART_0 COM port. • On your laptop, launch hyperterminal, • Fill-in the following properties to match the Control Panel's UART_0 settings (Bits per second=57600, Data bits=8, Parity=None, Stop bits=1, Flow control=None):
USE CASE 3 • List of all available command • Type help followed by enter: this will execute the help command that lists all available commands and a short description for each. • Assignment 1: • Type on the shell: set_actuator_value actuator=lcd usrmsg="Hello Goodbye!" time=10 This command writes the string "Hello Goodbye!" to the LCD user message zone (i.e. the 4th line) in 10 seconds from the moment you hit enter. The "time=10" argument is optional.
USE CASE 3 • Examples of file system commands. • Suppose we want to see the content of the /WEB directory(i.e. the Web server files): • The Control Panel supports multiple drives. By default, there is only one available drive, that is the dataflash. Let's display the available drives. • We see that we currently have only one drive, the drive a. • Mount the a drive:
USE CASE 3 • Display the current content of the top / directory on the a drive: • Go to the WEB directory: type cd WEB then enter. Then display the content of the WEB directory.
USE CASE 4 Accessing the Control Panel acting as a USB Mass Storage host
USE CASE 4 • In this scenario, you are a local user who wishes to access the Control Panel through its USB interface. You are equipped with a USB key. • The Control Panel will behave as a USB Mass Storage host while the USB key will be a USB Mass Storage device. Since the Control Panel behaves as a host in this mode, it has full control over its own memory and over the memory of the attached USB device. • Do it by yourself and find how to copy ADC logs to your USB key.
Summary • You’ve learned: • How to use the EVK1100 kit! • How to use the control panel interface • HTTP • RS232 Shell • USB device and host • User interface (LCD, buttons, sensors….) • You can find the user’s guide in the UC3 Software Library:AT32UC3-X.Y.Z\APPLICATIONS\EVK1100-CONTROL-PANEL\readme.html