Download
1 / 15
240 likes | 675 Views
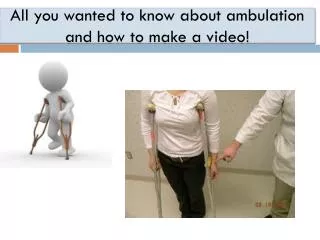
All you wanted to know about ambulation and how to make a video!. The gait belt. Instructions on how to use a gait belt

E N D
All you wanted to know about ambulation and how to make a video!
The gait belt • Instructions on how to use a gait belt • Ask the patient to scoot forward in his chair or bed in a seated position so the gait belt can be placed around his waist. Make sure the belt is positioned over the clothing and that the clip is in front. This will allow for easier belt adjustments and removal. • Feed the end of the belt through the portion of the clip with teeth. Pull on the loose end of the belt to tighten it to the proper tightness. The belt should be snug to the person, but you should still be able to get your fingers between the belt and the person to hold on to her. • If seated, ask the patient to slide forward to the edge of where he/she is seated, making sure the feet are placed flat on the floor. Be sure the location you are transferring them to is close by. • Place your fingers between the gait belt and the patient, using an underhand motion to grasp the gait belt. Ask the patient to stand as you lift with the belt and guide the patient to the transfer location. • Help the patient to safely sit down on the transfer location. Ask them to slide back a bit, so they are not in danger of falling from the seated location. Once the patient is safely seated on the transfer location, remove the gait belt. • If standing place your hands palm side up under the belt and provide support or assistance as needed. Be prepared to assist at a moments notice. Make sure that you are in proximity of the patient to assure the best mechanical advantage in case of loss of balance or loss of strength.
Proper use of crutches • Size the Crutches:The crutches should be properly sized so they are used appropriately and do not cause problems. Crutches should: Be about one to two inches below the armpit when you are standing straight; • Have handles at hip height, so that your elbows are slightly bent when grasping.
Check the pads/grips and tip: • Check the crutches to ensure they have ample cushion on the armpit, grips, and especially on the base that contacts the floor. These parts of crutches can be replaced by a medical supply store if they become worn.
Walking with Crutches • Lean forward slightly and move both crutches about one foot in front of you. • Shift your weight to the crutches and sway forward. • Swing your good leg forward between the crutches and place it in front of your on the ground. • Shift your weight to your good leg and start your next step by moving the crutches about one foot in front of you. • Keep in mind your crutches take up more room on the sides and can easily get caught on things, so keep a wide birth around you. • Look ahead to where you are walking and don't look at your feet.
Walking with crutches: another perspective • Move both crutches together a short distance in front of you (about 18 inches). While supporting yourself with your hands, allow your body to swing forward as if you were going to step on the injured leg, but instead of placing weight on the injured leg, rest your weight on the crutch handles. Do not allow the crutch top to touch your armpit - keep your body supported with your hands.
Getting Up From A Chair: • Place both crutches in the hand on the affected side (i.e., if you injured your right leg, grasp both crutches by the handle with your right hand). Grasp the handrest of your chair with one hand, and the crutch handles in your other hand. Place your weight on your uninjured leg and push up with your arms.
Types of weight bearing exercise with crutches • Non weight bearing • Touch down or toe touch weight bearing • Partial weight bearing • Full Weight bearing
Going Up Stairs (for information only, do not perform on stairs for your safety) • Stand close to the step, and place the crutches on ground level. With your weight on the crutches, pick the uninjured foot up to the step. Then bring the crutches up to the step level. Repeat this for each step.
Walking with a walker • First, put your walker about one step ahead of you, making sure the legs of your walker are level to the ground. • With both hands, grip the top of the walker for support and walk into it, stepping off on your injured leg. • Touch the heel of this foot to the ground first, then flatten the foot and finally lift the toes off the ground as you complete your step with your good leg. • Don't step all the way to the front bar of your walker. Take small steps when you turn.
Application • Create a video on how to use crutches properly • Use PROPER narrative using medical terms and movements to describe the process. • Include measurement, fitting and position. • Use text and graphics if you wish (we will all be impressed with your creativity) • For your inspiration view the following http://www.youtube.com/watch?v=w5mX8bfmJwQ&feature=related
The ambulation video • You task is to create an ambulation • video that can be used as an instructional video for anyone who seeks to understand how to use crutches. • You must provide a step by step approach that details such things as how to properly fit a patient, proper safety precautions (including if a crutch is safe to use) and above all accurate instructions.
The storyboard • Your video should include a story board (20 points) that provides you with guidelines for the kinds of visual images that you wish to have in your video. • Include images of what your “scene” should look like. (10 points) Stick figures OK! Artistry not necessary • It should also include “narration/dialog” at the base of each scene. (10 points) • http://www.howto.gov/sites/default/files/video-storyboard-template.pdf
Images? • You may use moving imagery or even still photos if you can effectively demonstrate the instruction.