Download
1 / 26
260 likes | 439 Views
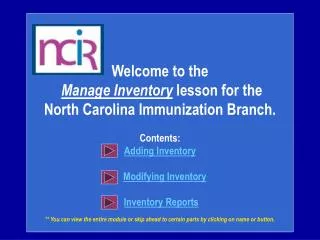
Welcome to the Manage Inventory lesson for the North Carolina Immunization Branch. Contents: Adding Inventory Modifying Inventory Inventory Reports ** You can view the entire module or skip ahead to certain parts by clicking on name or button.

E N D
Welcome to the Manage Inventory lesson for the North Carolina Immunization Branch. Contents: Adding Inventory Modifying Inventory Inventory Reports ** You can view the entire module or skip ahead to certain parts by clicking on name or button.
There are several inventory alerts that appear on the home page for the Administrator and Inventory Control Users. We are going to look at these alerts and then move on to how to manage your inventory. Keep in mind that any of these alerts can be changed to suit the individual practice by the administrator. Click Manage Inventory This alert lets you know the status of orders and transfers that have been placed. This alert lets you know if you have any active inventory that is going to expire. The default is set to 120 days. This alert shows any inventory that is running low by the vaccine group. The default for this is set to 10 doses. This alert shows any inventory that is running low by the individual trade name. The default for this is set to 10 doses. Now, let’s look at your inventory.
To view your inventory, click Show Inventory Click Show Inventory These are the same alerts that appear on the home page for both Administrators and Inventory Control users.
From this screen you can add inventory, modify quantity, and show transactions for your inventory You can look at any combination of inventory in the NCIR by clicking on the radio button next to your selection. For example, if you want to see all your active, public vaccine click on the radio button next to Active and State. Make sure your site’s name appears here. You are going to be able to add inventory to the NCIR by clicking on Add Inventory. Vaccine’s that will expire in less than 120 days will be highlighted in pink.
You can Modify Quantity 2 ways: • Click lot number from Manage Inventory screen • Check the box and click Modify Quantity Some Things to Remember • When should you modify the quantity? • If the lot number is already in your inventory • When should you add the inventory? • If the lot number is not in inventory
When you click on Add Inventory, please remember that you can only add state supplied Varicella and MMR-V (Proquad) along with all your private vaccine. To add your state supplied vaccine see Accepting Your State Supplied Order lesson. When you are finished, click Save Select your Trade Name from the drop down list Enter the Lot Number Select the Dose size from the drop down list Select the Units from the drop down list Enter the Expiration Date Choose the Funding Program Select either Yes or No in the Lot Active field Enter the Amount
Let’s go back and see how and why to modify the quantity of each vaccine. • At this time you have 3 options: • Click Cancel button to go back to the view inventory screen. • Click the Delete button to delete the vaccine just entered. • Click the Add New button to add a new vaccine into your inventory After you click the Save button, you will see the following message in red: Inventory was inserted successfully.
There are 2 different ways to modify the quantity of vaccine that is in the NCIR. We are going to look at both ways. Then click Modify Quantity Start by clicking in the box next to the Trade Name in blue until the green check appears.
This screen will allow you to modify the quantity of as many vaccines as you choose on the previous screen. It is good to use this option if you have several lot numbers to edit. When you are finished click Save Choose the Action from the drop down box. Either Add or Subtract Enter the Amount in doses that is being modified. Choose the reason under the Category drop down box. See the next slide for an explanation of each transaction.
Reasons to Modify Quantity Receipt from Inventory: Select this option to add private inventory received from manufacturer with the same trade name, lot number, funding source and expiration date. Receipt from Provider: Select this option to add inventory received from a provider with the same trade name, lot number, funding source and expiration date. This is intended for doses returned from providers not in NCIR. For providers in NCIR, use the manage transfer screen to track inventory shipments. Return to Provider: Select this option to add doses are being returned to you from another organization or an external site after your inventory transfer was returned. This is intended for doses returned from providers not in NCIR. For providers in NCIR, use the manage transfer screen to track inventory shipments.
Reasons to Modify Quantity Transfer to Provider: Select this option if you are transferring doses out of your inventory to an external site. Wasted Doses: Select this option if there was any vaccine waste for a particular lot. When you select the Wasted Doses category, you will be required to enter the following: 'Reason': Reason that the doses are marked as wasted Example: Tray left out overnight. (verified non viable with Immunization Branch 'Preventive Action': Action taken to prevent further wastage Example: Return vaccine tray to refrigerator immediately after drawing vaccine Error Correction: Select this option if you have made any errors in entry to your private stock of vaccine. For example you entered 100 instead of 10 for the quantity. You will also be required to enter a reason for error correcting. **Before you error correct any state supplied vaccines, you should call the NC Help Desk, 1-877-873-6247, so that you may be guided in how to find errors before changing quantities in vaccine lots.
The other way that you can modify a quantity of a vaccine in your inventory is to go through the Trade Name link. Start by finding the Trade Name for the vaccine you want to edit. Click the Trade Name in blue
Click Save when finished Choose to Add or Subtract from inventory Enter the Amount in doses Choose the reason from the Category drop down box
Click Cancel to return to the view inventory screen If you have modified the inventory correctly you will see this message.
How to Run a Transaction Summary Report Click Show Transactions If you want to be able to see all the different transactions that take place by the NCIR users in your office you can view this by running a Transaction Report. From the home page you need to click Manage Inventory then click Show Inventory.
When you are finished choosing the criteria for your report click View. Enter the To and From dates for the transaction needed. You can also choose the To and From dates for the date that an actual shot was given. You can choose one user name or all user names You can choose the Transaction Type or look at them all If your organization has more than one site established you can look at the transactions for one site or for them all. You can choose the Trade Name or look at them all. You can choose how many records you want to see. The maximum count is 9999 records.
The Transaction Report will show you the Site Name, Date Given, Trans Date, Lot/ Trade Name, Type, Quantity, Client Name, Date of Birth, User Name. Date the immunization was given Lot number/Trade Name for vaccine used Your Organization’s Name Type of transaction Date of the Transaction Client’s Name: last, first User who conducted the transaction Client’s date of birth Amount in doses
These are the Transaction Codes and what they stand for that will appear in the Transaction Report.
How to Run an Inventory Reconciliation Report An inventory reconciliation report will show you what the NCIR says you have in your inventory and give you room to write your actual count from your refrigerator so that you can begin to balance your inventory. Start by clicking Inventory Report
Click Generate when finished Choose your Site Choose your Funding Source for the report • Once you click on Inventory Report, you have the choice of what you want to appear in the report itself. • Make sure that if your organization has multiple sites that you have the correct site selected or you can run the report for all the sites in a single organization. • You can run the report for all private, all state supplied or both. • These options give you a wider variety of ways to keep your inventory balanced.
Expiration Date shows the date that the vaccine will expire. This is found on the box and the vial Funding Source shows whether the vaccine is Private or State Supplied. Actual Count of Doses on Hand gives you room to count out your vaccine in your fridge and then write the actual amount here in this column Lot Number shows the Lot Number that is associated with that trade name NCIR Reported Doses On Hand shows the doses that the NCIR reports that you have in your inventory. Vaccine Group shows the complete group name for the vaccine listed. Trade Name shows the actual trade name for the vaccine Once you have counted the actual vaccine in your fridge and you compare it to what the NCIR says you have on hand, both columns should match. If they do not you need to run down the list of possible inventory discrepancies. (see next slide)
Possible NCIR Inventory Discrepancies • Initial Inventory: • Initially mis-keying inventory into the NCIR • Giving immunizations after physical count is completed and before going live with the NCIR • Keying Errors: • Doses keyed as historical (which does not subtract from your inventory) instead of doses keyed as new immunization given (which does subtract from your inventory) • Trouble with data entry of combination drugs (i.e. Pediarix) • Certain nurses not entering all the shots that were administered • Clicking the back button when administering shots (which creates a double entry of those shots) • Picking the wrong site from the site drop down box or not changing the site when entering shots from inventory • Mixing up State and Private vaccine doses • Clicking the “Remove” button when entering doses from inventory • Not entering the data in a timely manner • Reporting on Vaccine Administered Logs and not in the NCIR • Server problems at the provider’s office- not able to key immunizations or place an order • Managing Orders, Transfers, Wastage: • Calling to place a vaccine order after going live with the NCIR instead of placing your order through the NCIR • Manually entering inventory instead of accepting transfers prior to it being mandatory to accept transfers from the state • Not reporting wastage • Not reporting transfers
How to Run a Vaccine Usage Report A Vaccine Usage Report is going to give you a break down of the total number of vaccines used per Trade Name and Age Group. Start by clicking request vaccine usage
Choose your Site from the site drop down box. If you have more than one site you can choose, however, if there is only one site associated with your organization the box will default to your site. Click Generate when you are ready to run the report. When you click this, you will notice that a status update will appear under the report screen. Choose your From and To dates for when you want the report to show. Your status will read Queue and you will need to click Refresh. This refresh button will update your status When your report is ready to view the status will read 100% and the report name will be displayed in blue. Just click on the report name and you can view the vaccine usage report.
Shows age categories for clients Total number of doses per age group Funding shows State of Private Group Name of the vaccine Trade Name of the vaccine Total number of clients served Complete total for trade name
This concludes the Manage Inventory lesson. If you have any questions please feel free to contact your Regional Consultant or the Immunization Branch Help Desk at 1-877-873-6247