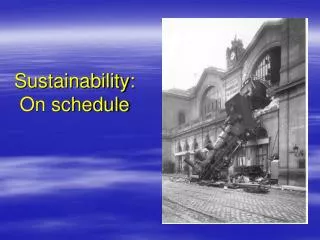
Schedule on mockup assembly
Schedule on mockup assembly. Detail schedule on mockup assembly. ※ definition of words : Target + Gamma catcher acrylic Buffer tank tank. July 22, 23 (Tue, Wed) -- 3 persons (K.S. Park, I.S. Jung, Andrey Kim)


Schedule on mockup assembly
E N D
Presentation Transcript
Detail schedule on mockup assembly ※ definition of words : Target + Gamma catcher acrylic Buffer tank tank • July 22, 23 (Tue, Wed) -- 3 persons (K.S. Park, I.S. Jung, Andrey Kim) • 22nd afternoon : Setting the acrylic position • 0. preparing tools (weight, wire, nipper, tape, name pen, measuring tape(2pcs), knife, scissors) • 1. marking the chimney line in the tank (top lib and bottom plate) • 2. setting the acrylic chimney to be aligned with tank line which has been marked just before • 3. setting the center of acrylic on the center of tank in x-y plate • i) check and mark the center of bottom plate of acrylic with measuring tape • ii) stick the wire to the center with tape (make a weight to be hanging on) • iii) make a end point of weight to indicate the center of tank marking
23rd : Binding the acrylic & cleaning up the tank • 0. preparing tools ( black sheet, black tape, scissors, alcohol, wiper (cloth or paper), vacuum ) • 1. Welding the hinges (company) • 2. binding the acrylic on hinge in tank with B/N • 3. making a cap for tank with black sheet • 4. cleaning up the tank with vacuum cleaner and alcohol • 5. making a cover the tank with a cap • 6. test the binding PMT with holder (with prof. Y.D. Kim, Dr. S.H. Kim) • Take a clean cloth and shoes before going into tank. • 10 min. break after 50 min. work
7월 24, 25일 (목, 금요일) -- 작업 인원 2명 (연구원 1명 이상) • 24일: PMT holder 설치 • 0. 준비물 6각 렌치, 알코올, 세척용 원단 또는 paper • 1. holder 세척(알코올), baffle 세척(알코올) • 2. holder 설치 및 탱크 세척 • 25일: 카메라 테스트 (작업인원 학생 1명) • 1. 카메라 테스트 • i) dark box에서 카메라 램프를 켜고 아크릴(또는 플라스틱 통) 속의 버블을 볼 수 있는지 체크 • 유리병에 물을 반 쯤 채운 후 dark box에서 수위 체크 • ii) 탱크 상부에서 화각 체크 • 25th : Calibration system test • 1. driving with the controller • 2. check the accuracy of position with acrylic tube (100mm(D) x 1500mm(H) )
7월 28~30일 (월~수요일) -- 작업 인원 6명 이상(연구원이상 급 2명 이상) • PMT mount • 28,29일 (월,화) • PMT 500동(실험실) 이동 • PMT tag 확인 • PMT 설치 교육 및 실습 (3인 1조) • 바닥 PMT 설치, 케이블 설치, 설치 후 바닥 중앙부분(탱크) 세척 • PMT 배열 및 케이블(lead 위치 마경주 박사와 상의) 도면 기록 • 벽면 PMT 설치 • 설치 전,후 바닥 및 벽면 세척, PMT 설치, 케이블 설치(케이블 용 flange 결합) • 아크릴 보호 테이프 제거 • 세척 후 탱크를 비닐(dark sheet) 뚜껑을 만들어 덮어 놓음 • 30일 (수) • 상판 PMT 설치 • 상판을 뒤집어서 바닥에 놓고 세척 • holder 설치, PMT 설치, 설치 후 상판 세척(알코올) • 상판 닫기 • chimney flange 결합, 상판 볼트 체결 • sliding gate 설치
7월 31, 8월 1일 (목, 금요일) -- 작업 인원 3명 (연구원 1명 이상) • Glove box 설치 • Sliding gate 설치 (수요일 작업에서 끝내지 못했을 경우) • glove box에 calibration system 적재 및 테스트 • glove box 설치 • 설치 glove box 내부 세척 • glove box 설치 • 8월 4일 (월) -- 작업 인원 2명 (연구원 1명 이상) • Electronics 케이블 연결 • 8월 5 ~ 8일 (화~금) -- 작업 : electronics 그룹 • Electronics 테스트
Glove Box Glove box ( 4~8 page) box 앞 뚜껑 (9page) 윗면 앞면 옆면(오른 쪽) 뒷면 아랫면
Glove Box 앞 모습 빛 차폐 용 O-ring (앞 뚜껑과 box 본체 사이) 아크릴, 알루미늄 볼트 홈 알루미늄 (4T) Glove 전선 구멍 (데이터용) 검출기 접합 부분 (75A flange) 투명 아크릴 윈도우 공기 밀폐용 O-ring (아크릴과 알루미늄 사이)
Glove Box 윗면 (상판) 뒤 앞 광 케이블 용 커넥터 홀 투명 아크릴 윈도우
Glove Box 밑면(검출기와의 연결 부위) 투명 아크릴 윈도우 앞 내경 66mm 이상 검출기와의 결합용 flange (75A) 뒤
Glove Box 뒷면 N2 gas 입구 (Swagelok fitting(1/4”) 타입) 내부 전원 공급 (커넥터 타입) 전선 구멍 (데이터용) hatch N2 gas 출구(외경 1/8”) + 뚜껑 검출기 접합 부분 (75A flange)
Glove Box 옆면 (오른 쪽) 투명 아크릴 윈도우 hatch 내부 통로 hatch
Glove Box 앞 뚜껑(앞면) –착탈식 뚜껑 걸쇠 손잡이 뚜껑 틈으로 샐 수 있는 빛을 차단 하기 위한 고정 장치는 귀사에서 자주 사용하는 것으로 적용 해 주시기 바랍니다. 오른 쪽 사진은 한 가지 샘플로서 저희 연구실에서 제작 한 dark box의 door 고정 장치 입니다.