Download
1 / 42
420 likes | 571 Views
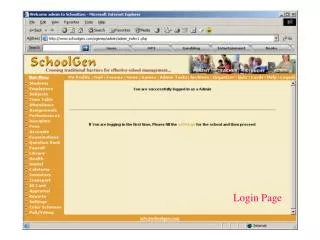
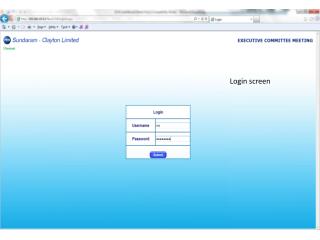
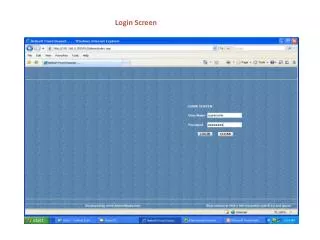
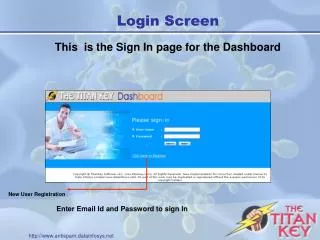
Login Screen This is the Sign In page for the Dashboard. New User Registration. Enter Email Id and Password to sign In. User Registration in SpamJadoo. 1. Enter the E-mail address and Password. 2. Click on the Register button to register. User Registration in SpamJadoo.

E N D
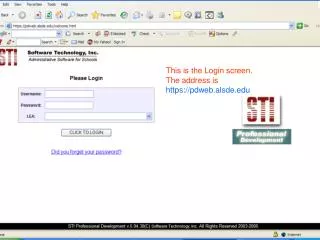
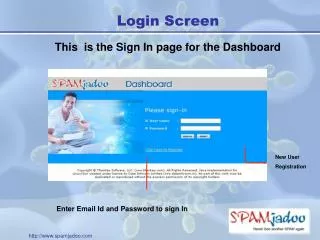
Login Screen This is the Sign In page for the Dashboard New User Registration Enter Email Id and Password to sign In
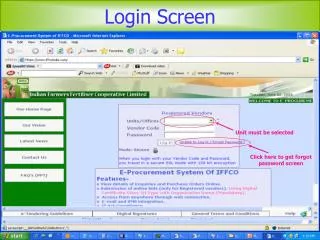
User Registration in SpamJadoo 1. Enter the E-mail address and Password. 2. Click on the Register button to register.
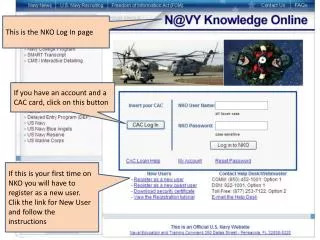
User Registration in SpamJadoo If your server administrator chooses TempID and Temporary Password feature at time of domain registration then it will show you a screen and ask for Temporary Id and Temporary password New User Setting
Chapter 1 Server Dashboard Section1 Server Dashboard The Server Admin Dashboard allows to control the settings for the SpamJadoo users in the domains that you administer. Server administrator will be able to make changes to the overall Domain section and the User Section Pre-approved senders List Spammers List Domains List Server Settings
Section 2 Server Add Domain This is to Add Domain to the SpamJadoo domain database. Enter Domain Name Enter SMTP and POP3 IP Address Authentication From which IP address Maximum No. of users allowed Select the Validation Type Select Allow External Set Default Domain for Postmaster Validation Link , URL of WBM site Content Of challenge/ Response message
Section 3 Server Add User This is to add an individual user to the SpamJadoo registered users database. In this server administrator add the user to the particular domain which is existed in domain list . Enter the Users email id to be added in the selected domain Select the authority for the added e-mail id. Select for auto–approve on CC. Select the status of the user asActive, Passive and Silent Select Keymails setting for the user Select Keymails Status The E-mail content for the challenge/response mails
Section 4 Server Add To white list This screen allows you to add a new email address to your pre-approved senders list or to your known spammers list. Enter the new e-mail address Select the policy to beapplied as Pre-approvedor Spam. Select the scope for the e-mail id The entries you add here will apply to all domains and their users
Section 5 Server All Domains View all of the defined domains registered on this particular server. As a server Admin, you will probably be administering multiple domains from a single server. To Editdomain List of All registered domains List of SMTP and POP3 IPof domain Click to save Changes This feature allows you quickly to look at andmake changesto the defined domains.
Section 6 Server All Users View to all the defined users within a specified domain. It provides feature of search for the Server Admin to quickly search for a specific user. Select the status Select the Role List of All the users of the searcheddomainaccording to status and role.
Section 7 Server Search White List This screen allows you to search through the database entries for your Server Wide White list. The search feature can be used to match email addresses or portions of email addresses. You can also apply various filters to modify your search as well. Pre-defined search forpre-approved and spammers Select policy and Scopeto filter search Specify date for your search List of Pre-approved Senders List of Spammers
Section 8 Server Pre-approved View All Pre-approved senders list with pre-defined searches that is provided for the Server Admin. Pre-defined Searches Pre-approved senders list with policy and scope which can be updated You can also perform your own custom search of the whitelist by choosing search option
Section 9 Server Spammers The Server Admin Dashboard provides you with a summary of all the known SPAMMERS Pre-defined Search options Spammers Listwith policy andscope which can be updated
Section 10 Server ALL Logs Server maintains Logs at both the domain and server levels. This feature allows server and domain admin to see the various logs and use the contents to help troubleshoot any problems that might arise. List of Incoming E-mails List of Outgoing E-mails List of Aliases List of Keymails
Section 11 Server Session Logs Search the list of spammers attacked within specific period of time. Enter Your Search Criteria From And TO Email Address Error List Client IP It gives different view and new key information which is the number of sessionsattempted within a specified time period. This is very useful while examiningthe logs to see and understand how Spammers are attacking servers
Section 12 Server Import This allows to Import the e-mail addresses, in the text file format. The address will be added to your whitelist in the database. Select the Email Addresses file in txt format Apply the scope on email addresses as email, domain or subdomain wise
Section 13 Server Settings The screen below is the template for Editing server settings. These settings deal with the Challenge / Response messages that will be used as part of the C/R system. E-mail content for the challenge /Response messages
Chapter 2 Domain DashboardSection1 Domain Dashboard Features The Domain Admin Dashboard allows you to control the settings in the domain that you administer. Domain administrator will be able to make changes to the overall Domain Settings section. Search For the e-mail id’s in the pre- approved and spammers List Search For the e-mail id’s in the particular domain Status of SMTP & POP3 IP and Validationfor the domain and the domain settings Link
Section 2 Domain Add User This screen allows you to add an individual user to the SpamJadoo registered users database. In this Domain administrator add the user to the particular domain. Enter the email address of that domain Select the authority Select the Auto approve cc option. Select the status as Active, Passive or Silent Content of the Challenge/Response messages defined at server or domain level.
Section 3 Domain Add To White List This screen allows you to add a new email address to your pre-approved senders list or to the spammers list. The entries you add here will apply to all domain users. Enter the email address Select the policy applied on this email address Select the scope applieson the e-mail address.
Section 4 Domain Domain Users The screen provides view to all the defined users within a specified domain. It provides a feature for the Domain Admin to quickly search for a specific user. Search by specific email address and by various status and authoritycombinations List of all the users ofthe specific domain
Section 5 Domain Search White List This screen allows you to search through the database entries for your Domain Wide White In this two pre-defined searches that allow you to see all pre-approved users and known spammers. Search according to thecriteria specified Pre-Approved senders List Spammers List
Section 6 Domain Pre-approved View All Pre-approved senders list and the two pre-defined searches that is provided for the Domain Admin. List of Pre-approvedwith their policy and scope which can be updated
Section 7 Domain Spammers The Domain Admin Dashboard provides you with a summary of all the known SPAMMERS for the domain you are administering. The two pre-defined searches are also provided. List of spammers with their policy and scope which can be updated
Section 8 Domain Logs It maintains Logs at both the domain and server levels. This feature allows server and domain admins to see the various logs and use the contents to help troubleshoot any problems that might arise. You can see all the log entries or you can specify a particular user's log entries only. E-mail addresses of From and To Select the after andbefore date Number of results Per page The list of incoming e-mails
Section 9 Domain Import This allows to Import the e-mail addresses, in the text file format. The address will be added to your whitelist in the database. As a Domain Admin you are adding addresses to Domain wide whitelist Select the Email Addresses file in txt format Select the Policy for the email address Apply the scope on email addresses as email, domain or subdomain wise
Section 10 Domain Settings This screen allows you to change the way SpamJadoo works for your domains. These are settings that you as a Domain Administrator control. SpamJadoo reads this information and applies it to govern the users within that domain. Specify the IP address for the SMTP serverand the POP3 serverthat this domain will be using. Validation Type as SMTP, Bounce or Forward Allow External Email Address as Allow or Reject Maximum Number of Users allowed to configure form this domain Select the authentication Scheme Content for the Challenge/Response Message
Chapter 3 User Dashboard Section1 User Dashboard Features The Dashboard provides a summary of your current KeyMail account. From this page you can quickly see the last six entries in the SpamJadoo database. Search For the e-mail id’s Pre- approved senders List Unvalidated senders List Validated senders List List of Key mail addresses List of Aliases
Section 2 User Add Keymail This screen allows you to add a new KeyMail address. New keymail addresses are formed by adding a unique set of characters after your assigned e- mail address. Enter the characters to the email Select the status. New text Max. Senders allowed Select the scope fromemail, domain and subdomain Expiration time of the keymail
Section 3 User Add Aliases All aliases will be added to your primary Email address. Form a new alias by inserting a unique id into the middle of your existing Email address Add characters in between e-mail and domain name
Section 4 User Add to Whitelist This screen allows you to add a new email address to your pre-approved senders list ,Unvalidated list or to the spammers list. Enter the email address Select the policy applied on this email address Pre-approved, Unvalidatedand Spam Select the scope applieson the e-mail address.
Section 5 User Search Whitelist This screen allows you to search through the database entries. The search feature use to match email addresses or portions of email addresses. Various filters can be applied to modify search. Pre-defined searchesto see all pre-approved users, validated senders, Unvalidated senders andknown spammers. Apply your search criteria
Section 6 User Pre-approved The View All Pre-approved screen is one of the four pre-defined searches that is provided for the User. You can also perform your own custom search of the whitelist by choosing your own search criteria Pre-approved Senders List withpolicy and scope which can be updated
Section 7 User Unvalidated This shows Unvalidated senders. These are email addresses that have sent you an email. SpamJadoo has rejected their email and sent them a challenge and they did NOT respond to the Challenge / Response. Unvalidated SendersList with policy andscope which can be updated
Section 8 User Validated This screen will show all of your currently Validated email senders. This means that all of these people have response to the Challenge / Response message SpamJadoo sent after bouncing their initial message. Validated Senders Listwith policy and scopewhich can be updated.
Section 9 User Spammers The User Dashboard provides you with a summary of all the known SPAMMERS, which you labeled as spammer. Update the Policy and Scope of any of the spammer from the list
Section 10 User Keymails This screen shows you all of the KeyMails you currently have defined. You can also edit any individual KeyMail address and make changes in the other settings as well. Click on any Keymail to view the details related to that Keymail like Keymail address, Policy details and all the instances of the keymail
Section 11 User Aliases This screen will show all of your currently defined email aliases. You can delete any alias or edit it from this screen. You also have the option to add a new alias from this screen as well. List of Aliases withthe edit option
Section 12 User Import This screen allows you to upload and add any new email addresses you have in your email address book to your white list in the database. Browse the .txt file of the e-mailaddresses Apply the scope on the emails address from E-mail, Domain and Subdomain
Section 13 User User Settings This screen allows you to change the way SpamJadoo works for your domains. SpamJadoo reads this information and applies it to govern the users within that domain. Can make changes in user’s First Name and Last Name Select auto approve on CC Select the status from active, Greylist, Passive, silent or Pass Select Keymail Displayed on incoming mails. Select Type of Handling of email sent with a keymail as your FROM Address Content of Challenge/Response message.