Download
1 / 11
110 likes | 296 Views
Mail Interface with SMTP PlugIn in SAP WAS Based Components. Parlin Sitanggang. Communication Possibilities with SAPConnect. In this documentation, only sending mail to outside SAP is discussed using any SMTP mail server. Communication Using SMTP.

E N D
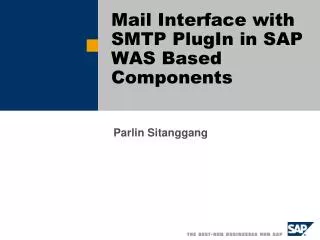
Mail Interface with SMTP PlugIn in SAP WAS Based Components Parlin Sitanggang
Communication Possibilities with SAPConnect In this documentation, only sending mail to outside SAP is discussed using any SMTP mail server
Communication Using SMTP • As of SAP Web Application Server 6.10, SMTP (Simple Mail Transfer Protocol) is supported directly by the SAP kernel. This means that it is possible to exchange e-mails between the SAP system and any SMTP-compatible mail server without using additional external components (such as connectors or gateways). You can use any product that meets the SMTP standard as a mail server. • As of SAP Web Application Server 6.20, it is also possible to exchange faxes and text messages (pager/SMS) using SMTP. Faxes and text messages are packed into e-mails for this purpose.
Outbound Mails – Process Scenario twdf1107.wdf.sap.corp domain01.sap.com • SAP server: twdf1107.wdf.sap.corp • Domain configured on twdf1107.wdf.sap.corp is domain01.sap.com twdf5000.wdf.sap.corp training.sap.com mail port 25
Overview of Configuration ProcessSEND MAIL for SMTP • Maintain parameters for SMTP • Maintain user addresses • Activate and configure the SMTP node using transaction SCOT • Schedule the send job
1. Maintain parameters for SMTP (WAS ABAP) • Maintain SAP WAS ABAP parameters: • rdisp/start_icman = true • This parameter automatically starts the ICM process during the system startup • exe/icman = <path for the executable of the ICM> • Should be like E:\usr\sap\T10\SYS\exe\run\icman.EXE • icm/plugin_<*> = PROT=SMTP,PLG=<prog> • This parameter loads the SMTP plug-in • Should be ok if the configuration is like this: • icm/plugin_0 = PROT=HTTP,PLG=E:\usr\sap\T10\SYS\exe\run\httpplugin • icm/plugin_1 = PROT=HTTPS,PLG=E:\usr\sap\T10\SYS\exe\run\httpplugin • icm/plugin_2 = PROT=SMTP,PLG=E:\usr\sap\T10\SYS\exe\run\smtpplugin • icm/server_port_<*> = PROT=SMTP,PORT=<port> • This parameter opens a TCP/IP port for receiving mails using the SMTP plug-in • Normally configuration is like below: • icm/server_port_0 = PROT=HTTP,PORT=8030,EXTBIND=1 • icm/server_port_1 = PROT=SMTP,PORT=0 • Restart SAP system.
Maintain e-mail address here 2. Maintain User Address • Maintain the user addresses, as every user that wants to send e-mails requires an Internet e-mail address. This is used as the sender address.
3.1 Activate and configure the SMTP node using transaction SCOT • In transaction SCOT, define the domain of the SAP system client under Settings→ Default Domain [domain01.sap.com] • Set the node so that it is in use. • In the Mail Host and Mail Port fields, specify the mail server to which the outbound mails are to be transferred. • Configure SAPconnect so that no confirmation of receipt is expected for Internet mails. Choose Settings→ Confirmation of Receipt, and define that SAPconnect does not expect confirmation for Internet Mail. • When you set the node so that it can be used, enter the address area of recipient addresses that are to be reached using this node (such as *, if all e-mails are to be sent using SMTP). • Enter the output format for SAP documents, such as PDF for SAPscript/Smart Forms, HTM for ABAP lists, and Business Object/links and TXT for RAW text.
3.2 Activate and configure the SMTP node using transaction SCOT
4. Schedule the SEND Job • In transaction SCOT, choose View→ Jobs. The system displays how often the send process has already run in your client (you can change the evaluation period). • Choose the Create button and enter a job name (such as SEND INT EMAILS). • On the next screen, adjust the time if required (you can view the system time by choosing System→ Status) and then choose Schedule Periodically. Choose the required period and confirm. • The job that you have just created now appears in the Job Overview (transaction SM37).