Download

1 / 26
260 likes | 365 Views
How to Make A wooden Bowl. By: Lindsay Myers. Preparation. Gather wood (cherry, walnut, maple) Plane wood (walnut – 1/8 in, all else – ¾ in) Joint one side of each board Cut boards to width w/ table saw (6 in) Cut boards to length w/ radial arm saw (6 in) Now we’re ready to start….

E N D
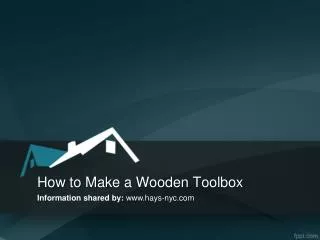
How to Make A wooden Bowl By: Lindsay Myers
Preparation • Gather wood (cherry, walnut, maple) • Plane wood (walnut – 1/8 in, all else – ¾ in) • Joint one side of each board • Cut boards to width w/ table saw (6 in) • Cut boards to length w/ radial arm saw (6 in) • Now we’re ready to start…
Glueing • Lay down a board • Apply glue to one side • Place another board on top of glued side if the original board (make sure the grain of the boards runs in the same direction) • Continue until all boards are glued together (the boards should be layered as follows: cherry, walnut, cherry, walnut, maple) • Use bar clamps to hold the boards together as they dry
Attaching the Face-plate • Draw two diagonal lines that connect the opposite corners on the bottom of the layered block (where they cross is the center) • Measure the diameter of the faceplate and divide by 2 • Measure the resulting distance out from center on the block in 4 directions • Center the face-plate between the 4 marks surrounding the center
Attaching the Face-plate Part 2 • While holding the faceplate in place, drill 3 holes into the block about ½ in deep • Run wide ¾ in screws into the previously drilled holes, thereby securing the face-plate firmly to the wooden block
Cutting Corners • Use a coffee can or cylinder of similar size to trace a circle onto the block around the face-plate • Following the circular pattern, use the bandsaw to cut off the edges of the block • The resulting block should be relatively round
Attaching to the Lathe • Screw the face-late onto the threaded end of the lathe until tight • Adjust the tool-rest to the proper height for shaping the outside of the bowl • Maneuver the tool-rest into position to cut the outside of the bowl, ensuring that as the wood spins, it does not, at any time, hit the tool-rest
Balancing the Block • Use either of the two tools indicated to smooth out the block until it is a perfect cylinder (this ought to get rid of any wobble you may experience when you first start the lathe)
Shaping the Bowl • Use the indicated tool to begin to shape the bowl • Cut deeper closer to the face-plate so that the profile begins to curve (you may need to angle the tool-rest to make shaping easier)
Hollowing the Bowl • Move the tool-rest so that it is parallel to the end of the bowl • Working only on the left-hand side of the bowl, begin carving out the center (be sure to curve the inside so that you do not carve through to the outside)
Sanding • With the lathe turning, begin by using 80 grit sandpaper to sand out all the imperfections • Continue this process until the whole bowl is smooth • Once complete, start the process again with 100 grit sandpaper, then 150, finally followed by 220
Detaching the Bowl • Unscrew the bowl from the lathe • Place the bowl facedown on a table and use a cordless drill to remove all the screws attaching the face-plate to the bowl • Remove the face-plate from the bowl so that the bowl can stand freely
Applying Finish • Wipe off the bowl with a soft cloth • Stir the Polyurethane Finish • Holding the inside of the bowl, apply finish to the outside with a soft brush • Flip the bowl over and place it on a piece of wood smaller than the bottom of the bowl • Apply finish to the top and inside of the bowl • Repeat
Once the finish has dried, it’s time to enjoy your bowl. Use it as a candy dish, a paperclip holder, or gift for a close friend. Whatever you use it for, you can take pride in knowing you just made an amazing project with your own two hands. Photo of lathe tools from: http://www.amazon.com/Grizzly-H5978-pc-Lathe-Chisel/dp/B0007D2C7E%3FSubscriptionId%3DAKIAI2AB5UK26NR7YHTQ%26tag%3Dwoodlathe-20%26linkCode%3Dxm2%26camp%3D2025%26creative%3D165953%26creativeASIN%3DB0007D2C7E