Download
1 / 27
300 likes | 607 Views
Learn step-by-step instructions for a relaxing face and scalp massage, including lymphatic drainage, jaw and neck techniques, pressure points, and sinus relief. This comprehensive guide will help you master the art of facial massage.

E N D
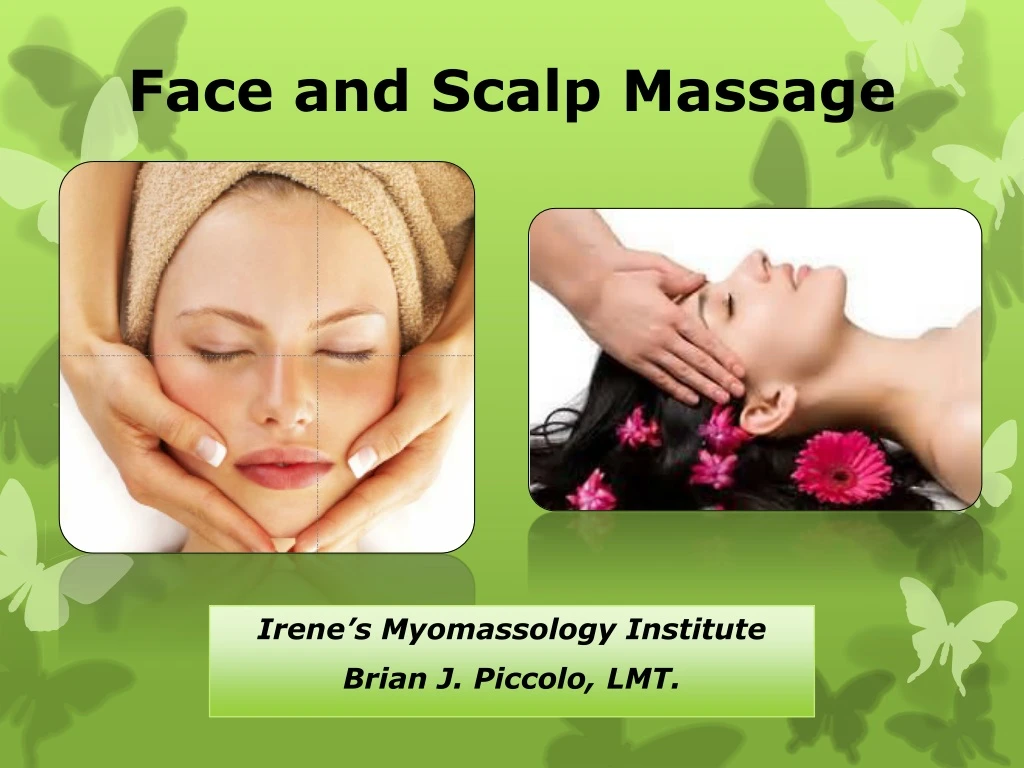
Face and Scalp Massage Irene’s Myomassology Institute Brian J. Piccolo, LMT.
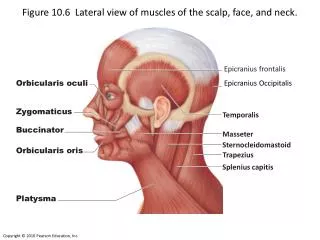
Face Massage Theory • All circular movements are performed from the midline outward. • The tissue around the eyes is delicate and should be treated very gently. • The following movements can be done with or without oils and lotions.
Start With Lymphatic Drainage • Before staring face massage, be sure to open the lymphatic ducts (right and left). • Press towards the midline and underneath the clavicle. Hold for a count of three, release, disengage and repeat. • Pressure is enough to move the skin but not the structures underneath.
Step #1A • Firmly stroke with index finger above jaw and middle finger below jaw, from one ear to the other. • Alternate our hands ear to ear.
Step #1B • Slide index finger over the top of the jaw, hook underneath on chin and slide back to ramus of the jaw.
Step #2 • To massage the neck, make circles with four fingers up the center of the throat (platysma) out and down to drain lymph.
Step #3 • Using knuckle of index finger and thumb in a pincer grasp compressing together slowly over and under the edges of the jaw. • Begin at the chin and move laterally to the angle of the jaw. Repeat on both sides several times.
Step #4A • Stroke around the mouth using index finger above the lips and middle finger below the lips, alternating hands.
Step #4B M T I • To shape the upper lip, place the index finger below the nose on mid-line. • Then slide thumb and middle towards the index.
Step #5 • Using small circles, gently and slowly massage the area from the lips out laterally to ends of the mandible, taking care not to stretch the tissue but locally relax the layers underneath from the surface.
Step #6 • Alternately compress with finger pad on each side of jaw for several seconds until you feel the tissues relax.
Step #7 • With your hands in the same location, use small myofascial (hold for release) strokes to bring the tissue superiorly and laterally. • Work around the area of the masseters until sufficiently softened.
Step #8 S S P S • At upper edge of corner of jaw, compress under the ridge (zygomatic arch) superiorly and hold for 8-10 seconds. • Move finger tips widths until reaching the spot under the middle of the eye. Compress and hold posteriorly (ST2).
Step #9 • Make circles up and out at corners of mouth. • Expand to include cheeks. • Make circles at the corners of the eyes. • Massage movements should always be circling upwards.
Step #10 • Stroke across the forehead from the medial corner of ne yet over the forehead to the opposite temple. • Do the same on the other side, repeating several times with alternating hands.
Step #11A • Make small circles to smooth out the forehead wrinkles
Step #11B • Then smooth out across the forehead with long firm strokes.
Step #12 • Start at top of nose and make circular strokes with index finger down along each side of the nose to the nostrils. • Shape the nostrils, moving up and down. Press beside nostrils and rest there for a few seconds (LI20). • Slide across the cheek bones, above the eyebrows, and down the nose again.
Step #13 2 2 3 3 1 1 2 2 3 3 1 1 4 6 6 4 5 5 4 4 6 6 5 5 • Use pressure points around the eyes, holding each a few seconds. • Do inner circle first, then outer circle. • Start at top inner corner of eye and proceed around the eye.
Step #14 M M S M M S • Moving between the eyes, use pressure points medially at the top of the nasal bone. Hold for 8-10 seconds (BL2). • Moving laterally and almost to the crease of the eyes, slowly compress medially again and hold for 8-10 seconds (BL1). • Find the area on the inferior aspect of the brow, about ¼ to ½ inch lateral of the midline where there is a notch. Reaching as far as comfortable under the bone and into the notch, compress superiorly for 10 seconds. These spots may assist in opening sinuses.
Step #15 • Using flat fingertips, gently compress the area between the brows towards the table and them move the tissue superiorly and hold(myofascial release technique). • Repeat movement, changing the direction of the stretch laterally.
Step #16 • Using index finger and thumb in a pincer grasp, take the tissue along the eye brow area and gently stretch superiorly and hold the tissue away from the face. • Hold for several seconds, gently exploring and releasing restrictions. • This releases the fascia between the nasal bone and orbits, and may help in decreasing furrowed brows, sinus headaches and etc.
Step #17 • Changing the angle of grasp to be more laterally oriented, use the fingers of both hands (doing one side of the forehead at a time), compress the tissue at the brow line and in a slight skin rolling fashion gently lift sections of forehead, moving from midline laterally to the hairline. • Repeat over the other eye.
Step #18 • Alternation hand tapotement on the cheek, use the length of the fingers to strum rapidly one at a time. • Continue this motion under the jaw and up the other cheek.
Step #19 • A technique for the ears is to press the reflex points for circulation. This can be found on the facial reflex chart (Session 10 Page 3).
Step #20 • Finish with all over scalp massage and gentle hair pull. • When doing scalp massage, be sure to move skin, do not just rub the hair.
THE END Kitty Scalp Massage.