Download
1 / 47
470 likes | 604 Views
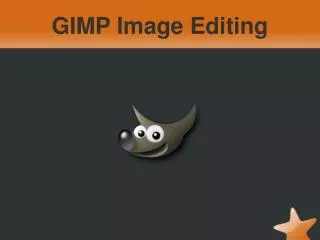
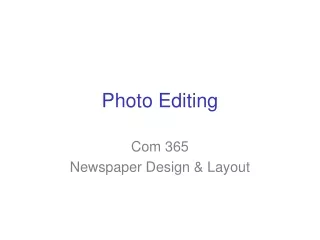
Join George E. Brooks from Cumberland County Schools for an engaging workshop on photo editing using GIMP. Learn essential techniques such as converting images to grayscale, utilizing color models (RGB, CMYK, LAB), and mastering tools like Color Curves and automatic color-stretching. This workshop covers a range of functionalities within GIMP to enhance your editing skills, whether you’re a beginner or looking to refine your techniques. Download GIMP from our recommended links and bring your photos to life!

E N D
Photo Editing with GIMP Workshop Presenter: George E. Brooks Cumberland County Schools South View High School georgebrooks@ccs.k12.nc.us
Workshop objectives • GIMP Downloads • Grayscale • Desaturate • RGB • Color Curves • HSV • LAB • CMYK • Automatic Color-Stretching • Auto Modes • Map Filters • Colorfiy • Tutorials • Questions • Work Cited
GIMP Downloads • Software Version GIMP for various operating systems Website address for downloading: • http://www.gimp.org/downloads/ • Windows XPSP3 or higher: • Windows Operating System • http://gimp-win.sourceforge.net/stable.html • Apple MAC’s • http://sourceforge.net/projects/gimponosx/ • http://gimp.lisanet.de/Website/Download.html
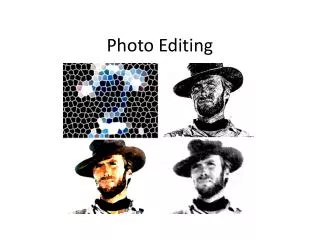
Grayscale • Here is what I get if I use the standard mode change to grayscale from RGB. • Duplicate the original image (Ctrl+D) and right-click on the copy. Select <Image> Image -> Mode -> Grayscale
Grayscale • You can use the Grayscale command to convert your image to grayscale with 256 levels of gray, from 0 (black) to 255 (white).
Desaturate • By using the Desaturate command, you can convert all of the colors on the active layer to corresponding shades of gray. This differs from converting the image to grayscale in two respects. First, it only operates on the active layer and second, the colors on the layer are still RGB values with three components. This means that you can paint on the layer, or individual parts of it, using color at a later time
Desaturate • Select <Image> Image -> Colors -> Desaturate.
Red, Green and Blue (RGB) • GIMP uses Red, Green, and Blue as primary colors. The first and primary channels display the Red, Green, and Blue values of each pixel in your image.
Decompose RGB • Select <Image> Image -> Colors -> Components, Channel Mixer.
Color Curves • The Curves tool is the most sophisticated tool for changing the color, brightness, contrast or transparency of the active layer or a selection. While the Levels tool allows you to work on Shadows and Highlights, the Curves tool allows you to work on any tonal range. It works on RGB images. • Smooth • Freehand
Hue, Saturation and Value (HSV) • This option decomposes image into three greyscale layers, one for Hue, one for Saturation and another for Value. • Although Hue is greyscale, it does represent hues. In color circle, white and black are starting and arrival points and are superimposed. They represent Red color at top of circle. Grey intermediate levels are corresponding to intermediate hues on circle: dark grey to orange, mid grey to green and light grey to magenta. • Saturation and Value: White is maximum Saturation (pure color) and maximum Value (very bright). Black is minimum Saturation (white) and minimum Value (black).
Decompose HSV • Select <Image> Image -> Colors -> Hue-Saturation
LAB • This option decomposes image into three greyscaled layers, layer “L” for Luminance, layer “A” for colors between green and red, layer “B” for colors between blue and yellow. • The LAB Decomposing is a color model of the Luminance-Color family. A channel is used for the Luminosity while two other channels are used for the Colors. The LAB color model is used by Photoshop.
Decompose LAB • The Lightness component is a very interesting one because it contains all of the luminance information.
CMYK • The CMYK color model (process color, four color) is a subtractive color model, used in color printing, and is also used to describe the printing process itself. CMYK refers to the four inks used in some color printing: cyan, magenta, yellow, and key (black). Though it varies by print house, press operator, press manufacturer, and press run, ink is typically applied in the order of the abbreviation.
Decompose CMYK • Select <Image> Image -> Colors -> Components, Decompose • Make sure to switch to Color Model to CMYK
Automatic Color-Stretching • GIMP has several automatic commands for stretching the columns of the histogram for the color channels of the active layer. By pushing bright pixels to the right and dark pixels to the left, they make bright pixels brighter and dark pixels darker, which enhances the contrast in the layer. • Some of the commands stretch the three color channels equally, so that the hues are not changed. Other commands stretch each of the color channels separately, which changes the hues.
Auto Modes • Equalize • White Balance • Color Enhance • Normalize • Stretch Contrast • Stretch HSV
Auto Equalize • Equalize applied to flower
Auto White Balance • White Balance applied to flower
Auto Color Enhance • Color Enhance
Auto Normalize • Normalize
Auto Stretch Contrast • Stretch Contrast
Auto Stretch HSV • Stretch HSV
MAP Filters • Map filters use an object named map to modify an image: you map the image to the object. • Types: • Alien • Color Exchange • Gradient • Palette • Rotate Colors • Sample Colorize
Alien • Alien-This filter renders very modified colors by applying trigonometric functions. Alien Map can work on images having RGB and HSV color models.
Color Exchange • Color Exchange • This filter replaces a color with another one.
Gradient • Gradient • This filter uses the current gradient, as shown in the Brush/Pattern/Gradient area of the Toolbox, to recolor the active layer or selection of the image to which the filter is applied
Palette • Palette • This plug-in recolors the image using colors from the active palette that you choose in Dialogs → Palettes.
Rotate Colors • Rotate Colors • Colormap Rotation lets you exchange one color range to another range.
Sample Colorize • Sample Colorize • This filter allows you to colorize old black-and-white images by mapping a color source image or a gradient against it.
Colorify • This filter renders a greyscale image like it is seen through a colored glass. • For every pixel, the filter computes a weighted average value of the RGB channels (this is equivalent to desaturation the image based on luminosity). The resulted color is the product of this average value and the “colorify color”. Hence, this filter works only on images in RGB mode.
Website for tutorial's • Website URLs: • http://www.gimp.org/tutorials/ • Beginner • http://www.gimp.org/tutorials/Lite_Quickies/ • Intermediate • http://www.gimp.org/tutorials/Drawing_Shapes/ • Expert • http://www.gimp.org/tutorials/Image_Pipes/ • Photo Editing • http://www.gimp.org/tutorials/Color2BW/ • YouTube Channels • http://www.youtube.com/watch?v=pEGR_Qps9OQ • http://www.youtube.com/user/GIMPtricks • http://www.youtube.com/watch?v=dvoyQAkPYDw
Website for tutorial's cont.. • http://gimpmagazine.org/resources/ • http://gimpmagazine.org/issues/http://gimpforums.com/ • http://blog.meetthegimp.org/ • http://gimper.net/ • http://gimpedtutorials.com/
Work Cited • Peck, Akkana. Beginning GIMP: From Novice to Professional. Apress, 2006. Books. 07 July 2007. <http://gimpbook.com/>. • Beginning GIMP: From Novice to Professional, Second Edition. 2nd. Apress, 2008. Book. 07 July 2012. • Simončič., Jernej. GIMP for Windows. 01 January 2013. Web Site. 07 July 2013. • Simone, Lisa. GIMP on OS X. 13 January 2013. Web Site. 07 January 2013. • Team, GIMP Development. GIMP Tutorials'. 01 January 2013. Web Site. 07 07 2013. • Team, The GIMP Documentation. GNU Image Manipulation Program User Manual. 01 January 2012. Web Site. 07 July 2013.
Questions E-mail them to this address: georgebrooks@ccs.k12.nc.us