Task Scheduling and GPIO Management in MQX for Tower System at National Tsing Hua University
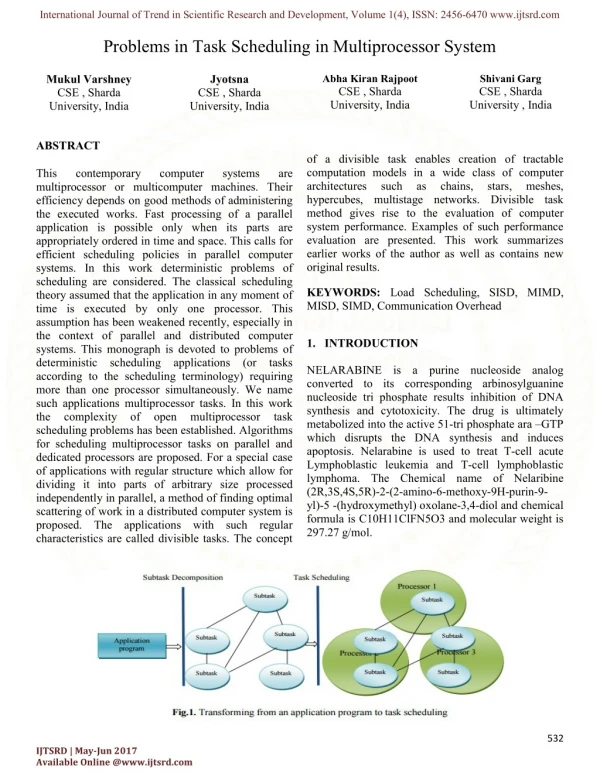
In this lab, students will learn to open an MQX project, manage tasks, utilize GPIO, set up I2C, and control a three-axis accelerometer. Key concepts include creating tasks using `_task_create()`, managing task states, setting task priorities, and utilizing FIFO scheduling. The lab will also cover GPIO initialization, button reading, and I2C protocol setup. Practical exercises involve controlling LED statuses and interfacing with the MMA8451Q accelerometer to acquire data. This hands-on experience is essential for understanding embedded systems.

Task Scheduling and GPIO Management in MQX for Tower System at National Tsing Hua University
E N D
Presentation Transcript
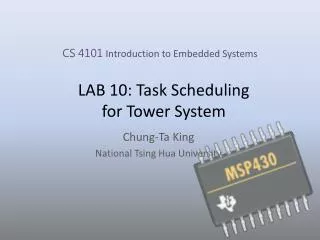
LAB 10: Task Scheduling for Tower System Chung-Ta King National Tsing Hua University CS 4101 Introduction to Embedded Systems
Introduction • In this lab, we will learn • To open a new MQX project • To manage tasks • To use GPIO • To set up I2C • To control three-axis accelerometer
Task States • Tasks can be automatically created when MQX starts; also, any task can create another task by calling _task_create() or _task_create_blocked() • _task_create() puts the new task in the ready state and the scheduler runs the highest priority task • If _task_create_blocked is used, the task is not ready until _task_ready() is called
Managing Tasks • _task_create: allocates and starts (makes ready) a new task. • _task_destroy: terminates the task after freeing its resources. • _task_get_id: gets the task ID. • _task_get_td: converts a task ID to a pointer to a task descriptor. • From MQX user guide P.30
Scheduling Tasks • _task_block: blocks the task. • _task_ready: makes a task ready. • _task_get_priority: gets a task’s priority. • _task_set_priority: sets a task’s priority.
Steps for Creating a Task • Make the task prototype and index definition • Add the task in the Task Template List: #define INIT_TASK 5 extern void init_task(uint_32); TASK_TEMPLATE_STRUCT MQX_template_list[] = { {TASK_INDEX, TASK, STACK, TASK_PRIORITY, TASK_NAME, TASK_ATTRIBUTES, CREATION_PARAMETER, TIME_SLICE} } TASK_TEMPLATE_STRUCT MQX_template_list[] = { {INIT_TASK, init_task, 1500, 9, "init", MQX_AUTO_START_TASK, 0, 0}, }
Steps for Creating a Task • Make the task definition • During execution time, create the task using • (if it is not an autostart task) void init_task(void) { /* Put the Task Code here */ } task_create()
Task Creation Example void init_task(void) { _task_create(0,TASK_A,0); ... _task_ready(Task_B); ... } init_task is created when MQX starts {INIT_TASK, init_task, 1500, 11, "init", MQX_AUTO_START_TASK, 0, 0}, void Task_A(void) { ... _task_create_blocked(0,TASK_B,0); ... _task_abort(TASK_A); } {TASK_A, Task_A, 1500, 10, “Task A", 0, 0, 0}, {TASK_B, Task_B, 1500, 9, “Task B", 0, 0, 0}, void Task_B(void) { ... _task_abort(TASK_B); } CPU Time
Ready Priority-Based FIFO Scheduling priority low high FIFO list of ready tasks CPU processor time Scheduler active
Ready Round-Robin Scheduling Task 1 75ms Same Priority Task 2 50ms Time Slice = 50ms Task 3 60ms time Task1 Task1 Task3 Task3 Task2 150ms 100ms 200ms T0 50ms time
Initialize LED (1/2) • #if defined BSP_LED1 #define PIN_LED1 GPIO_PIN_STRUCT pin_led1[] = { BSP_LED1, GPIO_LIST_END };#endif
Initialize LED (2/2) • /* open file not containing any pin/signal */ port_file_led1 = fopen("gpio:write", char_ptr) NULL);/* add pins/signals to the existing file */ioctl(port_file_led1, GPIO_IOCTL_ADD_PINS, &pin_led1 );/* write logical 0 to all signals in the file (fast) */ioctl(port_file_led1, GPIO_IOCTL_WRITE_LOG0, NULL );
Read the Button Value (1/2) • #if defined BSP_BUTTON1 #define PIN_BTN1 GPIO_PIN_STRUCT pin_btn1[] = { BSP_BUTTON1, GPIO_LIST_END };#endif
Read the Button Value (2/2) • //gpio sw1port_file_btn1 = fopen("gpio:read", (char_ptr) &pin_btn1 );ioctl(port_file_btn1, GPIO_IOCTL_READ, (char_ptr) &pin_btn1);
Serial Protocols: I2C • I2C: Inter Integrated Circuit Bus • Two-wire serial multimaster-slave bus protocol • Enables peripheral ICs to communicate using simple communication hardware • Data transfer rates up to 100k bits/s (400k bits/s now) and 7-bit addressing in normal mode • 3.4M bits/s and 10-bit addressing in fast-mode • Common devices capable of interfacing to I2C bus: • EPROMS, Flash, and some RAM memory, real-time clocks, watchdog timers, and microcontrollers
I2C Bus Structure • Signal lines: SCL (serial clock), SDA (serial data) • Any device can be a sender or receiver
void InitializeI2C() Initial the i2c port • void read_I2C(device_address, reg, N) Read the target address for continuous N register value. • void write_I2C(device_address, reg, value)Write the ‘value’ to the target register ‘reg’ for device address
Register contents are preserved when transition from ACTIVE to STANDBY mode occurs. • Register contents are reset when transition from STANDBY to ACTIVE mode occurs. • Register contents can be modified anytime in STANDBY or ACTIVE mode. A write to this register will cause a reset of the corresponding internal system debounce counter. • Modification of this register’s contents can only occur when device is STANDBY mode except CTRL_REG1 ACTIVE bit and CTRL_REG2 RST bit.
Sample Code • Create two tasks, and run the LED task as the background task. When holding down button1, print the 3-axis accelerometer value. When releasing the button, return to the LED task.
Basic Lab • Create three tasks, and run the accelerometer-print task as the original task. When holding down button1, blink the red LED. When holding down button2, blink the green LED. Once releasing the buttons, turn off the LED and return to the accelerometer-print task.
Bonus • Create three tasks, and run the accelerometer-print task as the original task. When holding down the button, two task “hello task” and “world task” will be created. You should use round robin scheduling to let these two task execute alternately. After releasing it, return to accelerometer-print task. • Hint1:“hello task” prints the “hello” string continuously, and “world task” prints the ”world” string continuously. • Hint2:May need to change BSP(PSP)’s configuration (usr_config.h)