Download
1 / 61
610 likes | 735 Views
This guide delves into the essentials of validating and uploading learning web design documents, focusing on XHTML 1.0 and Document Type Definitions (DTDs). Explore the differences between XHTML Transitional, Strict, and Frameset versions, and learn how to ensure that your HTML adheres to W3C standards. Effective validation enhances web document quality, improves performance, and ensures compliance with modern browsers. Get step-by-step instructions for validating local and online files, creating well-structured markup, and using UTF-8 character encoding to support diverse languages.

E N D
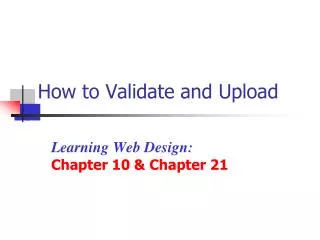
How to Validate and Upload Learning Web Design:Chapter 10 & Chapter 21
Document Type Definition (DTD) • A valid HTML declares what version is used in the document • A collection of XML definitions set the legal structure, elements and attributes that are available for use in the document and abides by the DTD • Three flavors of XHTML 1.0 • XHTMLTransitional • XHTML Strict • XHTML Frameset
Valid XHTML Syntax • W3C rewrote HTML according to the more strict rules of XML • So XHTML is a said to be a subset of XML • The X stands for eXtensible • The first version of XHTML was XHTML 1.0 • Shares the same elements and attributes as HTML 4.0, just “well-formed”
XHTML 1.0 Transitional • This is the version we will validate to!!! • Takes advantage of XHTML features like style sheets while still allowing older features that enable older browsers which cannot view style sheets to display these pages • Use: <!DOCTYPE html PUBLIC "-//W3C//DTD XHTML 1.0 Transitional//EN" "http://www.w3.org/TR/xhtml1/DTD/ transitional.dtd">
XHTML 1.0 Strict • Use this when you want really clean structural mark-up, free of.any tags associated with layout. Use this together with W3C's Cascading Style Sheet language (CSS) to get the font, color, and layout effects you want. • Use: <!DOCTYPE html PUBLIC "-//W3C//DTD XHTML 1.0 Strict//EN" "http://www.w3.org/TR/xhtml1/DTD/ strict.dtd">
XHTML 1.0 Frameset • Use this when you want to use HTML Frames to partitionthe browser window into two or more frames. • Use: <!DOCTYPE html PUBLIC "-//W3C//DTD XHTML 1.0 Frameset//EN" "http://www.w3.org/TR/xhtml1/DTD/ frameset.dtd">
<html> </html> tag • The opening <html> tag must immediately follow the DOCTYPE tag • All text and HTML commands should be placed within the beginning and ending html tags • Your document would not be a valid XHTML document without the following <html>attributes: • xmlns=http://www.w3.org/1999/xhtml • xml:lang="en" • lang="en"
What is Character Encoding? • There are hundreds of written languages with thousands of unique character shapes that need to be displayed on the web • Various character sets have been standardized for the Web • Our chosen character set is “utf-8” which is unicode which uses 8 bytes for each character
Specifying Character Encoding • The <meta> tag is used indicate the character set of the page • Of course, the <meta> tag appears in the <head> of your file • The attributes of the <meta> tag are: • http-equiv=“content-type” • content=“text/html;charset-utf-8”
“Well-Formed” XHTML Code • Some things to check when your code fails to validate: • <!DOCTYPE> tag is correct • Every non-empty has a closing tag • Self-terminating tags have closing / • Attributes are quoted • Tags and Attributes are lowercase • Use proper nesting
What is Validation? • Most Web documents are written using markup languages, such as HTML or XHTML. • Validation is a process of checking your documents against a formal Standard, such as those published by theW3C • Validation serves a similar purpose to spell checking and proofreading for grammar and syntax • The Markup Validator is a free service by W3C that helps check the validity of Web documents.
Why Should You Validate??? • Validating Web documents is an important step which can dramatically help improving and ensuring their quality, and it can save a lot of time and money. • Validation is, however, not a full quality check. A web page could still be poorly designed or hard to read.
Start at the Beginning • Every web page created will begin with the start.htm file • Contains the <!DOCTYPE>for XHTML 1.0 Transitional • Contains the <meta> tag for the character code • Contains other <meta> tags for documentation
Checking Your Page • Save your html/xhtml document • Go the the validation site: http://validator.w3.org • Do not type in the www in the URL
Validating Files • You can validate a file that is still local on your computer • You should validate your file locally before uploading it to a web server • Make any needed changes locally • You can also validate a file that has been uploaded to a web server • Always test you files for validation once you have uploaded them!
Validating Your Local File • For pages located on a web server, choose the “Validate by URI” tab • To validate your web page when it is still on your own machine, choose the “Validate by File Upload” tab.
Find the Page to Upload • Click on the Browse button and find the file you wish to validate • When the correct file appears in the text box, click on the : Check button • Your local page will then be uploaded to the W3C’s validator
Your Page was GREAT! • If your page was “well-formed” you will receive a message from the validator. This document was successfully checked as Valid XHTML 1.0 Transitional
Validation Graphic and Link • Near the bottom of the validation page, code is provided to add a validation icon and validation link to your web page.
Copy the XHTML 1.0 Code • After validating, copy the code provided to add the validation graphic and link to your web page • Be sure to place the code just before the closing </body> tag of your page • This graphic will link back to the validator site when uploaded
Validating a File on the Web Server • Use the “Validate by URI” option for pages uploaded on a web server. • Paste the URL of your web page as it is found on the web server in the Address box • If your page had errors, you should fix them, check the file locally and then re-upload the file to web server again.
Your Page is not Valid • If your page does not have a <!DOCTYPE> DTD tag, the validator will not be able to check your file • Use the start.htm file given to you by your instructor because it contains the needed <!DOCTYPE> as well as a <meta> tag that defines the character code of the file
Errors were Found • If you are not so lucky and errors are found in your document … • You will be given line numbers and help to fix the errors. • It is up to you to solve these problems • This process is known as Debugging • You must fix errors, and retry the validation until you are 100% successful • Explanations for some common validation errors can be found at this page in the W3C website: errors.html
What was Wrong? • The first error in this document was related to the <h1>tag • The second error is related to this missing <li>tag • Sometimes the validator gives more than one reason for an error • If you fix the problem both errors will go away
Debugging your Code • To find the problem in your code: • Read the validator message for the error • Look at the code shown • This will help you to see just where the error has occurred • Go back to your file and fix the error • Repeat if necessary
Advantages of XHTML 1.0 Transitional • With this coding standard we can use some of the newer web features like: • JavaScript (must be lowercase) • Cascading Style Sheets • FrameSets • Etc. • We can still use many tags and attributes that have been deprecated
Getting Your Pages on the Web Learning Web Design:Chapter 21
Web Server • A web server is a computer that is used to store your web pages • The web server has special software that allows you to connect to the server and request a page • Transmits the page to your own machine called the client
FTP Clients • Special software that allows you to connect to the web server and do the following: • You can make directories • Move or upload files • Delete files • Download files
Some Free FTP Clients • FileZilla (open source) • WinSCP (open source) • FTP Commander • Core FTP LE (freeware) • FireFTP (multi-platform freeware)
Using the Yoda web server • The College of Technology and Computing (Techcom) has created a web server for student use • yoda.tc.uvu.edu • This web server is behind the UVU firewall, but content can be viewed on the WWW • Students must use a FTP client to upload files
Choose an FTP client • Filezilla is available in most of the CS labs • The host will be:yoda.tc.uvu.edu/lastnamefirstname • Your username will be: your UV ID • Your instructor will email you your password
Setting the Transfer Mode • Our Web server expects the transfer mode to be Active, but the default is Passive • You must change this setting, or your file transfer will fail
Setting Active Mode – A Must Make sure Active is selected Click onFTP
Connect to Yoda Host name UsernamePassword Quickconnect
Moving Your Project Folders • Each student has their own web site on the Yoda web server • Create a folder for Practices and one for Projects in your home directory. • Drag your project folder from your local machine to your Yoda directory. • You can move individual files also.
Moving Files/Folders to Yoda Client Machine Web Server
Moving Files/Folders to Yoda Select and dragfile or folder
Check Files After Uploading • You should always check your pages in the web browser after uploading your project • Your project URL will be something like: http://yoda.tc.uvu.edu/lastnamefirstname/Projects/Project1/index.htm
Disconnect from Yoda • When you are finished with your work on Yoda, you should choose Disconnect from the Server menu
After this Class if Over…How do You Publish a Web Site??? • There are many types of web sites • Non-Profit • Personal • Entertainment – may need multimedia capabilities • Commercial – needs shopping cart or form processing capabilities • Match your needs with an appropriate web hosting option