Download
1 / 26
260 likes | 475 Views
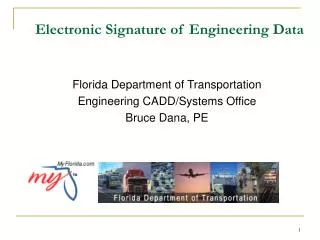
Electronic Signature of Engineering Data. Florida Department of Transportation Engineering CADD/Systems Office Bruce Dana, PE. What does the Board say?.

E N D
Electronic Signature of Engineering Data Florida Department of Transportation Engineering CADD/Systems Office Bruce Dana, PE
What does the Board say? (4) Engineers who wish to sign and seal electronically transmitted plans, specifications, reports, or other documents shall follow the procedures set forth in Rule 61G15-23.003, F.A.C.Specific Authority 471.025 FS.Law Implemented 471.025 FS.History--New 1-8-80, Amended 1-20-85, Formerly 21H-23.02, Amended 5-14-86, Formerly 21H-23.002, Amended 11-15-94. Amended 8-18-98. 61G15-23.003 Procedures for signing and sealing electronically transmitted plans, specifications, reports or other documents.(1) Information stored in electronic files representing plans, specifications, plats, reports, or other documents which must be sealed under the provisions of Chapter 471, F.S., shall be signed, dated and sealed by the professional engineer in responsible charge. (2) Electronic files may be signed and sealed by creating a "signature" file that contains the engineer’s name and PE number, a brief overall description of the engineering documents, and a list of the electronic files to be sealed. Each file in the list shall be identified by its file name utilizing relative Uniform Resource Locators (URL) syntax described in the Internet Architecture Board’s Request for Comments (RFC) 1738, December 1994, which is hereby adopted and incorporated by reference by the Board and can be obtained from the Internet Website: ftp://ftp.isi.edu/in-notes/rfc1738.txt. Each file shall have an authentication code defined as an SHA-1 message digest described in Federal Information Processing Standard Publication 180-1 "Secure Hash Standard," 1995 April 17, which is hereby adopted and incorporated by reference by the Board and can be obtained from the Internet Website: http://www.itl.nist.gov./div897/pubs/fip180-1.htm. A report shall be created that contains the engineer’s name and PE number, a brief overall description of the engineering documents in question and the authentication code of the signature file. This report shall be printed and manually signed, dated, and sealed by the professional engineer in responsible charge. The signature file is defined as sealed if its authentication code matches the authentication code on the printed, manually signed, dated and sealed report. Each electronic file listed in a sealed signature file is defined as sealed if the listed authentication code matches the file’s computed authentication code. Florida may have been the first State to implement an electronic signature alternative??
To make a long story short… • If the traditional ink signature and impression seal is good enough for paper documents... It’s good enough for electronic documents too! • All we need is a way to do it, and that is where PEDDS comes in…
How PEDDS Works • PEDDS relies on a one-way cryptographic hash function (SHA-1) to uniquely identify electronic data, (a fingerprint) • Hash codes created by SHA-1 are protected by the traditional means of manual signing and sealing. (That’s all there is to it!)
PEDDS One-Way Cryptographic Hash Functions: • The hash code is solely dependent on: 1) The file’s content and, 2) The cryptographic hash function (in PEDDS case it’s the fed’s SHA-1) • One-way means it’s easy to generate in one direction -- go from an input file and generate the hash code, but very hard to go backwards find two non-identical, files with the same hash. To PEDDS, files are zero’s and one’s, so file type doesn't matter. Path / filenames do not effect the hash result, so files could be named anything*
Securing Authenticating Producer -Electronic File Customer -Electronic File SHA-1 SHA-1 Hash Code Hash Code Verify Document Hash Code matches newly computed Hash Code Signed and Sealed Printed Document with Hash Code
Advantages of Electronic Signature Model • Security and identity is no different than in the paper world…still relies on ink signature / seal • No third-party key management authority needed • No fees for transactions, transaction between originator and customer exclusively, internet not required • Longevity (No one will guarantee keys for perpetuity) • Single sheet of paper could secure 1 epsilon files • You still have to store that one sheet of paper somehow • Boards did not have to change rules significantly • FDOT provided the software, others could too • Disadvantage – not a 100% digital signature Contrast: Electronic Signature & Digital Signature (one still uses ink and seals)
SHA-1 File 1 HASH CODE 1 SHA-1 File 2 HASH CODE 2 File 3 SHA-1 HASH CODE 3 File 4 SHA-1 HASH CODE 4 For multiple files, each is passed through SHA-1 and the results with the URL of the operated file are compiled into a manifest (Manifest file for the entire project, Signature file for those selected to signed/sealed by a Signatory) MANIFEST File URL / HASH 1 URL / HASH 2 … A Manifest is a listing…A Signature file is also a Manifest
ONE HASH SECURES ALL MANIFEST DOCUMENT HASH CODE of MANIFEST FILE MANIFEST or SIGNATURE FILE URL / HASH 1 URL / HASH 2 … SHA-1 SIGN HERE The Manifest (or Signatory file) itself then passes through SHA-1, resulting in a single hash that can secured all the data referenced in either the Manifest file or Signatory file. The hash result is printed on a paper to be signed / sealed. To Authenticate the data, at any future time, the process is repeated and all that must be done is a comparison of a single hash code. SIGNATURE DOCUMENT HASH CODE of SIGNATURE FILE SIGN / SEAL
Creating a PEDDS Project (If it has not been done before) Don’t Forget Help! PEDDS recognizes a project by looking for a \_meta_info\ directory beneath the project directory. If the files ProjectID.XML if found in the \_meta_info\ directory, the PEDDS will see the project. If not, then you must run Project > New from the menu pull-down to create the project for PEDDS. HINT: Use the Help in PEDDS ! Explains how to do most things (almost).
Creating the Project and project Identification Information The briefcase icons above indicate existing PEDDS projects As shown, were about to “create” the PEDDS project for “2100041” Next, we need to create Project identification information (the ProjectID.XML file).
Project Identification and Location Don’t Forget Help! It is very important that this information be entered as accurately as possible. On the Location screen, some field are multi-entry, combination fields (Segment and State Road Number). To use these, Fill the data entries in the field(s), then press the Add button. You can afterward enter another set of values and then press Add. Different entities could produce their own “ProjectID” to for their application**
More Project Identification data The State Road number is also a multi-entry, combination field. On the Disciplines dialog, check the options that are anticipated to be part of the data on this project. Note: the data in ProjectID can be updated later as the project progresses.
More Project Identification data The entire Bridge Identification dialog is a multi-entry, combination fields. The Key Words are used for the future when people are searching for this project using ad-hock searches. The General Description and Comments can be used as search keys too. Be verbose and describe carefully.
More Project Identification Data Enter the FDOT project manager and anticipated professional’s of record and their area of responsibility. Again, note the multi-entry, combination fields. Remember, the Project ID data can but updated at and time before the project is secured in the end. The project ID data is finished and the right dialog appears. Pressing “next”…
Additional description information Note the Project manager dialog above. This is used to enter the identy of the person managing the data for the delivery (not the Project Manager). The Description is explained on the dialog…
The Main PEDDS Dialog – Let’s create a Signatory (one who Signs, or Signs and Seals)
Enter the Name, Signatory Number and check the Signatory Type Signatory files can be secured with a Pass-phrase, although in most cases it is not necessary to do so. Security is still vested with the ink Signature and Seal ! You can create multiple Signatories for a single individual… Create “lay” signatories (Signature – No Seal) to sign only. Use FL Drivers license (which is your Official State ID by Statute) as the Signatory Number
Select files to Sign / Sign and Seal Choose files with Ctrl-click, or Shift-click just like in Windows. Once highlighted, right-click to access function menu above. Select the group with the option show. Files may be selected across project directories too.
The Signature Document The Signature Document should printed, Signed / Sealed by the Signatory. This document secures the files selected, and bears the SHA-1 Hash code of the Signatory file (which stores the listing of the files secured and their SHA-1 Hashes. Note: Data cannot be later authenticated without a copy of the Signature Document. The security is still the ink signature and seal !
Create or Select additional Signatories The active Signatory is selected from the pull-down list shown above
Secure the Project when you are finished Securing the project runs all files in the project through SHA-1. This process creates the Manifest file -(Manifest.XML) Note: Securing the project is normally done near the end – This slide was placed here for continuity
The Manifest Document The Manifest Document bears the Hash codes for the Manifest File (Manifest.XML) which secures the entire project. Print and sign too ! Note: Projects may be re-secured at any time, even if there are no Signatories