Download
1 / 29
290 likes | 425 Views
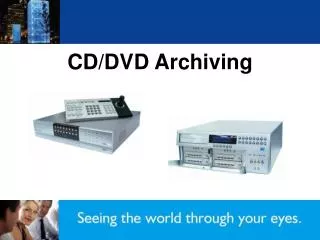
CD/DVD Archiving. Overview. Compatible media slide 3 Getting started slide 4 Copying a time and date range slide 7 Selective Camera Archiving slide 11 Copying from the Event Log slide 13 Copying from playback slide 17 Archive and Verify slide 20 Contact info slide 29.

E N D
Overview Compatible media slide 3 Getting started slide 4 Copying a time and date range slide 7 Selective Camera Archiving slide 11 Copying from the Event Log slide 13 Copying from playback slide 17 Archive and Verify slide 20 Contact info slide 29
Compatible Media Compatible media 52x or slower CD-R 700MB 52x or slower CD-RW preformatted 700MB (unformatted CD-RW not compatible) 16x or slower DVD – (dash or minus format) 4.5GB (initial release of New DS2 only compatible with 8x or slower) A version of Observer, a DM Player, as well as a version of Java, is written to disk so there is no need to load software on a PC to play it back. The CD/DVD will autorun on a Windows PC. Disks are closed out or finalized once written to and cannot be edited, added to, or altered and can only be used once. Installations with multiple DVRs must burn a CD/DVD for each DVR. Alternatives are available when downloading over the network that provide the ability to copy video from several DVRs to the PC first, then burn to CD/DVD ion the PC.
Getting Started Open the front panel door by pressing in the upper right corner to release. Door should pop open. Occasionally the door might stick closed. Pressing on the upper corner of the panel just to the right of the door often releases the door.
Handle Disk with Care Open drive tray using the drive eject button - do not force or pry the tray open. The tray will pop out partially. Slide drive tray out fully. WARNING: Do not touch the drive lens. Insert the blank CD/DVD picture side up into the DISK DRIVE. As illustrated. Align the center hole of CD/DVD with the drive spindle. Install the CD/DVD by pressing the CD/DVD near the center until all 3 positive lock-down devices on the drive spindle lock into place. NOTE: The CD/DVD must be installed into and not merely placed onto the tray. Close the CD/DVD tray but leave the front panel door open
Select Video to Archive There are four basic ways to select the video to archive to CD/DVD Copy All Cameras from the Copy Menu by manually entering the time and date range Copy Selected Cameras from the Copy Menu by manually entering the time and date range Copy All Cameras by from selected Events from the Event List Copy the video as you play it back on the main monitor Any and/or all of these options can be used to create a list of video to be archived prior to writing to a CD/DVD. The list will remain in the queue until manually cleared It is good practice to always have a blank CD/DVD in the tray, ready for archiving, and to make a back up copy of any evidence given to law enforcement or to be used for prosecution
Accessing the Copy Menu Press and Hold the COPY button for three seconds on the front panel or the KBS3A keyboard to access the Copy Images Menu. Note: this feature may be password protected
Navigating the Copy Menu Use the Up, Down, Left, right Navigation buttons to navigate the menu Enter Copy From and Copy To times by highlighting the time or date and scrolling up or down Note: It is best to confirm playback of desired video prior to copying Select either All Cameras or Selected Cameras TAP the MENU/MODE button to continue
Disk Archive List Highlight “Add Next” and TAP the MENU/ MODE button to add “NEXT” video time and date range to Disk Archive List queue
Disk Archive List Indicator will show percentage of disk being used. You will be prompted if From and To times create files that exceed disk capacity REW << button can be used to go back a menu page to enter another time and date range Highlight “Archive and Verify” and TAP the MENU/ MODE button to start archiving process PRESS and HOLD MENU to exit
Selective Camera Archiving From the Copy Images Menu, Use the Camera buttons to select or deselect cameras to be copied after entering time and date range. TAP Menu/Mode to continue Note: Selective Archiving may take longer than archiving all cameras
Disk Archive List Highlight “Add Next” and TAP the MENU/ MODE button to add NEXT video to queue. Note Selected option. Indicator will show percentage of disk being used. You will be prompted if From and To times exceed disk capacity REW << button can be used to go back a page to enter another time and date range Highlight “Archive and Verify” and TAP the MENU/ MODE button to start archiving process PRESS and HOLD MENU to exit
Copying from the Event Log Press and Hold the EVENT button for three seconds on the front panel or the KBS3A keyboard to access the EVENT Filter Menu. Note: this feature may be password protected.
Event Search Filter Enter search filter options and TAP the EVENT button to start search Search type choose from Event Log, Text Search, and Activity Search Event type choose from Activity, Alarm, System, or ALL Enter time and date range Use the camera buttons to select cameras
Copying from Event Log Use the Up, Down navigation buttons to scroll up and down the list. The FF>> and REW<< buttons can be used to page forward or page backward. Event automatically plays back in thumbnail as it is highlighted Highlight Event to be copied and TAP the COPY button. This will add this events time and date range to the Disk Archive List and will include ALL cameras.
Disk Archive List PRESS and HOLD the COPY button to access the COPY Menu to confirm video from the Event has been added to the Archive List Indicator will show percentage of disk being used. You will be prompted if From and To times exceed disk capacity REW << button can be used to go back a page to the Copy Images Menu to enter another time and date range Highlight “Archive and Verify” and TAP the MENU/ MODE button to start archiving process PRESS and HOLD MENU to exit
Copying from playback Playback video can be archived to CD/DVD while playing back. Press and Hold the PLAY > button, also known as the GOTO button, for three seconds on the front panel or TAP the GOTO button KBS3A keyboard to access the GOTO Menu to access the video to be copied for playback. The REW << button may also be used. Note: these features may be password protected.
Copying from playback While in playback mode, TAP the COPY button to start archiving. A message on screen indicates that you have pressed the COPY button. As long as you are playing back, you are copying. All cameras will be copied. An Archive Calculator is available on our web site and can help determine how much video will fit on a CD/DVD.
Copying from playback TAP the COPY button again to stop archiving. A message on screen confirms that range has been added to the Archive List.
Archive and Verify PRESS and HOLD the COPY button to access the Copy Images Menu, then TAP the MENU/MODE button to confirm the video has been added to the Archive List Highlight “Archive and Verify” and TAP the MENU/MODE button to start the archiving process PRESS and HOLD MENU to exit
Archive and Verify Selected Archiving may take longer than archiving all cameras. TAP MENU/MODE to CONFIRM.
Archive and Verify Archiving process begins. The system will continue to record as usual.
Archive and Verify A “Watermarking” message is displayed
Archive and Verify A “Writing lead in” message is displayed.
Archive and Verify A progress bar is displayed.
Archiving Completed Once Archiving is complete, press the MENU/MODE button to continue to the Disk Archive List Menu screen. A second CD/DVD can be burned at this time. Copies of the original can also be made in a PC. PRESS and HOLD MENU to exit
Clear List The list remains in the queue until the Clear List option is used. Highlight “Clear List” and TAP the MENU/MODE button Listed video is not currently protected and my get over-written in time. If the list has not been cleared for an extended period of time it may contain information about video that is no longer on the hard drives and will fail to produce an archive CD/DVD.
Auto play CD CD/DVD should auto boot on most Windows 2000 or XP PCs that have auto boot feature enabled without loading any software. CD/DVD includes a version of Observer and Java for playback. Copies of CD/DVD need to be made as an image.
WWW.DedicatedmicrosUS.com 1-877-DMSUPRT 1-877-367-8778