Download
1 / 64
640 likes | 751 Views
PA3 Grades 4-6 Solar System: Day 1. Rachelle Oblack rachelle.oblack@nasa.gov. Schedule. Schedule. Using the Manual. Groups: 2 students Alter as needed, these are here for your convenience. Goal: Program introduction and intended goal of the activity. Activity Number indicated here.

E N D
PA3 Grades 4-6Solar System: Day 1 Rachelle Oblack rachelle.oblack@nasa.gov
Using the Manual Groups: 2 students Alter as needed, these are here for your convenience Goal: Program introduction and intended goal of the activity Activity Number indicated here Day and theme indicated here • Reflection Questions: • Post these questions • Supplies: • Everything students need per group Images are included as reminders of what the activity pages look like. Directions: Shortened for you Some are like a script • Teaching Tips: • Record PD information here 15 min
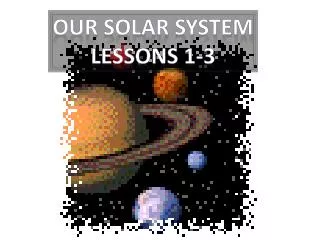
Building a Scale Model of the Solar System Goal: Make several models of the solar system to learn the positions of the planets in the solar system as well as relative distances and sizes Day 1: Solar System Reflection Questions: 30 min 1 hr
Building a Scale Model of the Solar System Model #1 – Relative Distance Clothesline Model • Supplies • Yellow construction paper • Piece of clothesline 10 feet long • Nine 1" X 6" strips of heavy paper • 10 clothespins Day 1: Solar System • Prepare • Put up clothesline across blackboard or bulletin board • Draw sun with 6" diameter on yellow paper. Label and cut out. • Write names of planets on strips. Directions Put sun on one end of clothesline. Put up the planets with the children's help Discuss sun, stars, planets, distances Mercury 1"Venus1½"Earth2"Mars3"Jupiter11½"Saturn19"Uranus38"Neptune60"Pluto79” 30 min 1 hr
Building a Scale Model of the Solar System Model #2 – Take-Home Picture for Refrigerator Door (Position of Planets) • Supplies • 12" X 18" black construction paper • Clear tape, scissors, glue, pencils • Yellow construction paper for sun • Copies of planets on copy Sun 6” diameter Mercury ¾” Venus 1¼” Earth 1 3/8” Mars 1” Jupiter 4¾” Saturn 3 5/8", with rings 7¾” Uranus 1 3/4", with rings 2¾” Neptune: 1½", with rings 2¾” Pluto ½” Day 1: Solar System • Prepare • Make a sample ahead of time. • Cut black paper in half lengthwise and tape together • Make semicircular pattern for the sun with 6” diameter Directions Color the planets with accurate colors. Refer to books with color photos. Trace and cut out semicircular sun. Sun should be the full width of long black paper. Glue sun to left side of paper. Cut out planets, glue to paper, and add labels. My Very Excited Mother Just Served Us NinePizzas (Noodles, without Pluto) 30 min 1 hr
Building a Scale Model of the Solar System Model #3 - Relative-Size Model for Hallway or Gym • Supplies • Tempera paints and brushes, old newspapers • Tracing patterns for smaller planets • String cut to theradius of the larger planets • Masking tape Day 1: Solar System • Prepare • Trace the larger planets on paper. Use string to make circles • Mix a few of the colorsahead of time. Directions Students trace smaller planets onto butcher paper. Teacher helps sketch larger planets. Paint and cut out. Put up in hallway. Mercury 1½” diameter Venus 3¾” Earth 3 7/8” Mars 2” Jupiter 44¼” Saturn 37 1/8” Uranus 16” Neptune 15¼” Pluto ¾” 30 min 1 hr
Building a Scale Model of the Solar System Directions: Cut dark construction paper to cover container #1. Repeat with light paper on container #2. Cut foam disc to fit inside each cup. Cut slot to fit thermometer through the cap. Insert thermometers and tape in place. Record initial temperatures. Place containers side by side and turn on lamp (6 inches away from containers). Record temperature at _______ minute intervals. Day 1: Solar System Teaching Tips: 30 min 1 hr
Solar Beads: Exploring UV Light from the Sun Goal: Use various UV protection materials and solar beads to explore ultraviolet light from the sun. Day 1: Solar System Reflection Questions: 15 min 1 hr
Solar Beads: Exploring UV Light from the Sun Directions: Distribute materials, demonstrate how UV beads work. Allow students to find locations for conducting their experiments. Offer students a chance to conduct other experiments combining some of the stations. Record and discuss results. • Supplies: • Per Student • Student handout • UV beads • Sealed container for UV beads • Sunscreen • Cup of water • Zip-lock bag • Sunglasses • Pipe cleaners (optional) Day 1: Solar System Groups: _______students 15 min 1 hr
Solar Beads: Exploring UV Light from the Sun Day 1: Solar System Teaching Tips: 15 min 1 hr
Notes: Total Time End Student Day 1
PA3 Grades 4-6The Sun: Day 2 Rachelle Oblack rachelle.oblack@nasa.gov
Eclipsing the Sun Goal: Demonstrate solar eclipses and how the eclipses appear based on perspective Day 2: The Sun Reflection Questions: 15 min 1 hr
Eclipsing the Sun Directions: Darken room Assign groups and roles (one acts as earth, one as sun, one as moon, and one as light from sun, holding flashlight.) Demo activity for students Students complete activity and record in their journals • Supplies: • Per group (each student gets only 1 of the following 4 items) • 1 -36” diameter inflatable ball • 1- 12 “ diameter inflatable ball • 1 – 8” diameter inflatable ball • flashlight Day 2: The Sun Groups: 4 students • Tips and Hints: • Use inflatable balls to “call on” students to engage them in conversations. • Post their” Know and Want to Know” in a chart on the wall. Notes: 15 min 1 hr
Build Your Own Sundial Goal: Learn how the position of the sun in the sky, and its shadow, can help us to determine time. Day 2: The Sun Reflection Questions: 30 min 1 hr
Build Your Own Sundial Directions: Make the sundial Distribute materials, find center of plate and mark with a dot. Place 4 registration marks along the edge of the plates. Make 4 ½ in cuts in one end of the straw section. Flare out the cut portion of straw and tape to the center of the plate, making straw perpendicular to the plate. Measure and cut straw to two inch height. • Supplies: • Per Student • 1- 9” paper plate • 1- 4” plastic straw • Pencil • Colored pencils • Ruler • Tape • Chalk • Scissors • Watch or clock • Worksheets Day 2: The Sun 30 min Groups: Individual 1 hr
Build Your Own Sundial Directions: Data Collection Mark sunny area with chalk at each of the 4 registration points on the sundials so students can find the same spot again. Trace the straw’s shadow with a pencil, darken the tracing and write the time at the tip of the shadow. Note where the sun is in the sky. Measure the shadow length and fill in the data sheets After repeated measurements, ask students to predict where the shadow will fall later in the day or the next day with a red pencil. Day 2: The Sun 30 min 1 hr
What Colors are in White Light? DEMO Goal: Discuss and observe light using a prism, make a spectroscope, and use the prism to observe white light Day 2: The Sun Reflection Questions: • Supplies: • 1 prism per group • flashlight, lamp, or projector to use with prism Groups: Whole group, as demo 30 min 1 hr
What Colors are in White Light? DEMO Directions: Set up light source, and darken room Ask: What color is light? Does light come in more than one color? Shine light through prism. Ask: What do you observe? What colors do you see? In what order are the colors? Explain that white light is really made up of all of the colors of the rainbow. A prism separates the light into colors. Hold up a CD and move within beam of light. Ask: What do you observe? How are the colors like the ones you observed when the light came through the prism? Explain that everyone is going to make a spectroscope, which works like a prism so we can see colors that make up light. Day 2: The Sun 30 min 1 hr
What Colors are in White Light? (Build Spectroscope) • Supplies: • 1 sheet heavy dark paper • 1 CD wedge • Tape or rubber cement • Scissors Directions: (Construction) • cut out the pattern • Glue or tape the CD wedge onto pattern • Cover over narrow end of CD wedge with tape or black marker • Fold pattern on fold lines • Tape flap of side C to side A • Tape solid end flap to side B • Tricky – The last side has 2 strips and you need to leave a narrow space in the middle between the flaps for light to enter. Tape one strip to side C and leave that space when taping down the last strip to side D. • Add more tape as needed to make spectroscope more sturdy Preparation: • Use scissors to cut discarded CD’s into 16 wedges Day 2: The Sun Groups: Individual 30 min 1 hr
What Colors are in White Light? (Observe Light) Groups: Individual Directions: • Look through eye holes and point light slit toward light source in room. Encourage looking at different light sources. • Have group observe sunlight by focusing on bright areas of the sky. Can be through window, but not at sun directly. Ask: What colors did you see when looking at indoor light sources? Were the same colors in the sunlight? Day 2: The Sun 30 min 1 hr
How Does Light Travel? Goal: Two sets of experiments: The first explores blocking light to create shadows, and the second explores travel paths using mirrors • Supplies: • 1 flashlight • Several small opaque and transparent objects • 2 or 3 small mirrors Day 2: The Sun Groups: 2-4 students Reflection Questions: Discussion Questions: 30 min 1 hr
How Does Light Travel? • Directions: • Discuss and record knowledge on shadows • What are shadows? What makes a shadow? • Pass out supplies. Students attempt to answer questions using tools they are given. • After 15-20 minutes, students record their findings in their journals using both writing and drawing. • Record responses to questions in journals • How does light travel? Can you make it bend? Can you make it go around corners? • Distribute mirrors. • After about 20 minutes, return supplies and record findings in journals. • Group discussion about findings. Day 2: The Sun 30 min 1 hr
What Causes an Aurora? • Supplies: • Yarn to connect field line of the magnetosphere. • Image of the Sun, Earth and a solar flare or coronal mass ejection (CME) • Red, blue and green streamers Goal: Students act out a solar storm to understand at the most concert level what causes an Aurora. Day 2: The Sun Reflection Questions: Groups: Whole group 30 min 1 hr
What Causes an Aurora? You are the SUN- a medium size star that is 93 million miles from earth. You provide all of the heat and light we need to sustain life. You are a SOLAR FLARE- electrified gases or plasma are emitted from the sun when magnetic energy that has built up and is suddenly released. The students who represent the MAGNETOSPHERE should now hold the lines of the magnetosphere to protect the earth (yarn). The magnetosphere is that area of space, around the Earth, that is controlled by the Earth's magnetic field. Did you know that the Earth's environment extends all the way from the sun to the Earth and beyond? It is not an empty wasteland of space. Instead, near-Earth space is full of streaming particles, electromagnetic radiation, and constantly changing electric and magnetic fields. All of these things make up our magnetosphere. The magnetosphere helps to protect our Earth from the danger of the Sun's solar wind. As the solar flare touches the magnetosphere the students pull back as far as they can. The oxygen and nitrogen become excited within the field lines! Jump around but don't break from the field lines or touch earth!! Become excited! Day 2: The Sun 30 min 1 hr
What Causes an Aurora? Directions: OXYGEN - holding red and green streamer; NITROGEN – holding blue streamer All magnetosphere students take a deep breath and relax to their original positions. Oxygen and nitrogen wave the streamers(aurora) Arrange students as shown Day 2: The Sun 30 min 1 hr
Notes: Total Time End Student Day 2
PA3 Grades 4-6Life Forms: Day 3 Rachelle Oblack rachelle.oblack@nasa.gov
Do the Mystery Samples Contain Life? Goal: Explore the properties of three mystery samples and try to find out which one contains life. Day 3: Life Forms Reflection Questions: 30 min 1 hr
Do the Mystery Samples Contain Life? • Supplies: • 3 clear containers • 1 container of warm tap water • 3 tablespoons of sand • 3 teaspoons of sugar • 1/2 packet of active dry yeast • 1 fizzing antacid tablet, crushed • hand lenses • 3 small sheets of paper • 1 spoon • large piece of chart paper markers • Directions: • Set up jars, hand lenses, water, sugar and paper for each student station • Review characteristics of living things • Observe samples with all senses except taste • Remove small amount and observe on paper, record observations • Discuss which samples contained life • Repeat above steps • after added sugar • then after adding warm water • then after more sugar Day 3: Life Forms Hints: Jar 1: no activity Jar 2: will begin to show activity after about 5 minutes, and continue to bubble Jar 3: will fizz vigorously at first, slow down, and finally stop 30 min Groups: 2-4 students 1 hr
Are Microbes Alive? Goal: Observe mold growing on potatoes, and then look at magnified images of several different microbes. Preparation: 1. About a week before the activity, slice the potato and leave the pieces out in the air for about an hour to collect microbes. 2. Place one piece of potato in each baggie. Store the baggies at room temperature out of direct sun. • Print out images of microbes from the internet to use. Day 3: Life Forms Reflection Questions: Groups: 2-4 students 30 min 1 hr
Are Microbes Alive? • Supplies: • 1/4 inch slice of raw potato, moldy • 1 zippered plastic sandwich bag • Hand lenses • Images of microbes Discussion Questions: Day 3: Life Forms Directions: Discuss microbes and prior student knowledge Distribute bags and have students observe – DO NOT OPEN Discuss, then observe again with hand lens Complete internet research 30 min 1 hr
Where Does Life Live? Goal: Use images to look at some extreme environments and then match the environments with life forms they support. Preparation: • Cut out Can Living Things Live Here? Cards and place in small bags • Cut out Extreme Life cards and place in small bags Day 3: Life Forms Reflection Questions: 30 min 1 hr
Where Does Life Live? • Supplies: • 1 set of cards Can Living Things Live Here? • 1 set of cards Extreme Life! • 1 large sheet of paper labeled "Where Does Life Live?” • Pens, crayons, markers Directions: Pass out Can Living Things Live Here? cards (environment cards) to groups. Separate into Yes, No, Not Sure Pass out Extreme Life cards (life forms) Try to match them with the 1st set of cards and discuss Play “Concentration” with the cards and discuss Day 3: Life Forms Groups: 2-3 students Discussion Questions: 30 min 1 hr
Could Life Exist in Other Places in the Solar System? • Supplies: • Solar System Lithograph Set Goal: Examine NASA images of moons, planets, and the sun to evaluate them as possible places for life to exist Day 3: Life Forms Reflection Questions: 30 min Groups: 2-4 students 1 hr
Could Life Exist in Other Places in the Solar System? Directions: Students record everything they already know about planets, moons, and sun in their journals Share and discuss Distribute Lithograph images and observe Record and discuss observations Display Mars, Europa, and Titan Discuss Day 3: Life Forms Discussion Questions: 30 min 1 hr
Notes: Total Time End Student Day 3
PA3 Grades 4-6Engineering: Day 4 Rachelle Oblack rachelle.oblack@nasa.gov
Design a Lunar Buggy Goal: Use the Engineering Design Process to complete a team challenge designing a lunar buggy Day 4: Engineering Reflection Questions: 30 min 1 hr
Design a Lunar Buggy • Supplies: • Building supplies • Meter stick • Scale • Plastic people • Plastic eggs • “cargo” (pennies, washers) • Wheels • Ramp (25 cm+) • Student pages Day 4: Engineering Groups: _______students 30 min 1 hr
Design a Lunar Buggy • Directions: • Show Apollo lunar buggy movie and discuss. starchild.gsfc.nasa.gov/Videos/StarChild/space/rover2.avi • Share Design Challenge, Assign Groups. • Allow time for students to design their buggy and test on the ramp. Prepare ramps while students work. • Students should record all steps in the process. They may work on any slope. • Allow time to IMPROVE their designs and re-test. • Discuss: • Did the cargo mass make a difference in your Buggy’s Performance • How did the slope of the ramp affect your Buggy’s performance? Day 4: Engineering Teaching Tips: 30 min 1 hr
Wright Brothers: Make Your Own Glider 1901 Goal: Create a model of the Wright Brothers’ 1901 Glider Reflection Questions: Day 4: Engineering 30 min Groups: _______students 1 hr
Wright Brothers: Make Your Own Glider 1901 • Supplies: • Clean foam meat tray, • 30 to 35 toothpicks • Low temp glue gun • Scissors • Cardboard to cut on • Fine tip permanent black marker • Ruler • Emery board • Manila folder Directions: Trace pattern onto inside of trays, keep front end of wings 2/3 up the curve Smooth edges with emery board Using a black marker and templates, mark the locations of the rib lines on both sides of each wing and elevator sections. Make two sets of marks, one on each edge. Connect the marks to make the rib lines. Use a permanent ultra fine black marker and a straight edge made from a manila folder (so the end can be bent to conform to the rounded shape of the foam). Day 4: Engineering 30 min 1 hr
Wright Brothers: Make Your Own Glider 1901 Cut out the center of the lower wing only by the dotted lines on that template. Cut two toothpicks in half and sharpen the cut ends of three of them. Dip the ends in glue and stick them in the cut edges to join the lower wing halves, leaving a 1.5 cm. gap. Use the wing template and a sharp toothpick to mark the holes for the spars on the top surface of the lower wing and the bottom surface of the upper wing(the front edges of the wings curve down). Dip toothpicks in glue and insert them in the spar holes marked in the lower wing. Try not to push them all the way through the wing. Be sure they are standing up as straight as possible. The upper wing in the front of this picture is upside down. Day 4: Engineering 30 min 1 hr
Wright Brothers: Make Your Own Glider 1901 With both the upper and lower wings upside down (the edges should be curving up at this point), insert the back row of spars into the underside of the top wing. Use the marked holes as a general guide, but keep the spars straight and evenly spaced. Put a little glue on each to keep them in place as shown in the picture. Now join the front spars to the top wing, remembering to keep them straight and fasten them with dabs of glue. Join two toothpicks side-by-side so the overall length is 11 cm.. When the glue is set cut each to a length of 9 cm and then glue the cut-off end back on, but at a 90 degree angle as shown. You will need to make two of these skids. Day 4: Engineering 30 min 1 hr
Wright Brothers: Make Your Own Glider 1901 Turn the wing assembly upside down and glue the skids on either side of the opening in the lower wing. The skids should overlap the front and middle toothpicks that join the wing halves and should extend out beyond the front (curved edge) the the lower wing. Turn the assembly back over so it is right-side up and cut two pieces to brace between the two skids and glue one at the end and one at the middle. Cut two more pieces for upright support for the elevator the same length as those at the end of the skid and glue them sticking up at the middle crossbrace. Also make two braces to go from the upper wing to the elevator by joining two toothpicks side-by-side with glue and then cutting to a length of 6.5 cm. Day 4: Engineering 30 min 1 hr
Wright Brothers: Make Your Own Glider 1901 Place glue on the ends of the four uprights and then push on the elevator. Also put glue on both ends of the upper braces, push them first into the center of the top of the elevator along the rib lines and then into the front edge of the upper wing. Day 4: Engineering Notes: 30 min 1 hr
Wright Brothers: Make Your Own Glider 1902 Goal: Create a model of the Wright Brothers’ 1902 Glider Reflection Questions: Day 4: Engineering 30 min Groups: _______students 1 hr