Download
1 / 46
460 likes | 596 Views
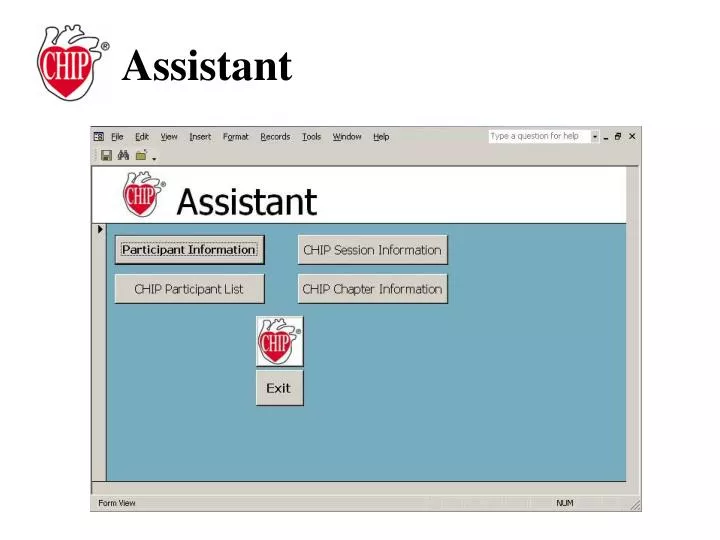
The CHIP Assistant control panel pops up immediately upon opening the CHIP Assistant program. Use this control panel to navigate through the various forms (sometimes called windows) and data entry screens. Click on the CHIP logo to view database version numbers for the CHIP Assistant.

E N D
The CHIP Assistant control panel pops up immediately upon opening the CHIP Assistant program. Use this control panel to navigate through the various forms (sometimes called windows) and data entry screens.
Click on the CHIP logo to view database version numbers for the CHIP Assistant.
This information accompanies the data you export to the CHIP databank.
If you are outside the United States, the blood result values may be different units (mmol/L). Please click here to indicate mmol/L and/or metric height and weight values. This allows the reports to provide the correct information.
If you are using A4 paper, please click here, so the reports will be formatted correctly.
Click this to add or edit session information, view and print reports, roster and name tags, enter a batch of lab results or send CHIP data to the CHIP databank.
After you have entered your CHIP chapter and session information you will be ready to enter participant information.
This is where you may view and record patient information collected from the Lifestyle Evaluation form.
To navigate through to different participants you can scroll through the records by using the navigation tool at the bottom of the window.
To start a new record, click on this button. It will open a new blank record. Add new participants by clicking here first.
On the tool bar are three buttons. The one with the floppy disk icon will save information you’ve just entered (however, when going to a different record also saves your data. The binoculars will open a search window to help you quickly find records, and the close button closes the current window.
Be sure to select a participant status and assign the participant to the current session.
Click here to enter or update the family and personal health history from the Lifestyle Evaluation Form.
Click here to view or edit the Heart Screen information for this participant.
Make sure that the CHIP Session selected is correct. To change it, just click on the down-arrow and select the appropriate session.
Click the tab labeled ‘Screening 2’ to enter the second screening results.
If there are medications to report, click on the ‘Medications’ button.
Click the ‘New’ button to prepare a new record for the participant (if the participant’s name appears in the upper left corner of the window then a record is ready for data entry).
Click this button to view and print a list of all participants in the database.
Click here to view or print a roster of session participants.
Click here to view and print name tags using Avery name tags 5395 labels.
Click here to enter the Heart Screen results for all participants at one time in alphabetical order.
Click here to view and print all the personal participant reports from your Heart Screen session.
Clicking the group Screening Report button will allow you to view and print a summary report of the group results for the heart screen.
These group statistical reports will provide a stratified view of the changes that occurred after the completion of your CHIP program.
Click here to print mailing labels for all participants or any subgroup within your database according to session and/or participation status.
Venipuncture is the default method of collecting blood specimens. If you use a fingerstick blood sample then indicate that here.
To identify the biggest losers in weight, cholesterol, etc, click here to generate an Excel spreadsheet that will allow you to sort the numbers many different ways.
This button opens the Metric Conversion Calculator. Use it to calculate Metric or SI units from standard units or the other way around. It’s simple to use.
When you are done. Click here to export your session data (without personal identifiers) and email it to the CHIP databank.
For additional information and explanations, read the CHIP Assistant User Guide.