Download

1 / 36
370 likes | 534 Views
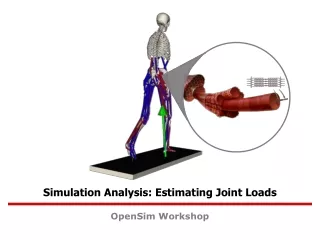
BALL JOINT ANALYSIS. F=600 lb f. MAR 120 – Ball Joint Analysis. Objective Modify the geometry to create a symmetry plane and fillet. Demonstrate surface mesh seeding for TetMeshes. Create an RBE2 multiple point constraint. Define a stress-strain curve for material plasticity.

E N D
BALL JOINT ANALYSIS F=600 lbf MAR 120 – Ball Joint Analysis
Objective • Modify the geometry to create a symmetry plane and fillet. • Demonstrate surface mesh seeding for TetMeshes. • Create an RBE2 multiple point constraint. • Define a stress-strain curve for material plasticity. • Create an animation of non-linear results. • Required • A file named balljoint.xmt_txt in your working directory.
Model Description: In this exercise you will analyze a simple ball joint structure. The geometry will be imported as Parasolid geometry. The ball joint will be made out of Aluminum and the purpose of the analysis will be to determine if there will be any plastic deformation under the required load of 600 pounds. The solid will be cut at the symmetry plane and a fillet will be added in the high stress area. The bolt holes will be constrained fully. A surface mesh seed will be used to define a fine mesh in the high stress area. Once the analysis is complete, the plastic strain will be plotted. An animation will also be generated for the von Mises Stresses.
Exercise Overview: • Create a new database named BallJoint.db. • Import the Parasolid geometry from a file named balljoint.xmt_txt. • Modify the geometry by breaking it at the symmetry plane and adding a fillet. • Create a surface mesh on the fillet face using a mesh size of 0.1 inches. • Create a solid mesh using a mesh size of 0.2 inches. • Add an RBE2 MPC for the load application. • Create the symmetry and fixed boundary conditions. • Define the Aluminum material properties. • Define an element property for the solid elements. • Run the analysis and read the results into the database. • Create a plot of the plastic strain. • Create an animation of the von Mises stress.
Step 1. Create a New Database a d e Create a new database. Name it BallJoint.db. • Select File / New. • Enter BallJoint as the file name. • Click OK. • Select MSC.Marc as the Analysis Code. • Click OK. c b
Step 2. Import the Parasolid Geometry a b c • Import the geometry. • Select File /Import… • Select Model / Parasolid xmt. • Select balljoint.xmt_txt • Click Apply. • Click OK. d Your model should look like this. After clicking Apply, you will see the model being imported automatically. e
Step 3. Shade and Re-Orient the Solid b c a • Shade and re-orient the solid. • Click the Iso 2 View toolbar icon. • Click the Smooth Shaded toolbar icon. • Click the Fit View toolbar icon. Your model should look like the Viewport above.
Step 4. Break the Solid at the Symmetry Plane a • Break the solid at the Z=0 Plane. • Geometry: Edit / Solid / Break. • Select the Plane Option. • Select the solid in the Viewport. • Select the Frame Direction 3 from the Pick Menu. • Select the Global Coordinate Frame at the Bottom Left corner of the Viewport. • Click Yes to delete the original solids. b After the operation, your model should look like the Viewport below. c e d f
Step 5. Delete One of the Ball Joint Halves d a • Delete one of the split solids. • Geometry: Delete / Solid. • Select the right half of the Ball Joint. • Click Apply. • Click the Refresh Graphics toolbar icon. c After the operation, your model should look like the Viewport below. b
Step 6. Add a Fillet to the Ball Joint a • Add a fillet to the ball joint. • Geometry: Edit / Solid / Edge Blend. • Enter 0.15 for the Constant Radius. • Select the edge shown in the figure to the right. b c After the operation, your model should look like the Viewport below. Remember, when the Auto Execute option is on, we do not have to click the Apply button after we enter in the last piece of required input. Once we select the edge for the fillet, MSC.Patran will automatically execute the operation. If you selected an incorrect edge, hit the Undo toolbar icon to undo the operation.
Step 7. Add a Fine Mesh Seed to the Fillet Surface a • Create a fine surface mesh on the fillet surface for use as a mesh seed for the solid mesh. • Elements: Create / Mesh / Surface. • Select Tria / IsoMesh / Tria6. • Select the fillet surface. • Uncheck the Automatic Calculation option. • Set the Global Edge Length to 0.1. • Click Apply. b c d e f The mesh should look like the image to the left. You can use the View Corners toolbar icon to zoom into the area. The Fit View toolbar icon will zoom out once you are finished examining the mesh.
Step 8. Create the Solid Mesh a • Mesh the Solid with Tet10 Elements. • Elements: Create / Mesh / Solid. • Select Tet / TetMesh / Tet10. • Click on TetMesh Parameters. • Change the Minimum Edge Length Factor to 0.3. • Click OK. • Select the solid in the Viewport. • Uncheck the Automatic Calculation option. • Set the Global Edge Length to 0.2. • Click Apply. b c f d g h e i
Step 9. Delete the Surface Mesh on the Fillet a • Delete the 2D elements from the fillet surface mesh seed. • Elements: Delete / Element. • Select Tri element from the Pick Menu. • Click and drag a box around the fillet in the viewport. • Click Apply. b d Since we were only using these 2D elements as a mesh seed for the solid mesh, we should delete them from the model once we have the solid mesh. c
Step 10. Add an MPC for Loading a b • Create an MPC to use for load application. • Click on the Iso1 View Toolbar Icon and Zoom into the loading area. • Elements: Create / MPC / RBE2. • Click on Define Terms. • Uncheck the Auto Execute Option. • Select the 4 Nodes shown below as the Dependent Nodes. • Select all of the DOFs in the list (UX, UY, UZ, RX, RY, RZ). • Click Apply. c d f e g Your model may have different node numbers that those specified in the Workshop.
Step 10. Add an MPC for Loading (Cont.) • Select the center node along the edge for the Independent Node as shown below. • Click Apply. • Click Cancel. • Click Apply. We will apply the load to the Independent Node at the center of the edge and the MPC will distribute the load across the edge, eliminating a potential stress concentration due to the point load. j g i h
Step 11. Create the Symmetry Boundary Condition a Create the symmetry boundary conditions at the cut faces. • Loads/BCs: Create / Displacement / Nodal. • Enter Sym-Z for New Set Name. • Click Input Data. • Enter <, , 0> for the Translations. • Click OK. • Click Select Application Region. d e b c f
Step 11. Create the Symmetry Boundary Condition (Cont.) • Select Surface or Face from the Pick Menu. • Select the two cut faces on the solid. Remember to hold the Shift Key down while picking multiple entities. • You may have to rotate the solid to pick the surfaces. • Click Add. • Click OK. • Click Apply. g i j k h
Step 12. Fix the Bolt Holes a d Fix the bolt hole surfaces to further constrain the model. • Loads/BCs : Create / Displacement / Nodal. • Enter Fixed for New Set Name. • Click Input Data. • Enter <0,0,0> for the Translations. • Click OK. • Click Select Application Region. e b c f
Step 12. Fix the Bolt Holes (Cont.) • Select Surface or Face from the Pick Menu. • Select the three surfaces that make up the bolt holes. • Click Add. • Click OK. • Click Apply. g i j h k
Step 13. Apply the Load a d Since we are using half symmetry for the model, we need to divide the total load of 600 pounds by 2. Apply a load of 300 lbf to the tip of the ball joint. • Loads/BCs : Create / Force / Nodal. • Enter Load for New Set Name. • Click Input Data. • Enter <300,,> for the Force. • Click OK. • Click Select Application Region. e b c f
Step 13. Apply the Load (Cont.) g • Switch the Geometry Filter to FEM. • Select the center node of the MPC. • Click Add. • Click OK. • Click Apply. h i j k
Step 14. Create a Field for Stress vs. Plastic Strain a • Define the Stress vs. Plastic Strain field for the Aluminum material. • Fields: Create / Material Property / Tabular Input. • Enter Plasticity for Field Name. • Uncheck Temperature (T). • Check Strain (e) as the Active Independent Variables. • Click Input Data…Enter the following values: • Click OK. • Click Apply. b c d f To modify the content of a particular cell, first click on that cell, then type the number in Input Scalar Data box and press Enter. e g
Step 15. Plot the Stress vs. Plastic Strain Data d a • Plot the Stress vs. Plastic Strain Data. • Fields: Show. • Select Plasticity in the Field list. • Click Specify Range. • Turn on the Use Existing Points option. • Click OK. • Click Apply. • Click Cancel on the Plotted Curves data window. • Click the Unpost Current XYWindow button when finished examining the data. b e c h f g
Step 16. Create the Aluminum Material Property a d • Create material properties for Aluminum. • Material: Create / Isotropic / Manual Input. • Enter Aluminum for material name. • Click Input Properties. • Enter 10e6 for the Elastic Modulus. • Enter .33 for the Poisson Ratio. • Click OK. • Click Apply. e b f c After you click Apply, you will see “Aluminum” in the Existing Materials panel. g
Step 16. Create the Aluminum Material Property (Cont.) j h • Material: Create / Isotropic / Manual Input. • Select Aluminum in the Material list. • Switch the Constitutive Model to Plastic. • Click in the Stress vs. Plastic Strain box. • Select Plasticity in the Field list. • Click OK. • Click Apply. i k l m n
Step 17. Create the Element Properties Apply the Aluminum material to the model. Properties: Create / 3D / Solid. Enter BallJoint for the Property Set Name. Click Input Properties. Click on Mat Prop Name icon. Select Aluminum. Click OK. Click in the Select Members box. Select the solid. Click Add. Click Apply. a e d b c g i f j h
Step 18. Run the Analysis e a d • Submit the model for analysis. • Analysis: Analyze / Entire Model / Full Run. • Enter BallJoint for Job Name. • Click on Job Parameters. • Click on Solver Options. • Select Iterative Sparse as the Solver Type. • Set the Max. Num. Iterations to -1000. • Set the Preconditioner to Incomplete Cholesky. • Click OK. • Click OK. • Click on Load Step Creation. f g h b c The Iterative Sparse Solver is a good choice when the model is made up of solid elements and the Non-linear effects are mild. Changing the Max. Num. Iterations to –1000 (adding the minus sign) allows the analysis to continue if the maximum number of iterations is reached. If this occurs, the Iterative Solution will exit and the Newton-Raphson routine will recycle. Using the minus sign for Linear Static jobs is not advisable since there is no way to recycle the iteration and the results will not be valid. The Incomplete Cholesky Preconditioner is more efficient than the default Preconditioner. j i
Step 18. Run the Analysis (Cont.) • Click on Solution Parameters. • Change Nonlinear Geometric Effects to “None (Small Displacements and Strains), then Click on Load Increment Params. • Enter 0.1 for the Trial Time Step Size. • Click OK. • Click OK. • Click on Output Requests. l Since the non-linear effects in this model are mild, we can decrease the solution time by changing the initial load increment from 1% (the default) to 10%. k o p m n
Step 18. Run the Analysis (Cont.) • Click on Select Element Results. • Add STRAIN, PLASTIC EQUIVALENT (27) to the Selected Result Types. • Click OK. • Click OK. • Click Apply. • Click Yes to Overwrite. • Click Cancel. • Click Apply. p q t r u w x v We are including the Equivalent Plastic Strain in the output to be able to determine if the structure plastically yielded during the load application. The Plastic Stain results are not saved to the results file by default. s
Step 19. Monitor the Job When the Analysis is running, you can monitor the job. • Analysis: Monitor / Job. • Select BallJoint as the Job Name. • Click Apply. • This form will automatically update during the analysis. The Job is complete when an Exit Number appears. Exit Number 3004 means Normal Termination. • Click Cancel when the Job is complete. a b d c e
Step 20. Attach the Results a • Once the analysis is complete, read the results into the database. • Analysis: Read Results / Result Entities / Attach. • Click Select Results File. • Select BallJoint.t16. • Click OK. • Click Apply. c b d e
Step 21. Plot the Plastic Strain Results Post process the results for the plastic strain. Click on the Plot/Erase toolbar icon. Click Erase under the Geometry Section. Click OK. Click the Reset Graphics toolbar icon to remove the Markers. Results: Create / Quick Plot. Select the last Result Case. Select Strain, Plastic Equivalent for the Fringe Result. Select Displacement, Translation for the Deformation Result. Click Apply. a d e b f c g h i
Step 22. Create an Animation of the von Mises Stresses Create an animation of the von Mises stresses. • Results: Create / Quick Plot. • Select all Result Cases. • Select Stress, Global System under Fringe Results. • Select Displacement, Translation under Deformation Results. • Turn on the Animate option. • Click on the Fringe Attributes button. • Make the Fringe Edges Black. • Display all Element Edges. • Turn off the Max/Min Label. • Click on the Deform Attributes button. • Set the Scale Factor to 5.0. • Turn off the Undeformed Plot. • Click on the Animation Options button. • Turn on Constant Range Values. • Click Apply. a j m f b n g k h c l o d i e
Step 22. Create an Animation of the von Mises Stresses (Cont.) • Click Unpost Result Tools when finished viewing the animation. p