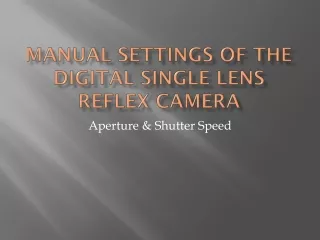
Understanding Camera Settings and Exposure Basics
Learn about different camera modes such as Portrait, Landscape, Night Scene, and more. Understand exposure factors like aperture, ISO, and shutter speed. Discover how to utilize ISO settings effectively for varying lighting conditions, and the importance of white balance for accurate color representation in photos.

Understanding Camera Settings and Exposure Basics
E N D
Presentation Transcript
Camera Settings What do they do & mean?
Basic Zone (Auto Modes) • Portrait Mode - Icon: A side (profile) view of a head. - This mode brings subjects in the foreground into sharp focus, and may enlist the use of a larger aperture to blur the background.Landscape Mode - Icon: Mountains. - This mode is for taking shots of distant objects, or wide-angle shots, and will bring background objects more clearly into focus by setting a smaller aperture.Night Scene Mode - Icon: Icon containing a star. - This mode uses flash and a slower shutter speed to illuminate the subject and allow more light to enter the camera.Black and White Mode - Used to take pictures in black and white, which is arguably not very useful, as you can always take a picture in color and convert it to black and white later using image editing software, which offers more versatility. (Not shown on example picture)Macro Mode - Icon: Flower. - Used for extreme close-up shots where the camera may have trouble focusing in other modes.Sports / Action Mode - Icon: Running person. - Use this mode for shots in which there is a good amount of motion which you want to capture without blurring.
Creative Zone (Manual Modes) • Program Mode (P) - Much like an automatic mode, the camera will still do the majority of work for you, but offers you the option to manually override settings such as focus, while the camera manages the exposure. Program mode is decent for beginners who want to be able to get quick shots without putting too much thought into it, but still want a bit more versatility than an auto mode offers.Shutter Priority (TV) - In shutter priority mode, you are able to manually adjust the shutter speed while the camera controls the aperture and ISO.Aperture Priority (AV) - Aperture priority mode is similar to shutter priority mode, but lets you adjust the aperture, while the camera controls shutter speed and ISO.Manual Mode (M) - This mode provides the most control of all, as you are able to adjust every aspect of the shot. There is absolutely no camera assist in this mode. You are able to adjust aperture, shutter speed, and ISO for yourself. Most experienced photographers will exclusively use manual mode due to the level of customization it offers.Auto Depth of Field Mode (A-DEP) - A-DEP is a mode exclusive to Canon cameras, and will measure the depth of the nearest and furthest objects in the viewfinder when the shutter release is pressed half-way, and therefore is able to compose a shot with no blurring of the foreground or background objects which you focus on. A-DEP is complicated to use and generally not worth even attempting.
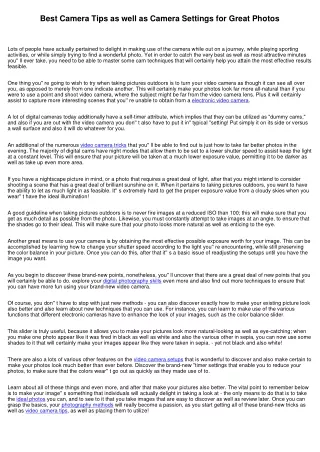
Shutter speed, ISO, Aperture... oh my! • What is exposure? Exposure is a combination of 3 factors which determine the amount of light which enters your camera. • These factors are aperture, ISO, and shutter speed. Photography is all about light, and without an ample amount of light entering your camera, you have nothing but a dark worthless picture. Learning how to determine the right combination of these three settings can be a tedious task, but understanding what they do will make it much easier.
Film Speed (ISO) • Film speed (or ISO) is a measurement of how sensitive your camera's sensor is to light. • The larger the ISO (higher number), the more sensitive it is to light. • The smaller the ISO (smaller number), the less sensitive it is to light. • Each step up in ISO doubles the amount of light sensitivity (ISO 400 is 2x as sensitive to light as ISO 200). Using a higher ISO, you can sometimes get shots in low light that would have required a longer shutter speed or a larger aperture if you were using a lower ISO.
General Tips on ISO • Use an ISO of 100 or 200 when taking photographs outside in sunny conditions. • If the sky is overcast or it is evening time, then use an ISO within the range of 400 to 800. • Night time or in cases of low light you might need to set your digital camera ISO to 1600. If you don't then your photo will appear too dark if at all.
White Balance • Setting the correct white balance in your camera, is important to ensure the objects that are white, are actually displayed white within the photograph. As you can see by the interactive example below, white balance also effects other colors as well. If your camera's automatic white balance setting doesn't get the color 'white' correct, it won't render the other colors correctly either
What is White Balance? • http://www.slrphotographyguide.com/camera/settings/white-balance.shtml
What is a Histogram? • A histogram is a bar chart that shows you whether a photographs exposure is good or bad. You can view the histogram on your camera's LCD screen after you have taken the shot. A histogram looks similar to the image shown below. • If you see high peaks on the right side of the histogram, this indicates the photograph may be too bright or overexposed. On the other hand, if there are high peaks on the left side of the histogram, the image is most likely too dark and underexposed. If the peaks are centered like in the example above, the photo is said to be well balanced and exposed. That is, not too dark or too light.