Download
1 / 7
70 likes | 80 Views
Gro Clock Instructions<br><br>GRO Clock Instructions (910/3348)<br><br>Gro Clock Instructions, GRO Clock Instructions (910/3348), Gro Clock, Grou2013clock, GroClock-User-Manual

E N D
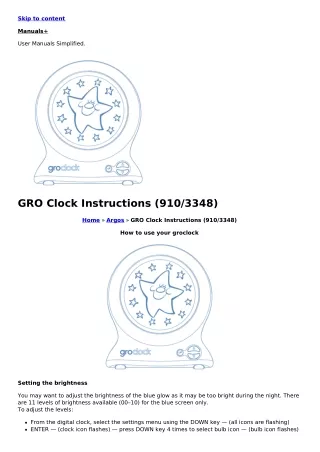
Skip to content Manuals+ User Manuals Simplified. GRO Clock Instructions (910/3348) Home » Argos » GRO Clock Instructions (910/3348) How to use your groclock Setting the brightness You may want to adjust the brightness of the blue glow as it may be too bright during the night. There are 11 levels of brightness available (00–10) for the blue screen only. To adjust the levels: From the digital clock, select the settings menu using the DOWN key — (all icons are flashing) ENTER — (clock icon flashes) — press DOWN key 4 times to select bulb icon — (bulb icon flashes)
— ENTER Using UP and DOWN keys, select the brightness level, from 00 to 10 — ENTER When all menu icons are flashing, press DOWN button to return to digital clock mode. Key–lock feature The Gro–clock has a key–lock feature, similar to mobile phones. The key–lock is best used once the sleep modes have been activated. To switch on the key–lock just press the DOWN key and HOLD for 3 seconds until you see a cross in the big star’s cheek. This means the key–lock is now on. To check it’s working press UP or ENTER and a cross will appear on the screen. To unlock the feature, just press and hold the DOWN key for 3 seconds until you hear a beep. Top tip: practice this so that the child does not see you pressing and holding the keys! The stars… At the start there are 12 stars around Mr Star. In order to show your children the passing of time these stars will go out evenly over the sleep or nap time. For example, if you set the Gro–clock for 12 hours, one star will go out every hour, or if you set for 1 hour nap one star will go our every 5 minutes. When the clock reaches the wake–up time that you set, the star disappears into a sun–rise and the sun appears. Frequently asked questions Q. If the power is turned off, does the clock remember the correct time? A. When the power goes off, the clock ‘freezes’ all the settings, including the main time, the wake up times and brightness settings. Therefore if the power goes off for a few seconds and then back on, the time will have been paused for a few seconds. However if the power was off say for 3 hours, then the time will be out by 3 hours and will therefore need re–setting. Q. If I need to keep the power on to maintain the correct time, should I worry about electricity consumption? A. No, your clock uses LEDs so it’s naturally energy efficient. However it also has a built–in energy saving mode. One hour after the wake up time has activated, the clock automatically turns off coloured LED lights and runs on a tiny amount of electricity. To re–activate just press any key and the colour LEDs will come back. Q. What is the difference between the night–time and day–time nap mode? A. In a way they are very similar because the clock works in exactly the same way in both modes. Once activated, the clock will count down and the star will change into the sun at the time set in each mode. The reason there are two modes is so that parents who are putting their children to sleep during the day and at night can have the two different times stored, which saves them from having to re–set the wake up times every session. Q. Can I make the alarm sound at any time and in any mode? A. Yes! The time you set for the alarm is independent of the night–time or day–time nap modes. Therefore you could have the sun coming up silently at 7am and then the alarm sounding at 7.30am. Q. How do I know if the alarm will sound? A. The alarm bell icon appears in the cheek of the sun/star when the alarm is switched on. Q. How can I stop my child from playing with buttons and changing the settings? A. Very easily, by using the key–lock function, which is similar to the function on mobile phones. (See page 6). Q. Is there a demo mode so I can show my child how it changes from the sun to Mr Star? A. Yes! There is a built–in demo mode which runs through all the sun and Mr Star transitions. To set the Demo mode on, just press and hold the UP button for three seconds and the clock will show all the transitions on a continuous loop. To turn off the Demo mode, simply press and hold the UP button for three seconds. Q. My screen has frozen and is not responding to the controls. A. Switch the clock off at the mains, wait a few seconds and switch back on. If you have any other questions, please call our customer services helpline on 0844 557 983.
Safety Your clock is a safe low voltage device, powered from a small mains operated power unit. For your continued safety and the reliability of your clock, please observe the normal electrical safety precautions: This product is not a toy. Please ensure that it is kept out of reach of children under 3 years old and never allow your child to play with either the power unit or the connecting lead Keep the product away from water and moisture. It’s intended for indoor use only Repairs should be carried–out only by a competent engineer. There are no customer adjustments or fuses inside the clock case The clock has been designed to be robust, but it may be broken if dropped The connecting lead is low voltage only, but for reliability reasons it should be treated with care To completely disconnect the power unit, the AC/DC adapter must be unplugged from the mains Access to the AC/DC adapter should not be obstructed whilst in use Electro–static discharge may affect the working of your Gro–clock. If this occurs, simply switch the unit off for several seconds and the unit will re–set The apparatus and AC/DC adaptor shall not be exposed to dripping or splashing and that no objects filled with liquids, such as vases, shall be placed on apparatus and AC/DC adaptor Manufactured and distributed worldwide by: The gro Company Linhay Business Park Ashburton, Devon TQ13 7UP, UK UK Tel: +44 (0)844 557 2960 www.gro.co.uk The Gro Company is a trademark of gro–group international ltd. All text and images © 2010 gro–group international ltd. The Gro Company reserve the right to amend the product specification at any time. All rights reserved. IMPORTANT! KEEP FOR FUTURE REFERENCE GCM EN 002 Technical Information Height: 14.5cm Weight: 393g Mains Supply Voltage: 230V, 50Hz. Power Unit: 6V at 200mA. Your Gro–clock is fully compliant with the following EU legislation: The Low Voltage Directive: 2006/95/EC The EMC Directive: 2004/108/EEC The RoHS Directive: 2002/95/EC Further information printed on rear and base of clock When the time comes to dispose of this equipment, please help protect our environment by means of proper disposal. Your local authorities will have special return and disposal facilities available for you. 4 simple steps to use your groclock Step 1: Get to know your clock What the buttons do?
What the screen shows: When the Gro–clock is first switched on, the digital clock is displayed. Using the DOWN button, you can scroll through the four screens: 1. Digital clock 2. Night–time sleep (sun with flashing star icon) 3. Day–time nap (sun with flashing sun icon) 4. Settings menu: Step 2: Set the clock time Set the clock time From the digital clock, select the settings menu using the DOWN key —> (all icons are flashing) ENTER—> (clock icon flashes) —>ENTER Using UP and DOWN keys, select the hour —> ENTER Select minutes —> ENTER Select AM or PM —> ENTER Select OFF or ON —> ENTER (selects whether the digital clock is invisible (OFF) or visible (ON) during the normal use of the clock). This educational feature allows you to teach your child digital time at the same time as using the stars and sun images When all menu icons are flashing, press DOWN button to return to digital clock mode, or press ENTER to re–enter the settings menu. Step 3: Set the wake–up time The Gro–clock has two different modes, one for night–time sleeps and one for day–time naps. This means you can set two different times that you want your child to wake–up. Set night–time sleep — setting the morning wake–up time This is the time that the clock will change from showing the blue star (time for sleep) into showing the yellow sun, indicating its OK for the child to get up. From the digital clock, select the settings menu using the DOWN key —> (all icons are flashing) ENTER —> (clock icon flashes) g press DOWN key once to select star icon —> (star icon flashes) —> ENTER
Using UP and DOWN keys, select the hour —>ENTER Select minutes —>ENTER Select AM or PM —> ENTER When all menu icons are flashing, press DOWN button to return to digital clock mode Set day–time nap — setting the wake–up time for the nap This function works exactly the same way as the night–time sleep mode, with the clock changing from the blue star into the yellow sun, showing the child that the day–time nap has finished. This separate setting for day–time naps, means you can have two wake–up times both stored simultaneously on the clock. From the digital clock, select the settings menu using the DOWN key—> (all icons are flashing) ENTER —> (clock icon flashes) g press DOWN key twice to select Sun icon —> (Sun icon flashes) —> ENTER Using UP and DOWN keys, select the hour —> ENTER Select minutes —> ENTER Select AM or PM —> ENTER —> (all icons flashing) When all menu icons are flashing, press DOWN button to return to digital clock mode Top tip: some parents like to use the day–time nap setting for a ‘weekend’ wake–up time! Step 4: Ready to go! To activate the night–time sleep mode From the digital clock use the DOWN key to select night–time sleep screen (the screen shows a large yellow sun, with a small flashing star icon) ENTER —> the clock gradually changes to the night–time star images and has now begun its countdown to the wake–up time the following morning. Don’t forget to use the key–lock (see page 6) or To activate the day–time nap mode
From the digital clock use the DOWN key to select day–time nap screen (the screen shows a large yellow sun, with a small flashing sun icon) ENTER —> the clock gradually changes to the night–time star images and has now begun its countdown to the wake–up time at the end of the nap. Don’t forget to use the key–lock (see page 6) To de–activate either mode If you need to de–activate the Gro–clock once the countdown has started, simply press the ENTER key to bring it back to the night–time sleep/day–time nap screen (sun with flashing star or sun icon). When it’s time to wake up As soon as the last star goes out the clock will go through an animated colour changing sunrise, indicating that it’s time to get up. Using the book with the Gro–clock When you are reading ‘Sleepy Farm’, leave the clock on the sun image with the icon flashing while reading the first half of the book. At the ‘sunset’ page, press the ENTER key and the sun on the clock will wink, just like the sun in the book! It’s great for the children to say good–bye to the sun, because they won’t see him again until the morning! (For key–lock feature see page 6). Additional Features Setting the audible alarm In normal use, the Gro–clock works silently, which means that when the wake–up time is reached the child may even stay asleep (which would be a bonus!). However, there is the option of setting and switching on an audible alarm. This alarm can be switched on whilst using any of the main 3 modes (i.e. night–time, day–time nap and digital clock mode). The default setting for the clock is for the alarm to be turned off, so there are no fears of the alarm going off when you want the clock to run silently. To switch on the alarm and set the time: From the digital clock, select the settings menu using the DOWN key —> (all icons are flashing) ENTER —> (clock icon flashes) —> press DOWN key 3 times to select Bell icon —> (Bell icon flashes) —> ENTER Using UP and DOWN keys, select the hour —> ENTER Select minutes —> ENTER
Select AM or PM —> ENTER To switch alarm on —> press the DOWN or UP key once g (bell icon flashes without cross) —> ENTER When all menu icons are flashing, press the DOWN key to return to digital clock mode The alarm is now on. To show you that the alarm is on, the Bell icon now appears on all the modes and remains in view at all times. To cancel the sounder once the alarm is making a noise, just press the UP or DOWN key. From the digital clock, select the settings menu using the DOWN key —> (all icons are flashing) ENTER —> (clock icon flashes) g press DOWN key 3 times to select bell icon (bell icon flashes) Press ENTER 4 times until the bell icon flashes Press the DOWN or UP key once to get the icon of the bell with a cross through it —>ENTER The alarm is now off. GroClock-User-Manual Download Basic Instructions for the Gro Clock Questions about your Manual ? Post in the comments! Related Manuals: 1. Ellia Gather Diffuser Instructions ARM-910 Ellia GATHER ARM-910 Create your perfect environment with Ellia Essential...