Inspecting with Eddy Currents
Inspecting with Eddy Currents. Theory Practical Testing Aerospace Applications Industrial Applications WeldScan Review of Current Equipment Probe Range Introducing Locator 2. H NDT Ltd., St. Albans, UK. Manufacturers of Non-Destructive Testing (NDT) Equipment

Inspecting with Eddy Currents
E N D
Presentation Transcript
Inspecting with Eddy Currents • Theory • Practical Testing • Aerospace Applications • Industrial Applications • WeldScan • Review of Current Equipment • Probe Range • Introducing Locator 2
H NDT Ltd., St. Albans, UK • Manufacturers of Non-Destructive Testing (NDT) Equipment • Leaders in the Field of Eddy Current Technology
Eddy Current Products • Portable instruments • Analogue Meter displays • Analogue and Digital screen display • Digital Conductivity meter • Dynamic rotating inspection • Systems • Automated in-line and off-line inspection • Aircraft wheel inspection • Condenser and heat exchanger tubing • Probes • Wide range of standard and special probes
Product History • 1968 - Amlec for Royal Navy • 1970 - Halec • 1971 to 1980 - Phasec D4 and D5 • 1983 - Locator UH for RAF • 1984 - Locator UH-B for USAF • 1986 - AV10b/AV100 • 1988 - AutoSigma 2000 • 1990 - Phasec 1.1/WheelScan • 1991 - Phasec 3.4/2.21 • 1993 - MiniPhasec • 1995 - Phasec 2200 • 1998 - Phasec D62 • 2000 - Locator 2 for RAF
Part 1:Theory HOCKING eddy current training programme
Introduction - Historical Context • 1879 - Hughes sorted metals of different permeability and conductivity • 1930’s used for metal sorting. • 1940’s crack detection applications developed. • 1950’s & 60’s techniques developed in Aviation and nuclear industries.
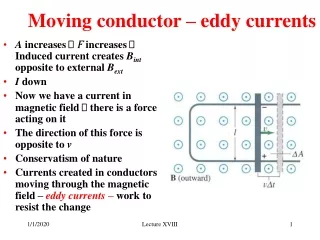
Basic Eddy Current Theory: Simple Coil above a metal surface • AC Field induces circulating eddy currents • Eddy currents load coil • Loading affects coil impedance
Basic Eddy Current Theory: Simple Coil above a metal surface • Crack in surface reduces eddy current flow • Loading on coil changes • Coil impedance changes
Principle Of Eddy Current Inspection • An AC magnetic field induces circulating eddy currents in a conductive material • Changes in the properties of the material change the sensor impedance
Basic Eddy Current Theory: Simple Coil above a metal surface • Monitor voltage across coil • Coil impedance changes • Voltage across coil changes • Detect changes in eddy current flow
Basic Eddy Current Theory: Simple Coil above a metal surface Crack parallel to eddy currents - not detected Crack interrupts eddy currents - detected
Basic Eddy Current Theory: Depth of Penetration • Eddy current density is greatest at surface • Reduces exponentially with depth • At standard D of P = 1/e (37%) of surface value
Basic Eddy Current Theory: Depth of Penetration • Decreases with an increase in frequency • Decreases with an increase in conductivity • Decreases with an increase in permeability Depth (mm) Depth (in) 100 4 Titanium 10 0.4 Aluminium Copper 1 0.04 Steel 0.1 0.004 0.01 0.0004 100Hz 1kHz 10kHz 100kHz 1MHz 10MHz Frequency
Basic Eddy Current Theory : The impedance plane • Resistance (X) vs. Reactance (Y) • Values unique to probe and frequency, but general form is the same.
Basic Eddy Current Theory : The impedance plane Titanium Crack in Aluminium Lift-Off Aluminium Increasing conductivity of Test Sample Copper
Basic Eddy Current Theory : The impedance plane • Typical instrument display is a ‘Window’ on impedance plane • “Rotate” and “Zoom” to suit application “cracks” Lift-Off
Basic Eddy Current Theory: Factors affecting eddy current response • Conductivity • Measured in %IACS or MSm-1 • Greater Conductivity -> Greater current flow on the surface - Less penetration • Conductivity is often measured using eddy currents. • Permeability (relative) • one for Nonferrous, up to hundreds for Ferrous. • Higher permeability reduces penetration into metal and gives much larger EC response. • Permeability variations may mask defects
Basic Eddy Current Theory: Factors affecting eddy current response • Frequency • Very significant effect on response • The one thing that we can totally control! • Geometry • CRACKS!!!! • Curvature, edges, grooves etc. all affect response • Generally try and scan along line of constant geometry • Thickness relevant if less than depth of penetration.
Basic Eddy Current Theory: Factors affecting eddy current response • Lift-off • Closer probe to surface -> greater effect • “Lift-off” signal as spacing varies • reduction in sensitivity as spacing increases. All of these factors will affect the response: accurate assessment of one requires that the others be held constant or their influence minimised
Basic Eddy Current Theory: Coil Configurations Three main groups: • Surface probes - used mostly with the probe axis normal to the surface, includes pencil probes and fastener hole probes • Encircling coils - e.g. in-line inspection of round products • ID probes - e.g. in-service inspection of heat exchangers.
Basic Eddy Current Theory: Coil Configurations • Absolute probe • Single coil (mostly) • Metal sorting and crack detection • Sensitive also to material variations, temperature changes etc.
Basic Eddy Current Theory: Coil Configurations • Differential probe • Sensitive to small defects • Insensitive to lift-off, temperature, geometry changes common to both coils • Characteristic ‘figure 8’ response • Probe / flaw orientation critical
Basic Eddy Current Theory: Coil Configurations • Reflection (Driver/Pickup) Probes • Primary winding driven from the oscillator • Sensor winding(s) connected to the measurement circuit • May give response equivalent to either an absolute (top) or differential probe(lower). • Each winding can be optimised for its function • Wider frequency range • Better penetration • Better sensitivity at large lift-off
Differential Amplifier Phase Sensitive Detector & balance circuitry Main Amplifier Basic Eddy Current Theory: Coil Connections • Bridge Probes • When the bridge is balanced the measured voltage will be zero
Differential Amplifier Phase Sensitive Detector & balance circuitry Main Amplifier Basic Eddy Current Theory: Coil Connections • Reflection (Driver/Pickup) Probes
Practical Testing: Requirements • Any practical Eddy current test will require the following: • An instrument with the necessary capabilities. • A suitable probe • A good idea of size, location and type of the flaws it is desired to find • A suitable test standard to set up the equipment and verify correct operation • A procedure or accept/reject criteria based on the above. • The necessary operator expertise to understand and interpret the results.
Part 2:Practical Testing HOCKING eddy current training programme
Practical Testing: Requirements • Any practical Eddy current test will require the following: • An instrument with the necessary capabilities. • A suitable probe • A good idea of size, location and type of the flaws it is desired to find • A suitable test standard to set up the equipment and verify correct operation • A procedure or accept/reject criteria based on the above. • The necessary operator expertise to understand and interpret the results.
Practical Testing: Typical Instrumentation • Special Purpose:(AutoSigma 3000 shown) • Conductivity, Coating thickness etc. • Simple digital readout • Minimal operator training • Crack Detectors: (Locator UH shown) • Meter or Bar-graph readout • High frequency - Surface cracks and sorting • Often absolute probe only
Practical Testing: Typical Instrumentation • Portable impedance plane Eddy Current Flaw detectors:(Phasec 2200 shown) • Impedance plane display • Wide frequency ranges • extensive alarm facilities, • rate filtering • may have multifrequency operation,
Advantages of Eddy Current Inspection • High sensitivity to microscopic flaws at or near the metal surface • High inspection speeds • No surface preparation required • Can detect flaws through paint layers • Good discrimination between flaw types • No couplant, no consumables, no radiation hazards • No effluent treatment needed • Ability to access the small and complex geometries • Skills are easy to acquire • Complementary to Ultrasonic technology
Practical Testing: Operating frequency • Primary operator controlled variable. • Determine Relative response from different flaws or “Artefacts” • Mostly Determined by: • Probe, • Material Type, • Material thickness/Geometry • High frequency ( typically > 100 kHz) tests: • Little penetration, • Find small flaws, More signals from scratches etc. • Low Frequency (typically <10kHz) Test • Deep Penetration: Find Thickness variations etc. • Insensitive to signals from small flaws and scratches
Practical Testing: Applications • Surface Crack Detection • Pencil or ‘Pancake’ probes • High Frequencies • Find cracks down to 0.1mm or so deep • Normally Absolute probes, sometimes differential, but crack direction/probe orientation is critical
Practical Testing: Applications • Metal Sorting • Conductivity / Permeability Testing • For NFe Conductivity meter may be a better choice • Frequencies from few Hz to MHz depending on parameters / geometry • N.B Same reading does not mean same metal • Many factors can vary together, • Check for correct Heat treatment or composition, Not both at once
Practical Testing: Applications • Sub-Surface Crack/Corrosion Detection. • Primarily Used in Airframe Inspection. • Low Frequency, • Usually Reflection Probes • Penetrate Aluminium Structures (10mm) • Detect Second and Third Layer Cracking or Corrosion
Practical Testing: Applications • Heat exchanger tube testing • Petrochemical or power generation Heat exchangers may have thousands of tubes, up to 20m long. • Use a differential ID ‘bobbin’ probe • Test at high speed (up to 1 m/s or so with computerized data analysis.) • Identifies cracks, inside or outside corrosion • Pitting can be assessed to an accuracy of about 5% of wall thickness. • The operating frequency is determined by the tube material and wall thickness, • Dual or multiple frequency inspections commonly used
Practical Testing: Applications • In-Line inspection of Steel tubing • Inspect using encircling coils . • Magnetic material - two main problems: • High permeability - little or no penetration. • Variations in permeability cause eddy current responses greater than those from defects. • Overcome by magnetically saturating the tube using a strong DC field. • Tubes up to around 170mm diameter • Welded tubes tested using sector coils which only test the weld zone.
Practical Testing: Applications • Ferrous weld inspection • geometry and material variations prevent inspection with a conventional eddy current probe, • Special purpose “WeldScan” probe has been developed • Allows inspection of welded steel structures for fatigue-induced cracking, • May be used in adverse conditions, or even underwater, • Will operate through paint and other corrosion-prevention coatings. • Cracks around 1mm deep and 6mm long can be found in typical welds.

