Seaford School District
960 likes | 1.11k Views
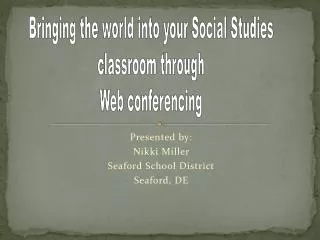
Seaford School District. PowerPoint Training Presented By: Courtney White. Welcome and Introduction . Welcome Today’s Agenda Our Goals. Agenda. Enhancing our teaching through the use of PowerPoint

Seaford School District
E N D
Presentation Transcript
Seaford School District PowerPoint Training Presented By: Courtney White
Welcome and Introduction • Welcome • Today’s Agenda • Our Goals
Agenda • Enhancing our teaching through the use of PowerPoint • Microsoft PowerPoint (full name Microsoft Office PowerPoint) is a ubiquitous presentation program developed for the Microsoft Windows and Mac OS computer operating systems. Being widely used by businesspeople, educators, and trainers, it is among the most prevalent forms of persuasion technology: according to its vendor, Microsoft Corporation, some 30 million presentations are made with PowerPoint every day. • Microsoft PowerPoint. Retrieved July 23, 2006, from Wikipedia Web site: http://en.wikipedia.org/wiki/Powerpoint Give an overview of the subject. • Importance and usefulness. • How is PowerPoint being used in Classrooms • How to search for a PowerPoint • Creating Your First Presentations • 50 Quick & Easy PowerPoint Activities • Important PowerPoint Links • Summary Image from Microsoft.com & Wikipedia.org
Importance and Usefulness of PowerPoint Standards Technology Curriculum Objectives Put together in an organized, creative and motivating way.
Ancient Egypt & Nubia 6th Grade Social Studies Unit Chapter 3
Chapter 1 Sec 1Geography and History • Essential Question: • How has geography shaped the patterns of history? • Geography Standard 1-4 • History Standard 4 • Warm Up:What would be some benefits to living near the Nile River? • Agenda: • Warm Up • Read pgs. 70-75 • Show Ancient Egypt Life on the Nile (Prentice Hall movie) • Answer questions on page 75 #1 & 2 • Homework: • None • Chapter 3 Objectives: • Students will: • Find out how the geography of the Nile changes as the river runs its course. • Learn about the types of communities that first appeared along the Nile, and how the Nile was used for trade. Organize a Unit
Chapter 1 Sec 1Geography and History • Essential Question: • How has geography shaped the patterns of history? • Chapter 3 Objectives: • Students will: • Find out how the geography of the Nile changes as the river runs its course. • Learn about the types of communities that first appeared along the Nile, and how the Nile was used for trade. • Geography Standard 1-4 • History Standard 4 • Warm Up:What is the title of the person that rules Egypt? • Agenda: • Warm Up • Female Rulers Organize a Unit
Female Pharaohs • Cleopatra Hatshepsut Organize a Unit
Chapter 3 Sec 2The Rulers of Egypt • Chapter 3 Objectives: • Students will: • Find out how the geography of the Nile changes as the river runs its course. • Learn about the types of communities that first appeared along the Nile, and how the Nile was used for trade. • Essential Question: • How has geography shaped the patterns of history? • Geography Standard 1-4 • History Standard 4 • Warm Up:Look at pages 76 & 77, how does this art show how advanced Egyptian culture was for their time period? • (hint look at the older art work on page 68) • Agenda: • Warm Up • Read pgs. 76-81 • Show King Tut movie (united streaming) 25 minutes • Homework: • Answer #1 & 2 page 81 Organize a Unit
King Tut Movie Questions • How did King Tut’s age affect his ability to rule? • How did King Tut’s chief take advantage of his position? • Give an important event during King Tut’s rule. Organize a Unit
The Great Sphinx of Egypt • A sphinx is a mythical creature with the body of a lion and the head of a person, a hawk, or a ram. Ancient Egyptian sculptors made statues of sphinxes to honor kings and queens. In Egyptian art, kings are often shown as lions defeating their enemies. To the Egyptians, the sphinx stood for royal power and protection. • Alongside the pyramids in the desert near Giza, Egypt, is a huge monument called the Great Sphinx. The Great Sphinx has a human face. On its head is a royal headdress. The statue lies near the pyramid of King Khafre, a Fourth Dynasty ruler. The sphinx’s face is thought to be a portrait of Khafre. • The Great Sphinx was built about 4,500 years ago. It is the oldest and most famous statue of a sphinx. It is also the largest, measuring 240 feet long and about 66 feet high. Organize a Unit Click the picture to find a link
Directions for Great Sphinx of Egypt Activity • Egyptians made the Sphinx to honor King Kafre • You will: • Design a creature to represent You and the things that you want people to remember about you. (ex. Activities you like, sports, beliefs) • Create a model of your creature along with an • explanation of your symbols. Organize a Unit
What Social class would you find at the top of the pyramid? Organize a Unit
Pharaoh Organize a Unit
Pharaoh Upper Class Very small group. Made up of Priests, members of the Pharaohs Court and Nobles Organize a Unit
Pharaoh Upper Class Very small group. Made up of Priests, members of the Pharaohs Court and Nobles Merchants and skilled workers Middle Class Organize a Unit
Pharaoh Upper Class Very small group. Made up of Priests, members of the Pharaohs Court and Nobles Merchants and skilled workers Middle Class Not a very large class. They farmed and built roads & temples. Peasants Organize a Unit
Pharaoh Upper Class Very small group. Made up of Priests, members of the Pharaohs Court and Nobles Merchants and skilled workers Middle Class Not a very large class. They farmed and built roads & temples. Peasants Organize a Unit Slaves Small group. Prisoners captured were made into slaves.
Chapter 3 NotesEgypt • Summary • "Egypt is the gift of the Nile," wrote the Greek historian Herodotus. The Nile did indeed provide the Egyptians with many necessities of life and their civilization was built along its fertile shores. • Egyptian and Nubian kingdoms ruled the banks of the Nile for over two thousand years. Organize a Unit
Chapter 3 NotesEgypt • Section 2: The Rulers of Egypt • The first dynasty of Egypt began when King Menes united Upper and Lower Egypt. This union began one of the most stable civilizations in history. • The Egyptian pharaohs successfully ruled this large civilization for over 2,500 years. Organize a Unit
Palette ActivityThe Cultures of Nubia • Chapter 3 Objectives: • Students will: • Examine the relationship between Nubia and Egypt. • Learn about and Nubian kingdoms centered in Kerma, Napata, and Meroe. • Essential Question: • How has geography shaped the patterns of history? • Geography Standard 1-4 • History Standard 4 • Warm Up: • Write down Homework • Agenda: • Warm Up • Palette Activity • Homework: • Get movie permission slip signed Organize a Unit
Seaford Middle School This Palette represents the SPIRIT of SMS. The people represent ____________. The man with the stick represents __________. The two people swimming at the bottom of the palette represent ____________. The scène at the top right represents __________. Organize a Unit
Name Your Group • List the characteristics of your group Organize a Unit
Create Your Scene Draft Organize a Unit
How is PowerPoint Being Used in the Classroom Venn Diagrams
Animals on the Farm By Ben Talking Story Book Animal sounds from: www.findsounds.com
The rooster wakes up early in the morning. Talking Story Book
The cow gives us milk to drink. Talking Story Book
The horse eats grass. Talking Story Book
The pig likes to lay in the mud. Talking Story Book
Importance and Usefulness of PowerPoint Add Your Text Text Text Cycle name Text Text Cycle Diagram Text
Importance and Usefulness of PowerPoint TEXT TEXT TEXT TEXT TEXT TEXT 3-D Pie Chart
Table Table
Courtney White presents: Microsoft® Office PowerPoint® 2003 Training Create your first presentation
Course contents • Overview: Presentation basics • Lesson 1: Slides, text, and notes • Lesson 2: Design and layout • Lesson 3: Proof, print, prep for the show
Overview: Presentation basics • You've been asked to put together a class activity using PowerPoint, and you have no idea how to begin. • Get equipped with the skills to do the job. Learn what you need to know to put together a Microsoft PowerPoint presentation quickly and with little fuss.
Course goals • Put text and pictures on slides. • Navigate in the PowerPoint window. • Apply a design template. • Arrange slide content by using layouts. • Print handouts and notes. • Prepare to give the show.
Lesson 1 Slides, text, and notes
Slides, text, and notes • There it sits in the middle of the PowerPoint window: a big, blank slide. "Click to add title," says the text on the screen. It sounds easy, but you've never done this before, and the blank canvas is daunting. • Yet you have to start somewhere. A blank slide can be daunting; don't let it be.
Work in the slide area • The window that first opens in PowerPoint has a big working space in the middle, with smaller areas around it. • That middle space is the slide area, officially called the slide pane. The working areas of a PowerPoint window
Work in the slide area • Working in this space, you type text directly onto the slide. The area where you type is a box with a dashed border called a placeholder. All text that you type onto a slide resides in a box like this. The working areas of a PowerPoint window
Work in the slide area • See the image at left. • The slide pane. • On the left is a thumbnail version of the slide you're working on. This area is the Slides tab. • The notes pane. Type notes that you'll use when presenting. The working areas of a PowerPoint window
Add new slides • When PowerPoint opens, there's only one slide in the show. It's up to you to add the rest. Add them as you go or add several at a time, whichever you prefer. Use the shortcut menu to insert a new slide.
Add new slides • There are multiple ways to insert a new slide. See the image at left. Use the Slides tab, the area on the left that contains the slide thumbnail, to add new slides. • Right-click the thumbnail that you want the new slide to follow. • Click New Slide on the shortcut menu. Use the shortcut menu to insert a new slide.
Type text • If you don't want a bulleted list, select the placeholder by clicking its border. Then, click the Bullets button . • Another button on the Formatting toolbar handy for positioning text is the Center button . Text in placeholders
Navigate among slides • Once you have several slides in the show, you'll need to move among them as you add content. The picture shows two ways to do that. • Click the slide thumbnail on the Slides tab… • …to display that slide, or… • Click the Previous Slide or Next Slide button.
Lets practice • Look at the areas of the PowerPoint window. • Type title text. • Add new slides. • Navigate and add more text. • Use text indents and formatting. • See how AutoFit works. • Type and view notes.
Break time Please Be Back in 10 minutes
Lesson 2 Design and layout