Introduction to Culminating Project
240 likes | 545 Views
Introduction to Culminating Project. One of the most important things you’ll do in PODS this year is work on your Culminating Project. The Culminating Project is a graduation requirement for all seniors in the state of Washington.

Introduction to Culminating Project
E N D
Presentation Transcript
Introduction to Culminating Project • One of the most important things you’ll do in PODS this year is work on your Culminating Project. • The Culminating Project is a graduation requirement for all seniors in the state of Washington. • You’ll start working on the project this year and you’ll finish it during your senior year.
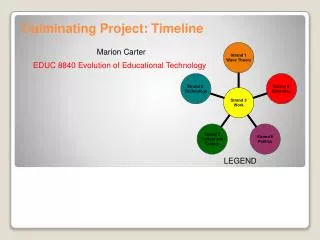
This presentation will show you the parts of the Culminating Project, and when they must be completed. Have your Culminating Project Timeline out. You’ll need to fill in some important dates as you watch this presentation.
A Topic for Your Project • Before you can begin to work on the parts of the project, you’ll need to find a topic for your project. • Projects can be developed around one or more of these areas of interest: • Career • Issue (social, health, environment, etc.) • Academic area • Hobby or skill • Volunteer/community service • Process of applying to post-high school training ( this project must include community service) • Delayed entry into the military
You’ll work on choosing a topic during PODS in November. • On the Culminating Project Timeline write November 2012on the line next to Choose a Topic For Your Project. • This is a very important part of your project.
5Ps • After you’ve chosen a topic you’ll begin to work on the 5 parts of the Culminating Project. • Proposal Letter • Portfolio • Product/Performance • Reflective Paper • Presentation
In the Proposal letter you describe how you’ll successfully complete your project. During PODS in November you’ll receive a sample letter and the letter rubric. You’ll learn how to write the letter. Proposal Letter
In the CP Timeline write November 2012 on the line next to Learn to write the Proposal Letter. • You’ll receive a Proposal Letter Planner during PODS in December. • You’ll start to write your letter by filling in the planner. • In the C P Timeline write December 2012 on the line next to Fill in Proposal Letter Planner.
You’ll work on the letter outside of PODS until March. Then you’ll finish the letter during PODS in March and April. • In the CP timeline write March 2012 on the line next to Finish Proposal Letter. • You’ll present your letter as part of your student led conference in May.
Once your Proposal Letter has been approved you can start to work on your project. • You’ll finish your project during your senior year.
Product (something you make for your project) Performance (something you do for your project) You’ll work on the product or performance independently next summer or during your senior year. Product/Performance
In the CP timeline write June 2012-January 13 on the line next to Work on Product/Performance.
As you work on your product/performance, you’ll collect documents in a notebook. That notebook is called the portfolio. You’ll work on it independently. You’ll show your completed portfolio to your panel when you give your presentation. . Portfolio
In the CP timeline write June 2012-January 2013 on the line next to Collect papers for the Portfolio.
Reflective Paper • After you’ve completed your product or performance you’re ready to write the Reflective Paper. • Your Reflective Paper will show the research you used to complete your project. • It will also explain the skills you developed and how you grew as you worked on the project. • .
You’ll learn about the Reflective Paper in PODS but you’ll work on it independently. • It’s due February 2013.
In the CP Timeline write March 2013 next to Reflective Paper is Due.
The time spent doing research for the paper, along with all of the activities to complete the product/ performance should take a minimum of 20 hours. 20 HOURS
The last part of your project is an oral presentation. During the oral presentation you will explain what you did and what you learned from the project. Presentation
It must include a visual. You’ll give your presentation in April or May of your senior year. • In the CP Timeline write April 2013 on the line next to Give the Oral Presentation.
For more information go to Shadle’s culminating project web page at ww.spokaneschools.org/shadle. Click on students. Click on culminating project. Or see Mrs. Hanson, the culminating project coordinator, in the library.
Start thinking about a topic for your Culminating Project. We’ll work on finding a topic during PODS in November.