Download
1 / 32
320 likes | 470 Views
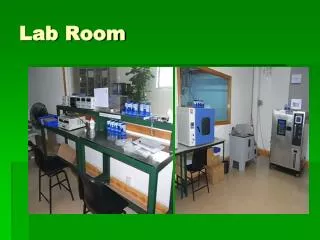
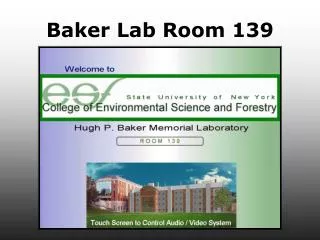
Baker Lab Room 139. Presentation Mode Select. Select Mode For presentation Choices are: Auto Mode 1 Auto Mode 2 Auto Mode 3 Manual Mode Video Conference. Press AUTOMATIC MODE 1. Auto Mode 1 Setup. Lectern Gooseneck/Boundary Room Overhead/Students/Table Wireless

E N D
Presentation Mode Select • Select Mode For presentation Choices are: • Auto Mode 1 • Auto Mode 2 • Auto Mode 3 • Manual Mode • Video Conference Press AUTOMATIC MODE 1
Auto Mode 1 Setup • Lectern • Gooseneck/Boundary • Room • Overhead/Students/Table • Wireless • Tracking/Handheld/Lav • Chose Mics • Chose Remote • Remote Mouse • “Auto Mode” Press START PRESENTATION
Auto Mode 1 System Info • All Visual Media on Center Screen • VCR, DVD, Document Camera • Lectern Computer, Laptop • Room Cameras • Center Slide Projector • Mics and Playback Audio • Audio Conference
Auto Mode 1 Main Page Select Visual Source Here Touch Window to Make Picture Full View Select Audio Source Here
Auto 1 Pop Up Controls Press EXIT when done……….
Presentation Mode Select • Select Mode For presentation Choices are: • Auto Mode 1 • Auto Mode 2 • Auto Mode 3 • Manual Mode • Video Conference Press AUTOMATIC MODE 2
Auto Mode 2 Setup • Lectern • Gooseneck/Boundary • Room • Overhead/Students/Table • Wireless • Tracking/Handheld/Lav • Chose Mics • Chose Remote • Remote Mouse • “Auto Mode” Press START PRESENTATION
Auto Mode 2 System Info • All Video Media on Center Screen • VCR, DVD, Document Camera • Lectern Computer, Laptop • Room Cameras • Left and Right Slide Projectors • Mics and Playback Audio • Audio Conference
Auto 2 Pop Up Controls Press EXIT when done……….
Presentation Mode Select • Select Mode For presentation Choices are: • Auto Mode 1 • Auto Mode 2 • Auto Mode 3 • Manual Mode • Video Conference Press AUTOMATIC MODE 3
Auto Mode 3 Setup • Lectern • Gooseneck/Boundary • Room • Overhead/Students/Table • Wireless • Tracking/Handheld/Lav • Chose Mics • Chose Remote • Remote Mouse • “Auto Mode” Press START PRESENTATION
Auto Mode 3 System Info • Slide Projectors, VCR, DVD and Cameras are not available • Document Camera is on the Stage Left Screen • Lectern Computer is on the Center Screen • Laptop Computer is on the Stage Right Screen • Mics and Playback Audio • Audio Conference
Auto 3 Pop Up Controls Press EXIT when done……….
Presentation Mode Select • Select Mode For presentation Choices are: • Auto Mode 1 • Auto Mode 2 • Auto Mode 3 • Manual Mode • Video Conference Press MANUAL MODE
Manual Mode System Info • You can manually route sources to destinations…… in fact, you have to. • All sources on left hand column • Projectors (destinations) on top. • Slide Projector control w/ modes. • Mics and Playback Audio • Audio Conference
Manual Mode Main Page Select Visual Source Here Chose which Projector to monitor Source from Here Select Audio Source Here Select Slide Source Here
Manual Mode Pop Up Controls Press Exit to continue……….
Manual Slide Page Select Projector Here Chose Slide Mode Here
Manual Slide Pop Up Controls Press Back to Return to Manual Main Page……….
Presentation Mode Select • Select Mode For presentation Choices are: • Auto Mode 1 • Auto Mode 2 • Auto Mode 3 • Manual Mode • Video Conference Press VIDEO CONFERENC MODE
Video Conference Mode System Info • Slide Projectors no available • All sources on left hand column • Far End on Stage Left • Near End on Stage Right • Monitor Far End and Near End on Touch Panel and Rear Plasma Displays • Cameras Become Important • Quad Splitter Available • Mics and Playback Audio • Audio Conference
Video Conference Mode Page Select Visual Source Here Video from Room 139 Video from “Far Site” Select Audio Source Here Select Quad Sources Here Activate Student Cam Buttons
Video Conference Pop Up Controls Press Exit to continue……….
ISDN CODEC Pop Up Controls Press Exit to continue……….
Mic Position Main Page Chose which Projector to monitor Source from Here
Exit Mode Select • To Mode Select – Return you to that page • No – Will Return to previous page • Yes – Will Shut down System REMOVE VIDEO TAPE AND/OR DVD NOW !!
System is shutting off now…. • The projectors will stay on for 5 minutes – there is a countdown timer on the “Welcome” screen of the touch panel • The room can be restarted while the countdown is happening. • If the countdown ends, the system is off. You must wait approx. 2 minutes to restart the system to allow the projectors to cool. (the fans will shut off when done) PLEASE REMEMBER TO SHUT OFF THE SYSTEM WHEN YOU ARE DONE….