Download
1 / 10
100 likes | 287 Views
It is hard to keep cables on a nightstand, you either end up draping them all the way across the surface of the table or they tend to slide down on to the floor. Finding this really problematic, he decided to give a little DIY tweak to the chargers and solve the issue of sorting cables.

E N D
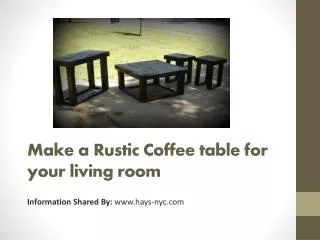
Make a Rustic Coffee table for your living room Information Shared By: www.hays-nyc.com
Coffee table is an important piece of furniture in our abodes. When you want a new coffee table for your home, there are two options – you can either purchase it from the market, or build one at home from readily available things.
If you want to build a solid wood coffee table that’s sustainable and rustic, check out the following DIY steps to reach at one of the finest tables unlike one that you will find from a similar price in the market.
Things (tools) you’d require: • White pine boards • Brad Nailer • Miter Saw • Air compressor • Sander • Table saw
The frame A solid frame is key to a table’s strength and show. It was therefore foremost for me to create a solid frame which also appealed to the eye. For my table’s frame – I took a 2×4 plank and slit it and used the piece for the corners. Using 1×4 size hooks, and sticking the parts together with brad nailer and wood glue.
To the top For the table’s surface, use 1×8 white pine boards. The boards were hooked to the frame after they were sanded properly.
Sides of the table For the sides of the surface, use 1×6 white pine boards. Four of these will be required. Then, to ensure the four corners of the table fit sung and fell like done by a pro, cut the boards on both ends at 45 degrees.
Side boards In table, if you want boards on the sides – both on the top and at the bottom; you can skip this if you feel your table looks complete with whatever you have managed already. If you want to make the sides secure, use similar 1×6 white pine boards and cut them at 45 degree angle on both ends.
Finishing Since, this table was supposed to look rustic, distress the table at places with knife and made hole on the table so it could look like bug damage. Then fill it with wood puddy and sanded it.