Download
1 / 6
60 likes | 205 Views
Percentage View A dash near the P at the top of the display Max column height is 1650 degrees Column height indicates the percentage of maximum A column only one segment high is equal to 50% of maximum (825 deg). Comparison of EGTs across all cylinders as a percentage of maximum.

E N D
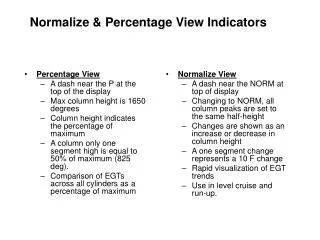
Percentage View A dash near the P at the top of the display Max column height is 1650 degrees Column height indicates the percentage of maximum A column only one segment high is equal to 50% of maximum (825 deg). Comparison of EGTs across all cylinders as a percentage of maximum Normalize View A dash near the NORM at top of display Changing to NORM, all column peaks are set to the same half-height Changes are shown as an increase or decrease in column height A one segment change represents a 10 F change Rapid visualization of EGT trends Use in level cruise and run-up. Normalize & Percentage View Indicators
Toggling between Percentage and Normalize views • Hold the LF button for 5 seconds until display changes • The analog display becomes half height when going to Normalize view • Does not affect the digital display • Does not alter the parameter scanning sequence • The CHT display is not affected by the Normalize or Percentage view. • May be toggled in either the Manual or Automatic scanning mode • Always set to Percentage view • before adding or reducing power. • when beginning your descent. NOTE: • Changing power setting in the Normalize view will cause all columns to go off scale - - either high (applying more power) or low (reducing power).
EDM 700 Scanning Modes • Automatic Scanning Mode • When power turned on it starts in the Manual Mode • Enters Automatic Mode after 2 minutes OR • Tap the LF button, then tap the STEP button to initiate Automatic mode • Temp and Fuel Flow parameters sequenced at pre-determined rate • Parameters can be included/excluded from sequence • Tap STEP to go to Manual mode • Tap STEP to the parameter to be included excluded • Tap STEP & LF buttons simultaneously to toggle between included/excluded • All parameters reset to be included each time the EDM700 is turned on. • Tap LF then STEP to return to Automatic Mode. • Manual Scanning Mode • Tap the STEP button – Automatic scanning stops • Tap STEP button to sequence display to the next parameter • All installed parameters are sequenced through in the Manual Mode.
The goal of Rich of Peak leaning is to reach: 100 deg F rich (cooler) of peak for Best Power OR Peak EGT for Best Economy Leaning procedure Establish cruise power setting Pre-lean the mixture to 50 deg F estimated rich of peak EGT on any cylinder___________ Wait 1 minute (to let the engine stabilize) Tap the LF button to enter LeanFind Mode Lean the mixture: At a rate of approx 10 deg F / sec without pausing – slowly and smoothly Move the mixture lever about 1/16 inch every 5 seconds When a 15 deg F rise is detected the LeanFind Mode becomes active and a flashing dot will indicate the hottest cylinder Stop leaning when a column begins flashing You will also see LEANEST for 2 seconds followed by EGT & FF readings )Ex. 1545 12.4) EGT at this point will be about -15 deg lean of peak due to thermal inertia. Hold the LF button down to see Peak EGT. (Ex. 1560 PK) The first cylinder to reach Peak EGT will not necessarily have the hottest EGT. Richen the mixture until either: Peak EGT is reached for Best Economy (Ex 1560) 100 deg F rich of Peak (cooler than peak) EGT is reached for Best Power (Ex. 1460) Tap STEP to finish. LeanFind Mode Rich of Peak NOTE: • The LeanFind Mode is not active until a cylinder dot is blinking. • To show the progress of the leaning process, the EDM selects the hottest cylinder for reference with the blinking dot and to show in the digital display
LeanFind Mode Lean of Peak • The goal of Lean of Peak leaning is to reach: • Lean of peak for all cylinders Leaning procedure • Establish cruise power setting • Pre-lean the mixture to 50 deg F estimated rich of peak EGT on any cylinder___________ • Wait 1 minute (to let the engine stabilize) • Tap the LF button to enter LeanFind Mode • Immediately hold both LF and STEP buttons until you see LEAN L in the display • Lean the mixture: (NOTE:The LeanFind Mode is not active until a cylinder dot is blinking) • At a rate of approx 10 deg F / sec without pausing – slowly and smoothly. • Move mixture lever about 1/16 inch every 5 seconds • When a 15 deg F rise is detected the LeanFind Mode becomes active and a flashing dot will indicate the hottest cylinder (this is not necessarily the hottest EGT) • The dot of each cylinder will flash as it peaks and the column will then become an inverted bar graph • Stop leaning when the last cylinder peaks and becomes inverted • Leave the mixture at this setting. • Each segment in the inverted column represents 5 degrees below peak. • The digital display will show • the degrees below peak of the last cylinder to peak • AND the current fuel flow. • Hold LF button to see • the EGT of the last cylinder to peak • and the delta fuel flow between the first and last cylinders to peak. • Tap STEP to resume scanning • the bar graph will return to normal. • Tapping LF again will return to the inverted bar graph for fine tuning if necessary. • To begin the LeanFind procedure anew, tap LF a second time.
Fuel Flow Operation • Setting Fuel on Board after Startup • The EDM will display FUEL for one second and then flash FILL?N • If you are resuming a flight without adding fuel press the STEP button • ELSE press the LF button to advance to FILL 80 • If you have filled to 80 gallons • Press STEP twice to complete. • If you have filled to 80 gallons or more but less than 100 • press the STEP button once to advance the display to see .0 gal • HOLD the LF button to count up to the number of gallons added above 80 (TAP the LF button to count down if you counted up too far) • Press STEP to complete • ELSE press the LF button to advance to FILL 100 • If you have filled to 100 gallons • Press STEP to complete. • ELSE press the LF button to advance to FILL + • Press the STEP button once to advance the display to see .0 gal • If you have ADDED fuel HOLD the LF button in to count up to the number of gallons you have added • Press STEP to complete (or TAP the LF button to count down if you counted up too far) • If you have OFFLOADED fuel TAP the LF button to count down to the amount you have removed • Press STEP to complete • If you forgot to reset fuel before the EDM entered the automatic scanning mode • Press STEP and LF simultaneously for 5 seconds to enter the Pilot Programming mode • The word Program will appear for 2 seconds then Fuel? N • Press LF to get Y • If you inadvertently press STEP instead of LF keep pressing STEP until you exit Pilot Programming mode and start over. If you accidentally change other parameters see the default sheet (next page) • Press STEP to see FILL? N • Follow directions as above