The Evolution of Microscopes: A Historical Journey
Discover the fascinating history of microscopes, from reading stones to modern magnification devices. Learn about important figures like Robert Hooke and Antony van Leeuwenhoek, and explore the essential parts and usage of microscopes. Gain practical tips for handling and maintaining microscopes for optimal performance. Let's delve into the world of microscopy together!

The Evolution of Microscopes: A Historical Journey
E N D
Presentation Transcript
A. History of the Microscope The first vision aid was called a reading stone. It was a round piece of glass that magnified anything it was placed on such as writing and pictures.
A. History of the Microscope Romans discovered that thick crystal pieces they called “magnifying glasses” could be used to see things clearer. They were also called “burning glasses” because they were used to help start fires
A. History of the Microscope All these things helped lead to the invention of the first type of microscope in the 16th century.
Important People and Dates • 1590: Hans& Zacharias Janssen, a father & son team from Holland made “spectacles” or glasses - discovered that lenses enlarged things • 1665: Robert Hooke used a compound microscope (one with 2 lenses) to see small “cells” in cork.
1674: Antony van Leeuwenhoek became the first man to make and use a real microscope that magnified things 270X. He made over 500 microscopes in his lifetime. Less than 10 are left in the world today. He is the Father of Microscopy.
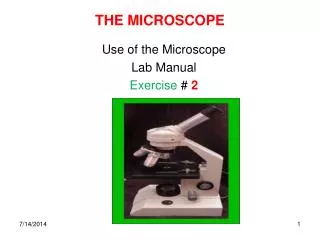
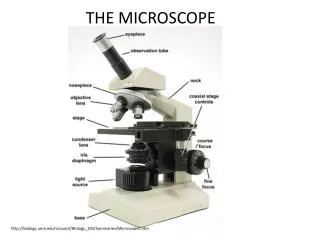
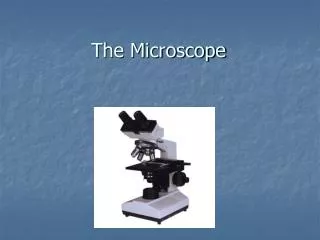
You will be assigned a microscope number. This is ALWAYS your microscope AND your lab group number unless I tell you differently. Get your microscope out of the scope cart. Always carry your scope with two hands. Microscope Parts **Complete your Scope diagram as we explore. You will need this to study for a unit test. I also suggest you write any extra notes in your composition books you feel are necessary.
The first lens system is the ocular or eyepiecelocated at the top of the microscope. Sometimes this is also called the ocular lens. • Depending on your microscope, the lowest (and shortest) lens is often called the scanning lens as it is used to “scan” the specimen to find your “target” for viewing. Usually these lenses magnify specimens 4x
The next two lenses are considered “high” (biggest) and “low” power objectives because of the power of magnification they have. These may vary from 10x-43x • Revolving Nosepiece-the assembly that contains the objective lenses
5. Base-area on which the microscope rests and used to help carry the microscope 6. Arm-vertical piece that supports the body; also used to help carry the microscope 7. Body Tube-the portion of the microscope connects the objective lenses to the ocular lens
8. Stage-the platform upon which objects to be examined are placed; Some can be moved up and down 9. Stage Clips-hold the object to be viewed in place 10. Diaphragm-series of holes that control the amount of light that reaches the object to be viewed. Sometimes aperture (opening) numbers are found on holes.
11. Light Source- usually an electric light or a mirror • 12. Course Adjustment Knob-used to bring the object into view. Always look to the side when using this and NEVER use it with the high power objective. • 13. Fine Adjustment Knob-used to clear up the view of the object. Can be used with any objective lens.
Diaphragm Ocular lens(Eyepiece) Body Tube Nosepiece Arm • Objectives • Scanning-shortest • Low-mid-size • High-longest Stage Stage Clips Coarse Adjustment Fine Adjustment Light Base
C. Care and Use 1. Always carry the microscope by the arm and the base. 2. Cleaning-be sure that all lenses are clean using lens paper provided by your teacher and wiping off lenses in circular motions. Plain water may leave images blurry.
C. Handling and Use 3. Turn on the microscope and then rotate the nosepiece to click the scanning objective into place. 4. Place a slide on the stage and secure it using the stage clips.
4. Focusing a. While looking from the side, crank the lens down as close to the specimen as possible without touching it. Use the coarse adjustment knob (large knob) to bring the image into view or make it bigger (“magnification”). Look through the eyepiece lens and focus upward only until the image is clear **NEVER USE THIS KNOB ON HIGH POWER! It may crash into the slides which could break both the slides and the lenses!
Use the fine adjustment knob (small knob) to make is sharper or to finish the focus (“resolution”). This knob may be used with any power.
5. Once you have an image in view, rotate the nosepiece to view it under different powers. a. When you want to change the view of the object between low and high powers you will only need to use the fine adjustment knob. b. Again, you should NOT focus with the course adjustment knob while using high power, as it leads to broken slides.
Adjustment of Light- • Remember that the condenser controls the quality of light that reaches the slide. • To control the light adjust only the diaphragm. Be careful-too much light can wash an image out.
When you are done viewing objects, return your microscope to its storage place with the light source off and the scanning objective in place. ***Special Note: As we increase the power of the objectives we use, the smaller our field becomes and we often require less light. In other words-we see less of the object but sometimes better detail.
E. What's Your Power? 1. To calculate the power of magnification, multiply the power of the ocular lens by the power of the objective. a. 10 x 40= 400x What are the powers of magnification for each of the objectives we have on our microscopes? Fill in the table on your worksheet.
We can see better details with higher the powers of magnification but we cannot see as much of the image. Which of these images would be viewed at a higher power of magnification? 2.Comparing Powers of Magnification
F. How to make a wet-mount slide … 1 – Use a clean slide and cover slip 2 – Place ONE drop of water in the middle of the slide. Never use too much or the water will run off the edge and make a mess! 3 – Place the edge of the cover slip on one side of the water drop.
4 - Slowly lower the cover slip on top of the drop. Lower slowly Cover Slip 5 – Place the slide on the stage and view it first with the scanning objective. Once you see the image, you can rotate the nosepiece to view the slide with the different objectives. You do not need to use the stage clips when viewing wet-mount slides! F. How to make a wet-mount slide …