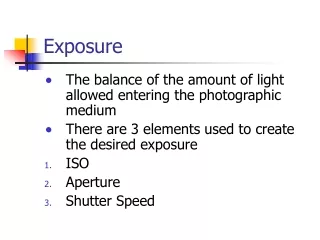
Mastering Your Camera's Light Meter for Perfect Exposure
Explore advanced techniques for using your camera's light meter effectively to achieve optimal exposure in your photos. Learn about different metering modes, exposure compensation, and program shift to take full control of your camera settings.

Mastering Your Camera's Light Meter for Perfect Exposure
E N D
Presentation Transcript
Any time you half press the shutter button, the light meter activates. • As we know, it measures the light in your scene, and calculates a shutter speed and aperture. ( And ISO, if your camera is set to auto ISO) • You already know what your light meter does, but what do you do, when it encounters issues in your photo? THE LIGHT METER REVISITED
MATRIX METER: It divides your image into a grid and takes a separate meter reading for each cell in the grid. These cells are then analyzed to determine an exposure setting. • The total number of cells is not nearly as important as how well the camera processes the data it gathers from those cells. METERING MODES
CENTER – WEIGHTED AVERAGING: A variation of Matrix metering, this also divides your image into a grid of cells, but when analyzing the readings, it gives preference to the cells in the MIDDLE of your image. • Designed to be used when your subject is in the middle of the frame. METERING MODES
PARTIAL METERING: This setting only meters cells in the middle of your image, the size of the area is only about ten percent of the total scene. • Provides a way to address backlighting troubles, because the partial meter completely ignores the cells that sit outside the metered area. METERING MODES
SPOT METERING: Measures only a small area of your image, usually the center, the metering from this area is the only information used to calculate an exposure. • This area is much smaller than what a partial meter provides, and it doesn’t take any other areas of the image into account. • Provides precise readings, especially to very small details. METERING MODES
http://www.youtube.com/watch?v=Jh_Fc4JKOBw METER MODES
Frame a shot with a bright subject • Press and hold the shutter button, take note of exposure settings • Reframe so the majority of the frame is filled with dark areas and note if the exposure settings change • If your exposure settings do not change, then you know your camera locks exposure when the shutter button is held down. LOCKING EXPOSURE
Your light meter, meters/measures the luminance of light reflected by your subject. • The most important thing you need to know about your camera’s light meter is that it always assumes that it is pointed at something that is 18% gray. • In other words, your light meter calculates an exposure recommendation that will accurately reproduce middle gray under your current lighting. • A typical scene reflects 18% of the light it hits, this assumption is fairly accurate. WHAT YOUR LIGHT METER METERS
To get the best result, you’ll want to meter off something that is middle gray, such as an 18% gray card. • Please note, that this assumption will not always be correct, some instances might have a subject that is darker than the “18%” gray mark which can cause you metering settings to be confused.
When you start messing with the camera’s carefully calculated exposure settings, you risk over/under exposing your scene. • Having said that, sometimes it is ok to over/under expose a highlight to get better tonality in your subject. THE RISK OF OVER/UNDER EXPOSURE
Allows you to specify an amount of over/under exposure. • Most cameras let you adjust exposure compensation in ½ or 1/3 – stop increments. • This lets you think in purely relative terms with no concern for shutter speed or aperture. Exposure Compensation
If you decide your scene needs to be underexposed by a stop or properly render some black objects, simply press the minus exposure button twice. • Your camera will meter as normal to determine its usual adequate exposure. • Take note that on automatic mode will not provide you access to exposure compensation, so you’ll have to switch to program mode. Exposure Compensation
Program Shift, lets you automatically change between equal exposures after the camera has metered. • In other words, you can switch quickly to a different shutter speed or aperture, while maintaining the correct exposure. • Ex. You decide to meter and then use Program Shift to switch to a wider aperture because you want a shallower depth of field. • Essentially your metering first, then simultaneously moving to your shutter speed or aperture setting. Exposure Compensation and Program Shift
Using a built in light meter, you can force an over or under exposure by pointing the camera at something darker or lighter. • Meter off lighter subject = under expose • Meter off a darker subject = over expose • Since your camera will lock exposure at the same time it locks focus, MAKE SURE you meter off something that is the same distance as the object you want in focus. Controlling Exposure with your Light Meter
The LCD screen on your camera greatly increases the brightness, and possibly color contrast and saturation in any image. • This is due in part that the camera’s creator wants you too be able to see your picture in direct sunlight. • A built in Histogram, allows you to determine if your camera has certain exposure problems. IN CAMERA HISTOGRAMS
The histogram flashes any areas that have clipped highlights or shadows. http://www.youtube.com/watch?v=DXK6ena5Fk8 IN CAMERA HISTOGRAMS
A Histogram is a simple graph of the distribution of all tones in your image. • A Histogram provides a bar chart showing how much of each shade of grey is present in the image, with each vertical line representing one shade. • Black is at the far left, White is at the far right. HISTOGRAM DEFINED
In addition to spotting over and underexposed problems, you can use your camera’s histogram to determine the amount of contrast in your image. ASSESSING CONTRAST
Shows a separate Histogram for each color channel (Red, Green, and Blue) • If the three channels are way out of registration there's a chance your image has a white balance issue. THREE CHANNEL HISTOGRAM
Bracketing as you should already know, is the process of shooting extra exposures above and below your target exposure to give yourself a margin of error in your exposure calculation or adjustment. • The easiest way to bracket is with your exposure compensation control. • Take a shot, dial in an underexposure, and then shoot again. BRACKETING
As always with exposure compensation, you'll have no way to control how the camera achieves its over or under exposure. • Bracket when you are taking photos of landscapes, still lifes, portraits, and other nonchanging static scenes. BRACKETING
Find it in menu, Press the shutter button, the camera shoots an image at the recommended metering and then automatically adjust to one stop of underexposure and one stop of over exposure. AUTO BRACKETING