Download
1 / 42
420 likes | 450 Views
Learn how to create accessible PDF documents using Adobe Acrobat 9, featuring built-in accessibility features and compatibility with assistive technology. Improve accessibility for users with disabilities.

E N D
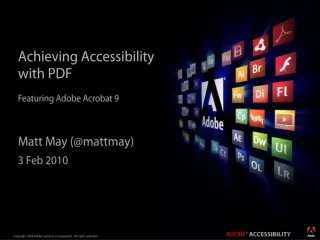
Achieving Accessibility with PDF Featuring Adobe Acrobat 9 Matt May (@mattmay) 3 Feb 2010
Agenda • What is Accessibility? • Why is it Important? • Acrobat 9 and PDF Accessibility Overview • LiveCycle Designer Accessibility Techniques
What is Accessibility? • Accessibility involves two key issues: • How users with disabilities access electronic information • How content designers, developers, and authors produce content that functions with assistive devices used by individuals with disabilities.
Adobe Acrobat 9 Accessibility Overview • All products in the Acrobat family, Reader, Acrobat Standard, and Acrobat Professional work with conventional assistive technology products such as the popular screen readers JAWS and Window Eyes. • All of the Acrobat products also have built in accessibility features such as Read Out Loud speech synthesis, the ability to control the contrast between background and text, and the ability to provide a large type display using the Reflow feature. • Pro versions provide authors the ability to validate and create accessible PDF documents and forms from a variety of original sources including scanned paper documents.
Product Features: Lowering Barriers to Accessibility • Works in Conjunction with Conventional Assistive Technology • Screen Readers: • Windows: NVDA, JAWS, SuperNova (Reader / Magnifier), Window-Eyes • Linux: Orca • Mac OS: VoiceOver • Voice Recognition: Dragon NaturallySpeaking (Windows) • Screen Magnifiers: Lunar, ZoomText (Windows) • Built-in Features in Adobe Reader 9 and all versions of Adobe Acrobat 9 Mean There is Accessibility without Additional Software • Incorporates Operating System Accessibility Features • Read Out Loud, Reflow, High Contrast View, Autoscroll, Accessibility Setup Assistant
Product Features: Providing Accommodation for a Variety of Disabilities • Accommodation Achieved With or Without 3rd Party Assistive Technology • Blindness (Text to Speech functionality: Read Out Loud and Screen Reader Compatibility also support for Braille output – refreshable keyboards, Braille embossers) • Low Vision (Text to Speech functionality, Support for Magnification and Large Type Display: Reflow, High Contrast Viewing, Read Out Loud, Screen Magnifier Compatibility) • Limited Mobility (Autoscroll, numerous keyboard equivalents, compatibility with alternate input devices, Support for Voice Recognition - Dragon, ViaVoice) • Cognitive (Read Out Loud, Compatibility with TextHelp’s PDFAloud which highlights content as it is being spoken)
Product Features: Built In Accommodations • Auto-scroll: moves the page for you • View > Automatically Scroll • Keyboard: Shift +Ctrl+H
Product Features: Built In Accommodations • Export to Other File Formats • Reader: Save as Accessible Text • Acrobat: Export to: • Word Document • Rich Text Format (RTF) • HTML • XML • Text • High Contrast View • Alters text and background colors • Edit > Preferences (Ctrl-K) • Select Accessibility • Check “Replace Document Colors”
Product Features: Built In Accommodations Read Out Loud – Reads to You • View > Read Out Loud > Activate Read Out Loud • Shift + Ctrl + Y activates Read Out Loud • Shift + Ctrl + V reads the current page • Shift + Ctrl + B reads the entire document • Shift + Ctrl + C pauses reading • Shift + Ctrl + E stops reading
Product Features: Built In Accommodations • Form Fields • Edit > Preferences (Ctrl +K) select Reading and select “Read Form Fields” • Reflow – Large Type Display • View > Zoom > Reflow • Ctrl + 4 • Alt + V + Z + R
Product Feature: Optimize Adobe Acrobat / Adobe Reader for Best Results • Accessibility Setup Assistant Configures the User Agent for Optimal Performance with Assistive Technology • Adobe AcrobatAdvanced > Accessibility> Setup Assistant • Adobe Reader Help>Accessibility Setup Assistant
Adobe Acrobat Pro Versions Accessibility Details • Compatible with Conventional Assistive Technology • Has Built in Accessibility Accommodations • Read Out Loud • High Contrast • Reflow • Autoscroll • Accessibility Setup Assistant • Facilitates Accessible Authoring • OCR • Add Tags • Touch Up Read Order Tool • Accessibility Checker
The File Format: Accessibility Requirements • Logical Reading Order –Does it make sense when you listen to it? • Alternate Text Descriptions for Non-Text Elements –Have alternate text descriptions been added to graphics for those with visual disabilities? • Logical Tab Order (Forms) – Can you navigate the form in a way that makes sense? • Short Descriptions (Forms) – Are audible short descriptions added to form fields for those with visual disabilities?
Product Feature: Acrobat TouchUp Read Order Tool • TouchUp Reading Order Tool in Acrobat 9 Professional for PDF Accessibility Repair • Review and correct reading order • Review and correct basic tagging issues • Add Alternate Text to Figures • Add Short Descriptions to Form Fields • Tag simple tables quickly and easily • Benefits • Quick and easy to detect tagging errors • Easy to fix most common errors
Scenarios for Accessible PDF • You Have a PDF File • Scanned PDF • PDF Forms • Acrobat Forms (Forms Toolbar in Acrobat 9 Professional) • Searchable PDF • You Intend to Create a PDF File • Applications that Create Tagged PDF • PDF Maker (for Microsoft Office) • Other Applications • PDF Form • LiveCycle Designer (Application Distributed with Acrobat 9 Professional)
The PDF Accessibility Workflow.... • Ask Yourself a Series of Questions in this Order • Is the PDF a Scanned Image? • Is the PDF Intended to be a Form? • Is the PDF Tagged? • Are the Items Properly Tagged? • Verifying read order • Verify proper tagging (i.e., figures, tables, etc.) • Add alternate text descriptions to graphics • Add short descriptions to form fields • Have I Missed Something? • Run the Accessibility Checker • Make recommended and appropriate repairs until no problems found
1. Open the PDF File • From Acrobat • From the Menu • File > Open • Keyboard Shortcut • Ctrl + O • Accelerator Keys • Alt + F + O • From Outside of Acrobat • Tab to file and select (begin typing file name) • Click on a PDF file • Right Mouse Click (“Open With...”)
2. Analyze the Content – Give Yourself an Idea of What Lies Ahead • Determine the Complexity of the Document / Page • Short document (a few pages) or a long document (many pages) • Single Column / Multi Column? • Are there graphics present? • Tables? • Does it appear to have multiple headings? • Does it appear to have form fields? • Is the layout easy or difficult to follow (side headings for example)?
3. Determine if the PDF File is a Scanned Image • Verify the presence of searchable text • Zoom In, Look for “Jaggies” • Search for Text on the Page (Ctrl F) Run “Read Out Loud” on the Page(First, Activate Read Out Loud: View > Read Out Loud, or Shift + Ctrl + Y, or Alt + V + A + A) • Menu: View > Read Out Loud > Read This Page Only • Keyboard: Shift+ Ctrl+V • Alt + V + A + P • If it is an image, Read Out Loud will prompt you to run the optical character recognition engine, “Recognize Text Using OCR” (see next slide)
3. Determine if the PDF File is a Scanned Image • Perform the Quick Check • Advanced > Accessibility > Quick Check • Shift + Ctrl + 6 • Alt + A + A + Q • Perform the Full Check • Advanced > Accessibility > Full Check • Alt + A + A + F
If it is a Scanned Image... Perform OCR • Optical Character Recognition • Menu: Document > OCR Text Recognition >Recognize Text Using OCR • Formatted Text andGraphics (ClearScan for Acrobat 9) • Verify Language • Lowest Downsampling (600 dpi) • Alt + D + Z + S • Search for and Correct “Suspects” • Menu: Document > OCR Text Recognition > Find First OCR Suspect • Proofread (Touchup Text Tool) • Read Out Loud Can AlsoLaunch OCR
4. Locate URLs and Activate Links • Use Acrobat’s Create Links from URLs CommandThis has the effect of converting URLs in a PDF document to active hypertext links • Advanced > Document Processing > Create Links from URLs • ALT + A + D + C
5. Determine if the PDF File is Meant to be a Form • Visual Inspection • Does the Document Appear to be Soliciting Information – Name, Address, Social Security Number? • Read Out Loud / Screen Reader Also Offer Clues for the Visually Impaired
If the PDF File is Intended to be an Interactive Form...Add Form Fields • Automatically detect Form Fields • Forms > Run Form Field Recognition • Alt + O + R or if you prefer • Advanced > Accessibility > Run Form Field Recognition • Alt + A + A + U • Add form fields using the Acrobat Forms Tools • Menu: Tools > Forms> Show Forms Toolbar • Alt + T + R + B
If the PDF File is Intended to be an Interactive Form...Add Form Fields • Add Form Fields to the Tags • Add Tags after adding form fields: Advanced > Accessibility > Add Tags to Document • Advanced > Accessibility > Add Form Fields to Tags • Alt + A + A + D
Or Manipulate the Form in the Adobe Designer • Or Manipulate in the Adobe Designer • Menu: Advanced > Forms > Make Form Fillable in Adobe Designer…(Alt + A + F + M) • Other LiveCycle Designer Options Available by Selecting from the Menu: Advanced > Forms from the Menu > Make Form Fillable in Adobe Designer (Alt + A + F + M)
Using the Designer: Open in the Designer from Acrobat • Open the Form in the Designer • Forms > Create New Form • Alt + O + N • Start with an Electronic Document • Use the current document • Run Auto Field Detection
Using the Designer: Verify Designer’s Accessibility Settings • Open the Accessibility Palette • Window > Accessibility • Alt + W + C • Shift + F6 • Verify that Screen Reader Precedence is properly set
Using the Designer: Do This, Not That • Combine Text Field Objects with Captions
Using the Designer: Merge Fields and Captions • Merge as Caption Command • Layout > Merge as Caption • or Right Mouse Click and select the Merge as Caption option.
Using the Designer: Verify Tab Order • View > Tab Order • Alt + V + T • Or use the tab order button • Shift + Click the First Item • Click remaining items in the desired order
6. Determine if the PDF File is a “Searchable PDF” • If you have performed the previous steps on the other PDF file types, your PDF will be a “searchable” PDF at this point • You Have Ruled Out or Corrected for the Scanned Document • You Have Ruled Out or Corrected for the Form • Now It Behaves as if it Came from a Word Processing or Desktop Publishing Application (Print > Adobe PDF)
7. Determine if the PDF File is Tagged • Verify the presence of tags, add tags if necessary • Verify Document Properties (Lower left corner of document properties dialog) • Menu: File > Document Properties • Keyboard: Ctrl + D • Display the Tags Panel and use the Options Menu to verify Document is Tagged PDF • Menu: View > Navigation Panels > Tags • Run a Quick Check • Run a Full Check
If the PDF File is Not Tagged...then add Tags to the File • Add Tags to Document • Menu: Advanced > Accessibility > Add Tags to Document • ALT + A + A + A
8. Determine if the Items are Properly Tagged • Use the TouchUp Reading Order Tool • Menu: Advanced > Accessibility > TouchUp Reading Order • ALT + A + A + T • Verifying read order (Follow the Numbers)
8. Determine if the Items are Properly Tagged • Show Order Panel Button onTouchUp Reading Order Tool • Menu: View > Navigation Panels >Order • ALT + V + N + O • Add alternate text descriptions to graphics • Add short descriptions to form fields • Verify proper tagging (i.e., figures, tables, etc.)
9. Make Sure You Have Not Missed Anything • Run the Accessibility Full Check • Menu: Advanced > Accessibility > Full Check • ALT + A + A + F • Make recommended and appropriate repairs – • Read the Report, Follow the Hyperlinks • Repeat this process until “No Problems Found”
Microsoft Word to Accessible PDF – Use the Adobe PDFMaker • Add Alternative Text to Graphics in the Word File • Select an image, use Format Picture dialog, add ALT text using the Web tab • Do NOT Use Spaces, Tabs to create tables, use the Table Editor • Do NOT Use Character formatting for Headings, Use Styles • Set Your Preferences • From the Microsoft Word Menu: Adobe PDF > Change Conversion Settings • ALT + B + S • Make sure “Enable Accessibility and Reflow with Tagged PDF” option is selected
Microsoft Word to Accessible PDF – Use the Adobe PDFMaker • Convert with Adobe PDFMaker • From the Microsoft Word Menu: Adobe PDF > Convert to Adobe PDF • ALT + B + C • Select the icon • Check the Results in Adobe Acrobat 9 • Alt + A + A + F • Follow the Suggestions for Repair, Repeat Until No Errors Detected
A Caution Regarding Automated Checking • There is NO Accessibility Button • Tell Your Customers Accessibility Requires Human Testing in addition to Automated Checking • Checking Can Only Detect for the Presence or Lack of Required Items • Cannot Check if an Item is Correct or Appropriate • Accessibility is a New Item for the Production Workflow – Like Authoring, Layout, Proofreading, etc. • Note Also, Publishers Will Need to Employ a Variety of Techniques and Methods
Loose Ends (Some Common Errors That Crop Up) • Check the Language Attribute in Acrobat • File > Properties (Ctrl D) • Choose the Advanced Tab, Select the Appropriate Language • Use Tags Panel to Provide Table Headers <TH> in First Table Row • In LiveCycle Designer, First Page Subform Needs to Have a Language Set • Fix Tab Order Does Not Correspond with Read Order Error • Display the Pages Panel: View > Navigation Panel > Pages • Select a Page and then Select All (Ctrl + A) • Select Page Properties and Check “Use Document Structure”
For More Information • Adobe’s Accessibility Website: Your Resource for Acccessibility Information for Adobe Products • www.adobe.com/accessibility • Adobe’s Voluntary Product Accessibility Templates (VPATs) • http://www.adobe.com/resources/accessibility/tools/vpat/