Download

1 / 3
30 likes | 37 Views
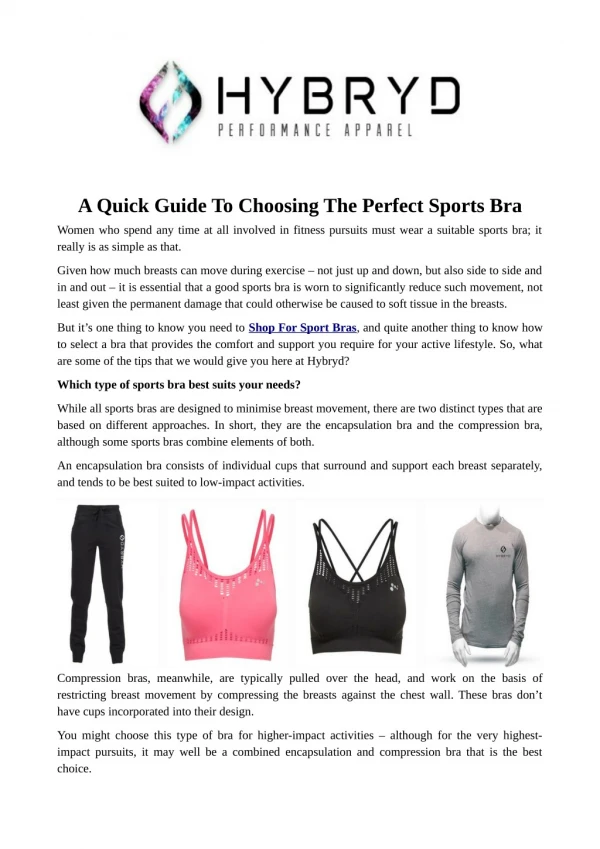
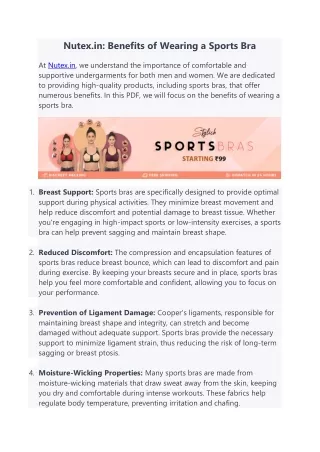
I am going to show you the right way to take a top, like a sports activities bra, that you have already got and add some mesh or other fabric onto it giving it just a bit bit of a unique, distinctive look.

E N D
I'm going to point out you the way to take a high, like a sports activities bra, that you have already got and add some mesh or other fabric onto it giving it simply slightly little bit of a unique, unique look. There are such a lot of appears that could possibly be obtained with just slightly piece of fabric. However, there are various other appears to be like you would create. Our cowl costume is 2-toned which is made simply by using a different color. A difference in material may make an enormous difference. You would use a matching colour that would merely create a change in texture. This technique is tremendous easy and tremendous enjoyable! You possibly can use mesh, Lycra, or even lace. If you're on the lookout for one thing to sort of jazz up that top slightly bit, this video is likely to be simply the one for you! It doesn't matter whether or not you call it gathering or ruching. The technique to get this look is to collect up, or some name it ruche, the fabric that's sewn over one aspect of the sports activities bra. It only matters that you know the look you are trying to achieve. It is a very cute, sweet look that softens up a costume and provides it loads of texture. For those who do not need access to, or don't need to use the same coloration, you should utilize a coordinating or contrasting coloration. I am going to finish this explicit venture using a corresponding mesh. The first step is to decide on the fabric that you'll use to complete this venture. It only must be huge enough to cover one aspect of the sports bra with further materials around it to permit for the gathering or ruching. You might want to utilize that scrap of fabric that you already have, don't want and is large sufficient to fully cowl the world that you just wish to cowl plus the additional needed. You'll only want a really small piece of fabric. Our cover costume uses a coordinating mesh to get that two-toned look. One of the deciding factors could also be whether or not the bottom of the costume has appliqués or rhinestones. In that case, you would want to use appliqués or rhinestones that match. Subsequent, determine in order for you to make use of an appliqué or rhinestones, significantly at the middle of the sports bra or alongside the straps or wherever you want. This technique is very easy to do. To begin with, pin the fabric to the sports bra in strategic locations - where the strap meets the highest of the shoulder, the place the two cups would come together in the center, at the underside of the sports activities bra, the underarms, and the middle again. You must gently stretch the fabric across the cup to the center of the again. It is best when you do this while the bra is being worn as a result of the fabric will then stretch the proper quantity to cover the bra cup. Even gentle stretching of the fabric round an empty bra cup would almost certainly trigger the cup to collapse or be misshapen. Security pins will keep the fabric from shifting when the sports activities bra is taken off and they're going to forestall the wearer from being stuck by a straight pin. Now that the material is pinned to the bra at strategic factors, I'm going to hint the surface of the bra on the fabric. I'm starting at the middle back, up along the top to the strap, down the neckline, the entrance center, underneath the bra and all the best way around the back. Additionally, whether it is being worn, it is best to use security pins as a substitute of straight pins to pin the fabric to the bra at these strategic spots. With that in mind, I can pretty much inform you probably have gone too close to or too removed from the bra. You'll be able to normally sort of feel the bra underneath the material as you hint around it and that may allow you to mark the fabric in the correct spots. Subsequent, I yoga pants and sports bra will unpin the material and lay it flat on the desk and lower the fabric across the markings - not on the markings but actually adding that little additional room that can be wanted for the seam allowance that you want to use. For this project, I'm going to use a ½ inch seam allowance. It's possible you'll need a small allowance of ¼ inch or a bit of larger - up to ½ inch. It can save one step to simply cut it with that additional materials, that manner we know that we've already obtained out seam allowance within the pattern and all edges have the allowance in- built. We want the material that we are actually going to make use of on the sports bra to be ruched, or gathered, all the way round to the again. Beginning from what could be the center of the sports activities bra and about, at the very least, an inch from the bottom, I am going to chop the fabric piece from what can be the middle of the bra in the direction of the back of the sample piece slicing it into several strips. As a way to make the final sample piece massive sufficient to permit for this gathering, or ruching, I am going to chop this interim sample piece into strips. The explanation for beginning not less than an inch from the underside and ending at least an inch from the top is to allow for the seam allowance. My final minimize will end up about, or no less than, an inch from the top. The width of the strips isn't necessary. They could also be wherever from a little more than a quarter of an inch broad to about a half inch vast. Ultimately, we would like more gathers in the front than within the back. This will create the flexibility to allow enough room on the final sample piece so that you'll be able to ruche it or collect it. You'll be able to measure the distance between these strips exactly if you want, but you actually do not need to. On this case, we wish to gather it more within the front so on some of the slices, I'm not going to chop quite all
the way by means of. We don't need to collect on the highest edge of the interim pattern piece because that will be the front and back neckline, so do not slice the fabric when you attain the neckline. Next, I'm going to lay these pieces down on the material I'll use for the ultimate sample piece with about a ½ inch space in between every of them. The slices needs to be right to left only. To have extra gathers in the middle of the bra, you will have the gap between the slices to be better on the facet that could be middle entrance of the bra and the distance between them to be less in the back. The house could possibly be a little bit extra or rather less relying on how many gathers you need. Now that I've laid these strips with the gap between them that I would like, I am going to simply go ahead and free hand minimize across the interim pattern piece. You might want to mark round the surface of the items, or at the least pin the strips in place. It all relies upon in your consolation stage, which will just about be dependent on your experience. Now that you've got your remaining pattern piece, lower the fabric that you will ruche, or gather. If you're only going to use this technique this one time only, you can skip making a last pattern piece and simply pin the cut up interim sample pieces on the material you want to ruche, or collect, and cut it. This will give you your ultimate pattern piece. This will prevent the step of making a closing sample piece. Once i get to the strap, I will fold the seam allowance of the fabric below so that it's between the material and the bra. Now that I have cut the fabric, I am going to pin it alongside the highest (the neckline) to the strap tucking the seam allowance over the top and inside of the bra. This gives a clear, finished edge right here. At this level, I'll probably go forward and sew the part that I just pinned. I prefer at hand stitch the fabric to the sports bra because that will enable me to hide the stitches. If you utilize a sewing machine, you'll find yourself with topstitching on the bra. Once i get to the center back of the sports activities bra, I'm going to show the seam allowance in in order that it is between the material and the sports activities bra like I did over the strap. I'm then going to pin it around the armhole to the middle again, again tucking the fabric contained in the bra. It will give it a pleasant, clean, finished look. Since I've sewn the highest edge of the material to the sports activities Bra, I am going to show the seam allowance beneath on the middle front and either gather the front or create cute little pleats down the middle front. So what we have now here is a number of cute little pleats going all the way in which up and down. You'd then do the same thing on the edge that will be the back. Be certain the little pleats, or gathers, go the identical route after which just hand stitch them in place from behind the sports bra being careful to not sew via to the front of the bra. If the stitches don't go all the way via the bra, the stitches won't show. Simply stitch the material through the back of the bra as a lot as doable in just a little whipstitch going all the way around the bra’s cup. If you wish, you would do a follow run by utilizing a sheet or additional material. That would allow you to visualize precisely how many little pleats you'll have and what it would look like. The final step is to fold the underside seam allowance beneath the bra and stitch it into place again trying to keep the stitches from going through to the front. If you want extra gathers, it is super easy to do. You possibly can easily double or triple the gathers or pleats by making the house between the strips wider. It will be important to recollect, although, to not add further within the width from proper to left because we all know that measurement is correct. You might want the size (top to backside) to be longer, however not the width (entrance to again) of it. Then you possibly can proceed pinning it to the highest as described above. If you happen to choose, you possibly can simply minimize the follow piece in strips and adding space between the new strips. Also, be certain that each time you come to an edge of the bra, you fold the material beneath to create a pleasant clear, completed look. When I am hand stitching with stretchy fabric, I like to knot the thread each few inches in order that if the thread should break, it will likely be a very small space affected and the challenge is not going to fall apart utterly. For those who by accident create a stitch that reveals by means of or causes somewhat imperfection on the entrance of the bra, you can put rhinestones or appliqués on the spot. Even when you do not need any imperfections in your sewing, you may want to sew appliqués along the middle seam, the back seam or each. So if you're looking to put a bit ruching on your top, this just may be the video for you. Have enjoyable and enjoy your “project! I realize it seems complicate while you see it on an outfit, but it is basically simply this simple. I know I say that a lot, but it actually is. You'll notice on the costume initially of this tutorial that there are matching appliqués on the highest and the underside, along with different embellishments. In case you simply take a chance, you will be amazed at what you are able to do. For those who loved this demonstration, make certain to take a look at our different demonstration or the bdancewear videos on YouTube. You may subscribe to our channel in order that you do not miss any of the wonderful DIY movies that we could have coming out.