Download
1 / 23
230 likes | 251 Views
Learn about Unix monitoring utilities, what to monitor and why. Explore monitoring with sar, reconfiguring the kernel, patching the kernel, and more. Practical examples and tips provided.

E N D
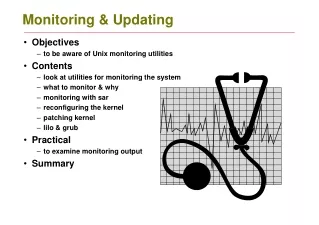
Monitoring & Updating • Objectives • to be aware of Unix monitoring utilities • Contents • look at utilities for monitoring the system • what to monitor & why • monitoring with sar • reconfiguring the kernel • patching kernel • lilo & grub • Practical • to examine monitoring output • Summary
Why Use Monitoring? • Monitoring is useful for benchmarking a system • If the system appears slow or sluggish • use monitoring to look for problems • too many processes or users • disk activity concentrated on one disk • Users complain that system isn't as good as it used to be • gather performance data for a period of time • compare with benchmarks • Analysing monitoring statistics is subjective • there are no hard and fast absolutes • data has to be compared over a period of time
What Do We Monitor? • Process (CPU) activity • monitor processor loading • know the most processor-hungry programs • Disk access (I/O) activity • understand how your applications use storage devices • observe I/O activity and its distribution • know the most I/O intensive programs • Memory utilisation • weigh amount memory against number of users and what they do • minimise swapping and paging activity • monitor kernel tables: don't allow them to overflow • Network activity • learn the 'nEtiquette' • don't load the network with activities which should be performed locally • All of the above means: KNOW YOUR SYSTEM
System Activity Reporter (sar) • Use sar to monitor the system • can look at current system performance • can look at historical data collected via cron jobs in files/var/log/sa/sadd and /proc • Install SuSE package sysstat to get sar • Collects data on cpu, disk, memory, paging etc. • over the next few slides we will see examples of sar reports • Compare values over a period of time (days or weeks) • system monitoring is an iterative process • often when you attempt to cure one bottleneck, new problem is introduced • Output not immediately meaningful • Not provided by all Unix systems • on BSD based systems (and AIX) look for vmstat • vmstat uses different options and reports, but provides the same kind of information # rpm –ivh http://ftp.sunet.se/pub/os/Linux/distributions/suse/suse/i386/9.3/suse/i586/sysstat-5.0.6-4.i586.rpm # chkconfig sysstat on # /etc/init.d/sysstat start
Trouble-shooting With sar (1) • Monitoring CPU usage • without any options (just time interval and number of samples) sar will report overall processor utilisation • look for zero idle time (machine overloaded?) • look for high system values: may be hardware problems # sar 10 5 Linux 2.6.11.4-20a-default (linux) 10/03/05 10:42:03 %user %system %idle 10:42:13 3.0 27.0 70.0 10:42:23 2.0 11.0 87.0 10:42:33 32.0 68.0 0 10:42:43 15.0 85.0 0 10:42:53 16.0 84.0 0 Average: 13.6 55.0 31.4
Trouble-shooting With sar (2) • Monitoring memory • w -if swapping, not enough physical memory • B -large values, not enough physical memory • Other memory options to use with sar • q if queue very large, too many processes • r look for small free swap space # sar -W 10 2 20:48:12 pswpin/s pswpout/s 20:48:22 0.00 0.00 20:48:32 0.00 0.00 Average: 0.00 0.00 # sar -B 5 2 20:57:22 pgpgin/s pgpgout/s fault/s majflt/s 20:57:27 0.00 15.97 7.19 0.00 20:57:32 0.00 0.00 4.80 0.00 Average: 0.00 7.99 5.99 0.00
Trouble-shooting With iostat • Monitor disk performance • d -device utilization report • look for uneven balance across disks and fast service times • p - analyses transfers to/from partitions • look for anomalies and high values # iostat –d 5 1 hda Device: tps Blk_read/s Blk_wrtn/s Blk_read Blk_wrtn hda 0.36 5.97 3.66 4374318 2680040 Device: tps Blk_read/s Blk_wrtn/s Blk_read Blk_wrtn hda 2.40 0.00 33.60 0 168 # iostat –d –p 5 1 hda Device: tps Blk_read/s Blk_wrtn/s Blk_read Blk_wrtn hda 0.36 5.97 3.66 4376558 2684600 hda3 0.61 5.90 3.31 4325064 2428528 hda2 0.00 0.02 0.00 13462 32 hda1 0.02 0.04 0.08 31320 57360
Performance Monitoring: Conclusions • Learn your system • you must understand all your system resourses and their interaction • you must know who does what, when, where and why • Accumulate full statistics when the system is idle • this will give you a common reference point for the system behaviour • Monitor performance when the system is busy • this will help you to learn 'normal' values • When problem strikes • define it as well as you can • use monitoring tools to identify the cause • correct the problem • continue monitoring • Monitoring and tuning processes are iteractive
Other Utilities • Various system provide various monitoring utilities • These are some to look out for: vmstat virtual memory and cpu statistics mpstat process statistics netstat network statistics • Don't forget about ps to look at current processes • Systems with X-windows often have good graphical interfaces for display system operation in real time • Accounting service • collects information about users and processes • requires vast amount of disk space • data collected through several commands run through cron
Tuning the Kernel • The Unix kernel behaviour can be adjusted • tuneable parameters are used to set various kernel parameters • data structure sizes • system thresholds to handle the expected system load • Beware - changes will affect system performance • not always in the desired manner! • Kernel tuning and rebuilding is system specific • All follow five basic steps • backup the existing kernel • tune your parameters • rebuild the kernel • reboot the system • hope it works better than before • Kerneltuning increases performance
Preparing for new kernel • Howto update/compile current kernel http://www-uxsup.csx.cam.ac.uk/pub/doc/suse/suse9.3/suselinux-adminguide_en/cha.kernel.html • 3 ways of getting the kernel: • From http://www.kernel.orgas tar-ball (for generic linux system) • From SuSE using YAST installing kernel-source package. • From SuSE RPM files. • Get needed packages and development enviroment 1. First check current version of running kernel with uname –r In my case I had: 2.6.11.4-20a 2. Install the enviroment if it is not already there (needed in all cases): (2a. package ncurces + package ncurces-devel (if needed only) 2b. package binutils 2c. package gcc + package glibc-devel 3. Install kernel-source: 3a. package kernel-source + package kernel-source-debuginfo • Find out ALL about your hardware CPU type Graphics board and chipsets Memory SCSI controllers Motherboard chipsets Audio controllers Network cards Other installed hardware
Kernel source home • Carefully read the kernel documentation /usr/src placeholder of kernel and rpm sources /usr/src/linux link to linux[-kernel-version] /usr/src/linux.vanilla link to linux, needed for patches /usr/src/linux/Documentation Linux kernel doc’s • To make a generic custom kernel Download latest kernel source from: http://www.kernel.org Download needed patches from same site or distributor site. • If needed apply patches 4. Backup old kernel source tree somewhere and then cd to /usr/src 5. Unpack kernel as it is under /usr/src/ 6. Make a link called linux.vanilla -> /usr/src/linuxkernel-whatever 7. Apply patches, for example alan cox ac found in people at kernel.org There can be vendor specific patches as well. Patch order is important.
Apply Kernel patches, if needed • If no kernel patches, skip step 7, goto the dry run! • Apply the patches, kernel source tree For a compressed patch, enter the following command : 7a. cd /usr/src/linux-whatever 7b. zcat /tmp/patch-whatever | patch -p1 2> out Accordingly the command for an uncompressed patch is 7b. patch -p1 < /tmp/patch-whatever 2> out • Allways ”dry run” first time on new kernels • Make a dry run compile, helps up, sometimes kernel wont compile if this step is omitted) 8a. cd linux.vanilla 8b. cp .configure configure.orig (Backup your old configuration, if exist) 9. zcat /proc/config.gz > .config (Get the running kernel configuration, good start point) 10. make oldconfig (11. make mrproper) for non rpm kernel sources. 12. make clean 13. make bzImage 14. make modules DONT install anything yet!
Ways to configure the kernel • Add our EXTRAVERSION to separate the new kernel from current/old • First edit the /usr/src/linux.vanilla/Makefile.to be able separating your kernel compiling attempts : EXTRAVERSION = -ac-IKEA1 • Backup the .config file • First time this file does not exist, backup after you run the make config above cp .config config.old • Installing the running kernel .config is a good startpoint in most cases zcat /proc/config.gz > .config make oldconfig • Normal ”config steps” and how the ".config" file is made • Current running kernel config options is in /proc/config.gz • If .config does not exist, a generic config will be used with your new kernel • .config is created if it does not exist or modified if it exists when configuring the kernel with one of these make options: • make oldconfig -use .config as template without questions • make config -classic config for text terminals (much coffe is needed) • make menuconfig -modern vt100/ansi terminals • make xconfig -X-Windows GUI • General config options inside the ”menues” • M=module Y=Yes, static and N=No skip • Modules are loaded into kernel when needed Static is there all the time
Kernel options, while configuring • Depending on your #make config# choice • We recommend using the make menuconfig or make xconfig • You will be presented a large menu, where you are supposed to select proper kernel support for various hardware and inner kernel workings. • Static selections will consume more memory but will respond fast • Dynamic Module will consume less memory but will respond slower • Filesystem for booting must be static, or system will not load, they live in initrd • You must now walk through all menu’s • To see what you can disable • To see what you need to support as static or module • Add support for at least what you found in ”Find out ALL about your hardware” • Now it is time for step 15, enter the kernel configuration: 15. make menuconfig (or some other shown like make xconfig)
Adding support for 3comNIC example • Walk to: ”Network device support --->” Hit enter on ”Select” Walk down to ”Ethernet (10 or 100Mbit) --->” Hit enter on ”Select” Walk down to ”3COM cards” Press spacebar to check/open 3COM cards Walk down to ” 3c590/3c900 series (592/595/597) "Vortex/Boomerang" support” press spacebar or m or y to select or n to deselect Now you have added this card to .config file! You can move with arrows to exit and exit up to main menu again. • Walk around exactly like this to select any other • This can take long time, read about all devices you add support • It is well worth the trouble, optimized kernels offer from 3% up to 40% preformance increase • Dont forget why we are here, we want to add support for our hardware!
Make the new kernel • Exit the configuration section Walk back to main menu and move to exit Press enter Question will come up if you want to save Select YES • Not nessesary step, configure dependencies type: 16. make dep (make clean or make distclean erases .config) • Extraversion will be added to output kernel now linux-2.6.11.4-20a-ac-IKEA1 • Compile A New gzipped Kernel image type: 17. make clean ; make bzImage bzImage will hide itself in the kernel source tree! • Build The Kernel's loadable Modules type: 18. make modules
Install the new kernel • Install the Kernel Modules 19. export INSTALL_PATH=/boot make install 20. make modules_install • All modules will copy to /lib/modules/kernelversion • Copy The New Kernel To The /boot Partition 21. make install • The new kernel is copied to /boot • The new System.map is copied to /boot • Check that they are really copied into /boot • The old kernel should still be there in /boot and the new with your subversion added • Depending on how you boot your linux • INITRD initial run demon, a miniroot system on ram disk. • INITRD is used to boot on raid, or special net boots cd /boot mkinitrd --omit-raid-modules /boot/initrd-kernelversion-extraversion.img \ kernelversion.extraversion (Sometimes you must "omit" some modules to make it work, dont omit modules nessesary for booting!)
Boot Loader for your kernel • Most popular are • GRUB • LILOLInux LOader • Bootloader common files • Your kernel need a bootloader, it must be configured to tell where to find the kernel and load the system /boot/boot.b Boostrap sector on disk, keeps LILO or GRUB start /boot/boot.0300 Boostrap backup sector backup on disk, keeps LILO or GRUB start /boot/message Boot message, can be a picture
LILO • Add entry for your new kernel: • In top of lilo.conf, so new kernel auto starts, change: default=linux • In /etc/lilo.conf add after last line: image=/boot/linux-2.6.11.4-20a-ac-IKEA1 label=linux initrd=/boot/initrd-2.6.11.4-20a-ac-IKEA1.img read-only root=/dev/sda1 • Update the boot.b lilo -v • Reboot and test new kernel reboot • Lilo is preferred over GRUB in optimated server systems
GRUB • Read the GRUB documentation before continue http://www-uxsup.csx.cam.ac.uk/pub/doc/suse/suse9.3/suselinux-adminguide_en/sec.grub.basic.html • Read the GRUB documentation before continue If you did the make install, and use GRUB, the new configuration is already added and the old GRUB configuration is named menu.lst.old • To manually add/check entry for your new kernel in /boot/menu.1st: In top of menu.1st, change to: default=1 After first ”title” bofore the next ”title” add a new title for the new kernel to auto start: title Linux (2.6.11.4-20a-ac-IKEA1) root (hd0,0) kernel /boot/vmlinuz-2.6.11.4-20a-ac-IKEA1 ro root=/dev/sda1 initrd /boot/initrd-2.6.11.4-20a-ac-IKEA1.img • Reboot and test new kernel reboot • GRUB is popular in modern workstations and some high end systems
Creating BOOT floppy for your kernel • Make bootfloppies for your system the SuSE way Insert a floppy and type: yast bootfloppy • You will be offered to make various boot floppies (select rescue) • Test your rescue disk reboot your linux with disk system should start on floppy and load the rest from your harddisks.
Kernel afterwork • Add APC UPS driver • We added alan cox patch to our kernel in order to support UPS USB • Now we need to compile the main driver for UPS control Prepare compiling APC UPS driver: cd /usr/src/extras/apcupsd-whatever export CFLAGS="-g -Wall“; export LDFLAGS="-g -Wall“; make distclean The ./config is insane !?: ./configure --with-upstype=usb --with-upscable=usb --enable-oldnet --enable-usb --enable-powerflute --enable-cgi --with-serial-dev=/dev/usb/hid/hiddev[0-9] --enable-http --enable-net --disable-nls --enable-apcsmart --disable-dumb --enable-pthreads --bindir=/sbin --with-libwrap=yes --enable-snmp --with-cgi-bin=/home/httpd/cgi-bin --with-css-dir=/home/httpd/cgi-bin Now make the driver make make install make clean If you want to backout you need to type make uninstall