Download

1 / 25
250 likes | 337 Views
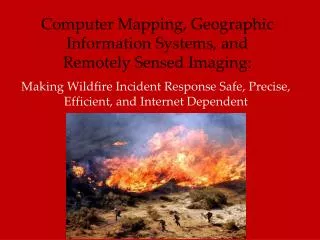
Norwegian and American scientists traverse East Antarctica using GPS devices to locate fuel depots and guide expeditions.

E N D
Mapping Missions and Geographic Positioning Systems April 4th, 2009
Norwegian and American scientists traversed across some of the least known parts of East Antarctica.
A vehicle pulled a large living module for the scientists across the East Antarctic Plateau. The 20 steel drums underneath the living module did not supply enough fuel for the entire traverse. http://traverse.npolar.no/norwegian-american-ipy-traverse/
GPS devices were used to locate fuel depots on the route of the traverse.
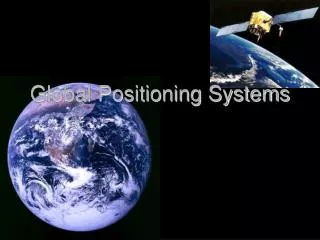
A network of GPS satellites orbiting Earth can be used to guide expeditions http://commons.wikimedia.org/wiki/Image:ConstellationGPS.gif
GPS devices use the microwave portion of the electromagnetic spectrum to communicate with the network of satellites. http://www8.garmin.com/manuals/GPS72_OwnersManual.pdf
The coordinates of a location The elevation at a location In what direction you are going (Heading) In what direction you should be going (Bearing) How fast you are moving How far you have traveled And much more GPS devices can indicate:
Getting Started with a Garmin GPS The PAGE button will switch off initial warning message and toggle among the various screens. Power On/Off The ROCKER. scrolls up and down through options.
When you are inside a building, you can use the Simulator to become familiar with the Garmin 72 pages and data fields.
Turn on the GPS Press ENTER to clear a warning statement. Press MENU. Start Simulator will be highlighted Press ENTER You will see some recently acquired data that includes Latitude, Longitude, and Elevation. Use the PAGE button to view different screens. The Simulator Mode
The GPS Information Page will indicate how many satellite signals you are receiving, your coordinates, and your elevation.
Latitude and Longitude angles originate at the center of Earth and describe the coordinates of a location. Earth Science: The Challenge of Discovery; D.C.Heath and Co. 1991
Coordinates for locations can be expressed as Degree, Minutes, and Seconds. This system is used on USGS Topographic maps For example: 41º 20’ 37” N, 71º 56’ 17” W There are other ways to indicate coordinates. Meteorologists often indicate the location of Atlantic Ocean hurricanes in Degree Decimal form. For example: 22.76 N, 59.45º W Latitude and Longitude Systems
Press MENU. Press MENU again. Use the ROCKER to highlight “setup”. Press ENTER Use the ROCKER to move to the right of the Units Tab to highlight the Location Tab. Press ENTER. Use the ROCKER to highlight your choice. You may need to scroll up to some options. Press ENTER Press PAGE This procedure is described on Page 5 of GPS Basics. A procedure to establish North Reference is also on Page5. You can change how Latitude and Longitude is expressed while in the simulator mode.
Directions for turning on the Garmin GPS are on page one of GPS Basics. When you go outside, you need to turn on your GPS unit and wait until you receive at least 4 satellite signals.
This process is described on Page One of GPS Basics. You need to name and save the location of your base station, two fuel depots, and a final destination as “waypoints”
Data includes: Latitude Longitude Elevation Accuracy Date Time You can toggle to the GPS Information Page to record hard copy data in a journal.
After reaching your final destination you can use GOTO to navigate back to a fuel depot or your Base Station. 1. Press GOTO to display the waypoints stored in the GPS 3.Press ENTER to select the waypoint that you want to GOTO. This is described on Page Three of GPS Basics . 2. Use the ROCKER. to highlight the waypoint that will be your destination.
Data Fields on the Pointer Page can indicate Bearing toward and Distance to Base Station One Data Field can indicate Bearing Another Data Field needs to indicate Distance to Next. See Page 4 of GPS Basics to change displays in Data Fields.
Heading and Bearing on the Pointer Page when using GOTO The Line at top of Compass dial shows the direction you are actually going (heading). The Black Arrow on the compass indicates a bearing to your selected waypoint. That is the direction you should be going.
Heading and Bearing are measured in degrees. http://en.wikipedia.org/wiki/Compass_rose
Heading and Bearing can describe your movements on the UMass Campus http://www.umass.edu/visitorsctr/Campus_Map/
Go to the area between Hasbrouck Lab and the Campus Center. Obtain enough satellite signals for 3D navigation. Refer to the Mapping Mission document for the mission parameters Mark, name, and save the location of a base station. See GPS Basics/ Establish, save and name the locations of two fuel depots and your final destination. Use the GPS Information Page to collect and record data for fuel depots and your final destination. Once you are at your final destination, use the GOTO to get bearing and distance to your Base Station. Navigate to the base station. Today’s Mapping Mission
Trade journals and GPS units with another team. Choose one of the following strategies to locate a fuel depot. Option 1: Use the GPS Information page to navigate to the coordinates previously recorded in a journal. The coordinates on the GPS Information page will change as you move. Option 2: Use the GOTO function and the Pointer Page to guide you to the location of a fuel depot that has previously been named and saved as a waypoint. The bearing arrow will guide you. Locate Another Team’s Fuel Depots(if time permits)
Applications of GPS technology include • Mapping a watershed • Ground truthing remote sensing data • Constructing a displacement vector diagram that describes a route Any suggestions for • Additional applications? • Introducing students to using GPS?