Download
1 / 18
180 likes | 198 Views
Filing a Motor Fuel Return Electronically. Create the data file with the spreadsheet, and submit it using the “My taxes” Website. Requirements. A computer with Excel 2003 or later installed Access to the internet. Creating The File:. Download the latest version of the Spreadsheet

E N D
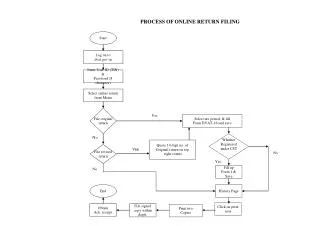
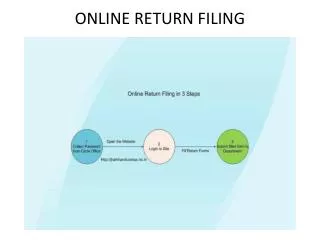
Filing a Motor Fuel Return Electronically Create the data file with the spreadsheet, and submit it using the “My taxes” Website
Requirements • A computer with Excel 2003 or later installed • Access to the internet
Creating The File: • Download the latest version of the Spreadsheet • Open The Spreadsheet • Enter Account Number and Filing Period • Select The Return to File • Complete the schedule sheets • Validate the data • Complete The Return, And validate • Export The File
Download the latest version of the Spreadsheet • Visit http://www.wvtax.gov/motorFuelInformationAndForms.html
Creating The File: • Download the latest version of the Spreadsheet • Open The Spreadsheet • Enter Account Number and Filing Period • Select The Return to File • Complete the schedule sheets • Validate the data • Complete The Return, And validate • Export The File
Open The Spreadsheet • Open the spreadsheet. • Be sure to click “Enable Macros” • You may need to change security settings to enable macros- Follow the instruction in the spreadsheet
Creating The File: • Download the latest version of the Spreadsheet • Open The Spreadsheet • Enter Account Number and Filing Period • Select The Return to File • Complete the schedule sheets • Validate the data • Complete The Return, And validate • Export The File
Creating The File: • Download the latest version of the Spreadsheet • Open The Spreadsheet • Enter Account Number and Filing Period • Select The Return to File • Complete the schedule sheets • Validate the data • Complete The Return, And validate • Export The File
Select The Return to File • Check The return you wish to work with • Click the Button to go to the return
Creating The File: • Download the latest version of the Spreadsheet • Open The Spreadsheet • Enter Account Number and Filing Period • Select The Return to File • Complete the schedule sheets • Validate the data • Complete The Return, And validate • Export The File
Complete the schedule sheets • Use the buttons on top to navigate the schedules • Or Select the desired sheet directly • Enter the Required Data. This may be pasted in as long as the data is placed into the appropriate columns
Creating The File: • Download the latest version of the Spreadsheet • Open The Spreadsheet • Enter Account Number and Filing Period • Select The Return to File • Complete the schedule sheets • Validate the data • Complete The Return, And validate • Export The File
Validate the data • After the data is entered, Click the validate button. • Correct any data entry errors that may occur. • Once data is correct, you should get a “Validation ok.” message. • Repeat this step until all the schedules are entered.
Creating The File: • Download the latest version of the Spreadsheet • Open The Spreadsheet • Enter Account Number and Filing Period • Select The Return to File • Complete the schedule sheets • Validate the data • Complete The Return, And validate • Export The File
Complete The Return, And validate • Go back to the return • Enter any additional data, such as Penalty & Interest , Discounts, Credit / Refund Request • Press The validate button to check for errors.
Creating The File: • Download the latest version of the Spreadsheet • Open The Spreadsheet • Enter Account Number and Filing Period • Select The Return to File • Complete the schedule sheets • Validate the data • Complete The Return, And validate • Export The File
Export The File • Go to the “Select Return to Export” Sheet • Select Sheet or use button • Press The “Export Selected Return” button • Choose a filename and where to save it. • A message will show where the file was saved.