Download
1 / 14
140 likes | 302 Views
Microsoft ® Small Basic. Exploring Shapes. Estimated time to complete this lesson : 1 hour. Exploring Shapes. In this lesson, you will learn about:. Creating shapes by using the Shapes object. Using various operations of the Shapes object. Animating shapes on the screen.

E N D
Microsoft® Small Basic Exploring Shapes Estimated time to complete this lesson: 1 hour
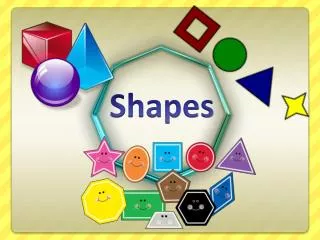
Exploring Shapes In this lesson, you will learn about: • Creating shapes by using the Shapes object. • Using various operations of the Shapes object. • Animating shapes on the screen.
Introduction to the Shapes Object So far, you have learned how to draw patterns in Small Basic by using the GraphicsWindow and the Turtle objects. This lesson introduces you to the Shapes object that Small Basic offers! By using this object, you can draw, rotate, and animate shapes in the graphics window. You can color your shapes by using specific properties of the GraphicsWindow object.
Operations of the Shapes Object By using certain operations of the Shapes object, you can give a vibrant look and feel to the shapes that you create. These operations include: • AddImage • AddRectangle • HideShape • ShowShape • SetOpacity • GetOpacity • Move • Animate • Zoom
Operations of the Shapes Object Let’s look at an example to demonstrate these operations… output In this example, we have used the ShowShape, HideShape,and SetOpacity operations of the Shapes object to perform a variety of actions on a rectangle.
Operations of the Shapes Object Let’s examine these operations in detail… • HideShape—You can hide a shape by using this operation and specifying the name of the shape. • ShowShape—You can display a shape by using this operation and specifying the name of the shape. AddRectangle—You can define a rectangle by using this operation and specifying the name, width, and height of the rectangle. • SetOpacity—You can set the opacity of a shape by using this operation and specifying the name of the shape and an opacity level from 0 to 100. • GetOpacity—You can return the opacity of a • shape by using this operation and specifying the • name of the shape.
Operations of the Shapes Object Let’s look at another example to demonstrate more operations… In this example, we used the AddImageoperation to display an image. Then we used the Move,Animate, and Zoom operations to perform various actions on the image.
Operations of the Shapes Object Move—By using this operation, you can move the shape to a different location in the graphics window. You must specify the name of the shape and the x-coordinate and y-coordinate of the new location. Animate—This operation animates a shape as it moves to a different position. You must specify the name of the shape, the x-coordinate and y-coordinate of the new position, and the duration of the animation. AddRectangle - By using this operation, you can add a rectangle shape that will appear in the graphics window. Zoom—The Zoom operation enlarges or shrinks a shape to a particular zoom level. You must specify the name of the shape and a zoom level between 0.1 and 20.
Operations of the Shape Object You can use the Shapes object to add different types of shapes in your program. You can then perform various operations on the Shapes object, such as moving the shape, setting its opacity, or adding a zoom effect. Let’s look at an example… Click on the toolbar.
Animating a Shape Let’s see an example of how to animate a shape by using the Shapes object. In this example, you animate a shape from its original position to a different position and back to its original position in the graphics window.
Rotating a Shape Let’s explore some more operations of the Shapes object by writing a program to rotate a shape. output When you run the program, the rectangle rotates in the graphics window. Click on the toolbar. In this example, you use a For loop to rotate a shape in its original position in the graphics window.
Fun with Shapes In addition to drawing shapes of different styles and sizes, you can also create unique shape designs by using conditions and loops in your program. For example, you can use a For loop to create multiple rectangles in random colors… output
Let’s Summarize… Congratulations! Now you know how to: • Create shapes by using the Shapes object. • Use various operations of the Shapes object. • Animate the shapes on the screen.
Show What You Know Write a program to display a graphics window, and perform the following steps: • Add a line and a circle to the window. • Set the color, size, and location of the shapes. • Animate the circle so that it moves on top of the line from the left side to the right side of the graphics window.