Download
1 / 54
540 likes | 557 Views
This guide covers pipe installation procedures, types of pipe, foundation support, joining techniques, and inspection tips for field office activities. Learn about rigid and flexible pipes, PVC pipe classifications, materials, and fittings. Practical information for safe and efficient installations.

E N D
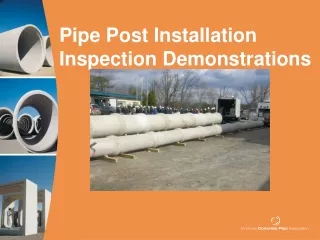
Construction Inspection for Field Office Activities Pipe and Appurtenances Installation Rev. Jan 8, 2015
Pipe & Appurtenances Installation • Objectives • Terms, Definitions and Types of Pipe • Trench Excavation/Safety • Foundation • Bedding and Laying • Joining Pipe • Thrust Blocks • Embedment & Backfill • Pressure Testing
Terms & Definitions Open the Pipe Installation book to page 1-4 notice that “Cover” is the fill height over the top of pipe
Terms & Definitions Pipe Parts:
Terms & Definitions Terms & Definitions
Types of Pipe • Rigid: transmits load on pipe through pipe walls to foundation • Clay pipe • Concrete pipe • Reinforced concrete cylinder pipe • Pre-stressed concrete cylinder pipe
Types of Pipe • Flexible: transmits part of the load on pipe to soil at sides of pipe • Steel pipe • Corrugated metal pipe (CMP) • High density polyethylene pipe (HDPE) • Polyvinyl chloride pipe (PVC) • Polyethylene pipe (PE) • Acrylonitrile-butadiene styrene (ABS)
Rigid Pipe Flexible Pipe Backfill load Backfill load Side support Foundation support Foundation support
PVC PIPE WHY HAS PVC BECOME SO COMMON? • light in weight as compared with other pipe materials (handling) • easy to work with and join together • inexpensive • readily available • comes in stock lengths like 10 or 20 ft
PVC Pipe - Schedule 40/80(ASTM D1785) • Schedule 40/80 pipe wall thickness does not increase proportionally with larger diameters. As a result, pressure rating (PR) decreases with larger pipe diameters. Table below is for Schedule 40. Diameterwall thickness Pressure Rating _ 2” 0.154” 280 psi 6” 0.280” 180 psi 10” 0.365” 140 psi • Sch.80 is gray in color, slightly thicker, stronger and is used primarily for threaded fittings.
PVC Pipe - SDR(ASTM D2241) • Standard Dimension Ratio (SDR) • SDR = diameter/wall thickness • e.g. 6.625” OD/0.316” wt = SDR21 • SDR pipe has the same PR for all pipe diameters. This table is for SDR21. • Diameter wall thickness Pressure Rating • 2” 0.113” 200 psi • 6” 0.316”200 psi • 10” 0.511” 200 psi • Whether 1" or 24" in size, pipe with a SDR-21 rating have the same pressure rating, such as the common 200 psi (Class 200) • Other common sizing is SDR-32.5 Class 125, SDR-26 Class 160 and SDR-13.5 Class 315
PVC Pipe Class: • Class 315, Class 200, Class 125, etc.: The "pressure class" distinction tells you that the pipe is designed to withstand normal pressures 315 psi, 200 psi, 125 psi, etc. • Materials used in PVC indicate strength and are stamped on the pipe – e.g. PVC 1120 is stronger than PVC 2112 • The industry standard is to have a built-in safety factor of 2:1 for pressure surges, so a Class 200 pipe could probably withstand 400 psi water hammer (shock) pressures.
PVC Pipe Classification • PIP, Sewer Pipe, DWV and Other Types: Other types/sizes of pipe (except Polyethylene, described below) are NOT designed for pressurized systems! • -Use what is specified. Not some off the wall type or class. • -If you don’t recognize it: Look it up or take a picture and ask someone!
PE Pipe Materials Polyethylene (PE) Pipe (Black “Poly” Pipe) • Black "poly pipe" is flexible pipe which comes in rolls in sizes from 1/2" to 2“ • Depending upon your area it is commonly used for livestock water pipelines or irrigation • Advantages include light weight, flexibility and easy no-glue fittings (labor and ‘leak’ savings). • Materials and installation are important
Fittings and Valves • Check pressure ratings for fittings and valves • Cracked and leaky valves are typically buried and not handy to replace • Fittings may be hard to find • clamps do not last as long as other joint connections
Don't Use Pex OutdoorsUnfortunately, most pextubing is not suitable for outdoor applications. While it resists freeze damage indoors, it won't hold up under hard freezing and thawing conditions. In rocky soils pex will crush and pinch, and it should never be exposed to UV light, which can break down the material and cause it to fail. As such, pex plumbing is usually recommended for indoor plumbing applications.
Inspecting Pipe Material Things to look for: • Inspect for damage • Cracks, deformations, damaged coatings • Pipe Markings • ASTM, AASHTO or AWWA specification • diameter • Cell class for plastic, pressure class or rating • Production lot number • Name or trademark of manufacturer • NSF Standard 61 or 14 for potable water • Check that bands and fittings are correct size and type
PVC Pipe markings • The outside of PVC pipe must be labeled as follows: • Manufacturer's name or trademark (e.g. PPFA) • Standard to which it conforms (ASTM) • Pipe size • Material designation code • DWV if for drainage • Pressure rating if for pressure • SDR number or schedule number • If the pipe is for potable water, a laboratory seal or mark attesting to suitability for potable water • For those standards that cover several products, there must be additional markings to indicate the pipe stiffness number, the SDR, the EB or DB number. A certifier's mark may also be on the pipe. Type of plastic “1120”, pipe dimension classification” sch40”, and 73ºF pressure rating. Pipe spec, usually D1785 or D2241 for PVC
Do Not Use DWV (Drainage Waste Vent) Pipewhen pressure pipe is specified
Use the proper fittings!! PVC (Pressure) – GOOD NSF – PW (stamp) DWV (Sanitary Sewer) – BAD NSF -dwv
Table 4 CPS – 378 (Note: May not be current) • All connections shall be watertight by means of couplings, gaskets, caulking, waterstops, or welding.
Class Problem Time!!! Pipe Installation Problem in Class Problem Section Use Friendly Farmer Drawings, Specifications, and other information in that section to answer questions 1A, 1B, and 1C at your tables. Discuss questions 2 and 3 as a class.
Trench Safety • Safety is paramount • Must comply with OSHA regulations (1926.651 Subpart P Excavations) • If its deeper than your waist, must have a way to exit the trench within 25 feet… • Never excavate more than can be maintained • Trenching should be overseen by competent person
Trench Excavation • Trench Width • Dependent upon pipe OD • Normally specified in plans • Must be wide enough for • Joining • Checking gaskets • Compacting haunches
Foundations • Foundation Soils • Provide a firm trench bottom during installation • Uniformly support the pipe to prevent differential movement • Typically firm enough if it can be walked upon without sinking or moving • Hard foundations may require greater bedding depth • Shaped trench bottom not normally recommended to support pipe (except some CMP culverts)
Foundations • Problem Foundations • Too soft • Too hard • Expansive • Transition from hard to soft • Collapse
Bedding & Laying • Bedding (refer to plans and specifications) • Inspect bedding thickness • Typically same material used for pipe embedment • Uncompactedbedding should be free draining coarse grained material • For bell & spigot pipe, bedding should be excavated to provide 1” clearance at bell
Bedding & Laying • Bedding (continued) • Place to provide uniform bearing support throughout pipe length • Never support pipe on mounds • Never push down on pipe to achieve proper grade • Excavate holes to remove slings from around pipe and backfill • Maximum particle size of bedding is dependent upon pipe material
Bedding & Laying • Laying • Inspect before and after placing pipe in trench • Overall no damage to pipe • Gasket bearing surfaces clean • Correct size • Keep people from under the pipe during placement • Do not drop pipe in trench • Use slings to lift pipe • When laying ceases, cover the ends of the pipe
Laying small diameter PE (e.g. livestock pipe) • Black pipe absorbs sunlight • its temperature increases • it expands • Laying it with serpentine alignment provides extra pipe that can contract as it cools • cools to ground temperature • reduces excessive stress
Joining Pipe • Types of Joints • Gasket (most common) • Welded (typically steel) • Solvent Cement (PVC & ABS) • Heat Fused (HDPE & PE) • Flanged (most common joint geometry) • Mechanical Couplings (CMP)
Joining Pipe – Bell & Spigot • Gasket Joints • Bell & spigot clean and undamaged • Check gasket for cracks, pits, or blisters • Lubricate as per manufacturer’s recommendations • Keep lubricated surfaces clean • Do not exceed manufacturer’s allowance for deflection in joint (pg 7-19) • Measure to insure specified joint gap
Joining Pipe - Solvent Cement • Solvent Cement Joints • Pipe ends square and deburred • Clean joint surfaces • Apply primer • Apply cement • Press components together to fully engage and rotate ¼ turn • Allow joint to set before disturbing
Joining Pipe – Solvent Cement • Solvent Cement Joint Problems • Pipe components do not match • Pipe is deformed • Inadequate amount or wrong type of cement used • Pipe connected after cement starts to dry • Joint not clean • Joining surfaces are wet • Rough handling before cement cures
Joining Pipe-CMP • Mechanical Joints • Pipe ends square and de-burred • Check gasket for cracks, pits, or blisters • Ensure coupling is properly sized (corrugation size and spacing needs to match pipe) • Properly tighten coupling
Joining HDPE CPT (non-pressure) black tape is typically used for soil tight connection
Joining Dual Wall HDPE CPT • Type of fitting • Bell and gasket • Tape is not needed with gasket connections • Some joints connect single wall to dual wall
Thrust Blocks • Important to hold pipe in place • Plans show locations • end block keeps pipe joints from pulling apart • corner blocks resist thrust as water flow changes direction • Place against undisturbed soil • Contact area against undisturbed soil is typically shown on the plans
Embedment • Pipe and embedment act together to support loads • Crucial portion of embedment is under haunches • Leave internal bracing in place during embedment placement and compaction • Typical min embedment depth (haunch) • Rigid = 0.37 x O.D. • Flexible = 0.7 x O.D.
Embedment • Embedment Placement • Place on sides of trench (do not drop on pipe) • Placed evenly along the trench equally on both sides • Do not dump large piles (could displace pipe) • Compact area closest to pipe when compacting under haunches • When compacting close to pipe, do not allow equipment to contact pipe • Place 12” of loose material over top of pipe before compacting • Recommend 3’ of fill over pipe before allowing ride-on compaction equipment to pass over pipe
Embedment • Embedment Compaction • Ensure adequate compaction of haunches (most difficult area to compact) • Compacted embedment brought up equally on both sides of pipe • Ensure specified degree of compaction is achieved throughout embedment
Embedment & Backfill Hand Compacting Under Haunches
Embedment & Backfill Shoring protects workers while they place bedding
Backfill • Backfill Considerations • Backfill should be clean: free of roots, limbs, and debris • Backfill trenches as soon as possible • Leave internal bracing in pipe until backfill is complete • Ensure specified degree of compaction is achieved throughout backfill, or ensure that backfill is mounded if no compaction required • Kicker berms to deflect runoff from following trench