Drawing Objects…
Drawing Objects…. Drawing Objects…. This lesson will cover: What Can You Draw? How to … Add Graphics to your worksheet Draw and Format AutoShapes Draw and Format Text Boxes. These topics are from Chapter 7 of the text. What can you draw?.

Drawing Objects…
E N D
Presentation Transcript
Drawing Objects… • This lesson will cover: • What Can You Draw? • How to … • Add Graphics to your worksheet • Draw and Format AutoShapes • Draw and Format Text Boxes These topics are from Chapter 7 of the text...
What can you draw? You can add graphics to your worksheets and charts to make them more visually appealing, to create more interesting reports, or to add emphasis. For example, you can display a logo, an image of a product or a flowchart on your worksheet. Graphics can be added as graphics files, ClipArt, or objects drawn with Excel’s own drawing tools. You can draw your own objects, dramatically enhance text and add descriptive “text boxes” (with all the associated lines and arrows) using Excel’s included drawing features.
Types of Graphics used in Excel • There are several basic types of graphics you can add to an Excel Worksheet: • ClipArt - Microsoft has a clipart library that comes with Office 2000, additional clipart can be downloaded from Microsoft’s Design Gallery Live at http://dgl.microsoft.com. • Graphic image files - such as GIFs, JPEGs, bitmaps, and Windows Metafiles (wmf). • AutoShapes – AutoShapes are predefined objects that can be inserted onto worksheets and charts. • WordArt - WordArt objects are predefined fonts that have been customized into various styles. They can be inserted onto worksheets and charts just like an AutoShape. • Digital images - such as those from scanners and digital cameras.
This is a Microsoft Office ClipArt image This is a GIF image This is a JPEG image This is an AutoShape image This is WordArt
Inserting a graphic object…or any object compatible with Excel 2000 can be done from the Insert menu. To insert a graphical object select Picture…then choose the appropriate menu command…
…such as the ClipArt command, which displays Office’s Clip Viewer…you can see that there is more here than just ClipArt. You could also select sound or video clips from this dialog box, but that is another lesson.
…selecting the From File command displays the Insert Picture dialog box. By default it looks in the My Pictures sub-folder of the My Documents folder for image files. Images are shown on the right as you select them from the file browser on the left…
…selecting the AutoShapes command displays the AutoShapes toolbar. AutoShapes can be selected and inserted onto a worksheet by clicking on a button…hovering your cursor over a button displays a text description of what it represents…
…the WordArt command displays the WordArt dialog box. WordArt can be selected and inserted onto a worksheet by clicking on a WordArt type…this same dialog box is displayed when you click on the WordArt button on the Drawing toolbar…but we need to discuss that next…
The Drawing toolbar… The Drawing toolbar contains most of the functions used to create and modify graphic objects within Excel. To display the Drawing toolbar click on the button on the standard toolbar or right click on any toolbar to display the shortcut menu and select the Drawing command… …the Drawing toolbar, like all toolbars can either be docked or undocked. Many times you will find it docked at the bottom of the Excel window…
The Drawing Toolbar… The Drawing Toolbar can be used to access most of Excel’s object drawing and formatting features as noted here… Object Manipulation and Placement options Select an Object(s) Free Rotate AutoShapes Lines or Arrows Rectangles or Ovals Text Box WordArt and ClipArt Fill color, Line color and Font color Line styles, Dash styles and Arrow styles Shadows 3D Effects
…to “active” or display the Drawing toolbar click on the button on the standard toolbar or right click on any toolbar to display the shortcut menu and select the Drawing command…
the Drawing toolbar, like all toolbars can either be docked or undocked…or floating and docked. To select an object to modify, either right-click on it or press the Select Objects button on the toolbar and left-click on any drawn object…using the right-click method displays the shortcut menu which is annoying, but it works.
The first button on the toolbar, from the left, is the Draw menu. It contains commands that move or spatially manipulate objects…
You can “adjust” the Order of the object…that is where it is within the layers of objects on the worksheet. For instance, if two objects overlap each other one is in Front and the other is to the Back of it…these commands can change this arrangement.
To move an object in small increments you use the Nudge command…the same can be done by using the Arrow keys…this makes them the shortcut keys for the Nudge command…right?
To create (or insert) an AutoShape click the AutoShapes button on the Drawing toolbar and then select a type…here a Stars and Banners type was selected…
When you select the AutoShape type, your mouse cursor becomes a crosshair. Place the crosshair at one of the corners where your AutoShape will be located. Click and hold any of the mouse buttons and drag to define the area the AutoShape will occupy. This process is an important one to master as it is used with many of the drawing commands.
Now that the object has been created select it and give it a Fill color… the Fill command is the button with a paint bucket spilling paint…
Now, to move the object, grab it in the same manner you would grab a chart and drag it…
To change the Line color, select the command that looks like a pen with a colored line under it…
The Line style command is used to add thickness or a multiline style to the selected object’s lines (or border).
Create a WordArt object by selecting the WordArt button…the one that looks like an “A”. This command displays the WordArt dialog…select a style and click OK…
Now enter your text…and press OK… Not only can you enter text here, but you can also select a font style and size.
We now have “Skippy” WordArt…and the WordArt toolbar is available for further refinements, if needed…
You can drag WordArt just like any other drawn object or chart…
…and it can be resized by grabbing the handles and dragging them…again like any other drawn object…
Creating and Using Text Boxes To insert text onto an Excel worksheet you first need to draw a text box. A text box is a container that holds the text. In can be moved, resized and formatted in several ways as an object. The text contained within a text box can be formatted as a whole or selectively by highlighting different characters, words or phrases. You can insert an empty text box onto a worksheet by clicking on the Drawing toolbar’s text box command button
When you select the insert text box command, your mouse cursor becomes a sort of crosshair. Place the crosshair where your text box will be located. Start typing your text…if you leave the text box, and select another object without entering any text the text box will disappear…
…by default a text box has no border and no width limit…to change this, instead of just typing at the insert text box prompt (as stated previously), use the crosshair cursor as you did with the AutoShape object. Drag it to define the boundaries of the text box. When you start typing you will be constrained within your selected boundaries and the text box will have a border…
…note that the typed text is now being wrapped and scrolled……
…some properties of a text box can be changed from the Formatting toolbar…such as the Font size…
…you can use the pop-up shortcut menu or the Format menu to display…
…the Format Text Box dialog box…from here you can change the size, borders, fill colors, font options and text alignment properties (including margins) of the selected text box…the options on the 8 tabbed pages are too numerous to explain…
…However, some of the more important ones are…the text box Fill color. Select a color from the dropdown list for a fill (or background) color…
…changing both of these properties and clicking the OK button applies the changes…
…you can grab one of the text box’s handles and resize it to fit all of the text…
…to add an arrow to the worksheet, select the Arrow button on the Drawing toolbar and “draw” the arrow by clicking on the starting point and dragging to the end point…the one drawn here appears in front of the text box…this doesn’t look right…
…right click on the text box and select Order from the menu…and then Bring to Front…
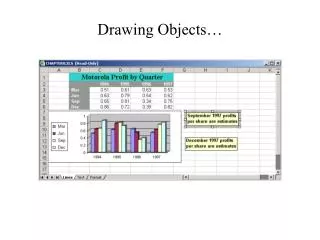
…this action places the text box over the arrow, so that it appears that the arrow originates at the text box’s border…now let’s add an oval to surround the numbers the arrow is pointing to…
…when you first draw an oval its border is thin and it is “filled”…here the oval’s Fill color is white, we need to see the numbers behind the oval… Inset Oval button
…from the Format AutoShape shortcut menu command we change the Fill color to No Fill and the Line (border) weight to 2 …
…now you have a see-through oval…actually what we’ve done is to circle the noteworthy numbers…mission complete.