TI 83/84 Plus Graphing Calculator Programming Project
290 likes | 498 Views
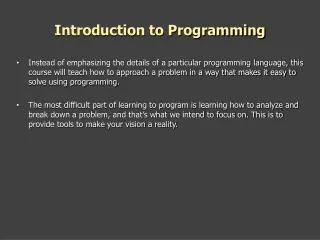
TI 83/84 Plus Graphing Calculator Programming Project. Created by L. Tucker. Get out your highlighters, please. Step 1: Hand Drawing on Graph Paper. Example:. Creativity Score: 8. Drawing Tip: KISS (Keep It Simple, Silly). Example 1: looks nice but was a bit too complicated to program.

TI 83/84 Plus Graphing Calculator Programming Project
E N D
Presentation Transcript
TI 83/84 PlusGraphing Calculator ProgrammingProject Created by L. Tucker
Get out your highlighters, please
Example: Creativity Score: 8
Drawing Tip: KISS(Keep It Simple, Silly) Example 1: looks nice but was a bit too complicated to program.
Drawing Tip: KISS(Keep It Simple, Silly) Creativity Score: 3 Example 2: After struggling to meet the deadline, she Changed her drawing to use simple lines & parabolas.
Example: Drawing by Michelle Tucker May 2007
TI 83/84 Plus Programming Steps & Notes #1 Initial Steps: PRGM, NEW, ENTER (type in name), ENTER Prepare Calculator: 2ND, DRAW, 1:CLRDRAW, ENTER (clears display) 2ND , FORMAT, ↓ ↓ ↓ → , ENTER (turns axes off) 2ND, STATPLOT, PLOTSOFF, ENTER (turns plots off) VARS, Y-VARS, 4:ON/OFF, 2:FnOFF ZOOM, 5:ZSQUARE (will ensure that circles appear round instead of oval)
2nd, Test, →, logic, 1 For Quadratic Lines: enter x2 instead ÷ 2nd, Draw, 6 2nd, Test, 4 2nd, Test, 6 :DrawF 0x-3/(x≥-5 and x≤2) Change slope for slanted lines Begin Programming: #2 To program a horizontal line at y = -3 from x = -5 to x = 2 (line segment): For slanted lines, change the slope y = mx + b
To Program a Vertical Line Segment: #3 x1 y1 x2 y2 2ND, DRAW, 2:LINE :Line (-3, -1, -3, 5) x1 y1 (-3, 5) x1 y1 (-3, -1)
radius Location of center x, y Shade pattern Shade from x=1 to x=9 #4 SHADE: Example – shade between -3x + 9 and y = -3 from x = 1 to x = 9: Draw a Circle: #5 2ND, DRAW, 9: CIRCLE Example: :Circle (-6, 5, 2)
0, 0 0, 94 HELLO 42, 94 42, 0 Add Text: #6 2ND, DRAW, 0:TEXT Example: :Text (34, 5, “HELLO”) Location of first letter row, column This is a trial and error process to get the correct text placement. No not use any negative signs!
Other Tips and Tricks? Insert a programming line: 2ND, INS, ENTER Scroll Down: 2ND, ALPHA, ↓ ↓ ↓. . . . , ALPHA To Number a Line within Your Program: Ex: :5:Vertical -2 You may want to turn the “axes on” during programming so you can see your restrictions. #7 Programming Errors: • Error: usually means you are trying to divide by zero. Cause: left out DrawF • Lines are not being drawn: Cause: domain restriction is set wrong • If you do not see your line, you either goofed on your restrictions or y-intercept. • If you get an error, choose “2 GOTO”. This will take you to the line with the error in it.
Tips for Students: • Do not remove the batteries – this will erase your program • Don’t do 2nd MEM, 7, 1, 2 (test this out to see if it erases the program) • Write all equations & steps in case your program is deleted. • To protect your program from accidentally being erased: • 2nd, Mem, 5:Archive, PRGM, choose your program • To unarchive your program for editing, 2nd, Mem, 6:Unarchive, PRGM, choose your program
Reasons Why You Can’t See Your Line: #8 :DrawF 1.5x/(x≥8 and x≤10)
Reasons Why You Can’t See Your Line: :DrawF 1.5x/(x≥5 and x≤2)
No calculators in hands until: • Students draw picture on grid. Teacher approves sketch of drawing on grid paper • Students fill out chart with equations. Teacher has approved all equations filled out on chart Turn In: • Print out of picture and lines of programming (use TI Connect software) • Hand-drawn picture on graph paper • Hand-written chart of equations as they appear in the program.
Shading Parabola Example: Shading Tip: If your functions graph properly but the shading is missing, you entered your functions wrong (the lower function goes in first, following by the upper function). .5(x+6)+4 .5(x-6)+4 -.5(x+6)-4 -.5(x-6)-4 Tip: turning the axes back on temporarily will help you determine the domain restrictions on your parabolas.
Shading Examples: …1,1) …2,1) …3,1) …1,2) …2,2) …3,2) …1,3) …2,3) …3,3) …1,6) 1: shade vertically 2: shade horizontally 3: shade diagonally (neg. slopes) 4: shade diagonally (pos. slopes) …1,6) Pixel width from shaded line to line
TIP: When deciding on a picture to draw, remember the KISS principal: Keep It Simple, Silly! (you will be a much happier computer programmer) Creativity Score: 10 Another Tip: Programming will be easier if your picture fills up the entire screen. Creativity Score: 10 Incomplete but cute! Includes two illegal commands