NUCCA X-Ray Analysis
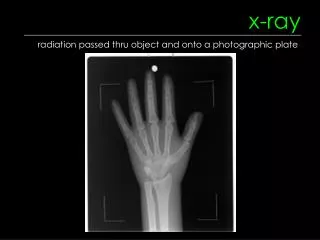
NUCCA X-Ray Analysis. Analysis Equipment. Cephalometer Circumscale Relatoscope Vertex square. Lateral Film. PURPOSE: To obtain the S line of the atlas To tell if the atlas has gone inferior or superior To determine where to take the Nasium. Lateral Film Analysis. S Line

NUCCA X-Ray Analysis
E N D
Presentation Transcript
Analysis Equipment • Cephalometer • Circumscale • Relatoscope • Vertex square
Lateral Film • PURPOSE: • To obtain the S line of the atlas • To tell if the atlas has gone inferior or superior • To determine where to take the Nasium
Lateral Film Analysis • S Line • Place a dot where the posterior arch of atlas meets the lateral mass • Place a second dot about 1/3 down along the length of the posterior arch of atlas *Note that because of how the Nasium film is taken, if the S line does not go through the mastoid markers, you must move the line up/down in a parallel fashion so that it does. This way it will be taken at the proper angle.
Nasium Film PURPOSE: • To determine atlas laterality • To determine upper and lower angle to determine the basic type • To determine APL, A/O, C/A, Ang, At, OD, BC, Sp • To calculate the height vector • To determine if C2 spinous rotation is present (torque)
Nasium Film • Atlas Plane Line (APL) • Place a dot on the lower border of the posterior arch where it crosses the lateral masses on each side of atlas
Nasium Film • Central Skull Line (CSL) • Mark the squamous suture on each side of the head • Mark the vertex of the head on each side • The CSL will only be determine using the area between these two points
Nasium Film • CSL Continued • Use the Cephalometer to match like points on either side of the head in order to determine the center of the skull • Mark a lower pivot point intersecting the APL • Mark an upper pivot point at the top of the skull
Nasium Film • CSL Continued • Starting with the lower pivot point, make your way up the skull finding like points with the cephalometer by keeping the lower pivot point in the slot. The line should match up with the two pivot points • Then make your way down with the upper pivot point • Repeat • If the line shifts, you have the wrong pivot points and need to redo • Once you have the best points, mark the CSL with a solid line
Nasium Film • Atlas Laterality (At) • To find laterality measure the side of the acute angle between the CSL and APL
Nasium Film • Head Tilt • To find the head tilt, measure the angle between the true vertical and the CSL
Nasium Film • Condylar Circle • Mark the outer 1/3 of the surface of the occipital condyles • Using the circumscale, find the best fit circle = c • If it comes out to ½, round down
Nasium Film • Axial Circle • Place a dot (A) on the most lateral aspect of the superior surface of C2 on each side • Also place a dot (B) on the medial aspect of the superior surface of C2 on each side • Connect those dots on each side • From the medial dots, place another dot (C) 3/32’’ down perpendicularly from that line • Use A and C to find the best fit circle for axis = a • If it comes out to ½, round up A B A B
Nasium Film • Odontoid Center (OD) • Mark the center of the Odontoid
Nasium • C2 Body Center (BC) • Using the dots on the lateral aspect of the superior surface of C2, place the center of a protractor on each dot and scribe and arcs above and below • Use a straight edge to connect the two intersections • Draw a small line down the center in the middle of the intersections
Nasium Film • BC Continued • Use the relatoscope that corresponds to the condylar circle • Square up atlas so that the horizontal lines of the relatoscope are parallel to the APL and the lateral masses are boxed in equally • Determine the degrees (if any) the body center line is off from the 0 mark on relatoscope • If BC is on the same vertical line as the 0 mark then BC = At
Nasium Film • C2 Spinous (SP) • Mark the inferior bifurcation of C2 spinous • Use the relatoscope again to compare position of C2 spinous to atlas like you did with BC • The lateral film can help you locate its position if its hard to see by comparing where it is on the lateral film in relation to the posterior arch of atlas
Nasium Film • Fixed Point • Mark the lateral aspects of the zygapophyseal joints of C7 • Determine the midpoint • Mark a point (D) between BC and SP if not on same vertical line • Connect the midpoint of C7 to D dot D
Nasium Film • Lower Angle • Measure the acute angle between the APL and the fixed point line
Nasium Film • Height Vector Components • PL • A/BC • C/A • Ang
Height Vector Calculations • PL • Use a true horizontal and move it up/down until it matches up where the APL crosses the ramus of the jaw on the side opposite of laterality and draw a small straight reference line on the side of laterality • Measure how far above or below the APL is compared to that true horizontal • If APL is lower by: • 1/16th “ - ¼” • 2/16th “ - ¾” • 3/16th “ - 1’’ • If APL is higher by: • 1/16th “ + ¼” • 2/16th “ + ¾” • 3/16th “ + 1’’
Height Vector Calculations • A/BC • Compare the amount of atlas laterality due to atlas side slip (ss) versus head tilt (ht) • If ht ≥ ss, then A/BC = -1/2 ht but only up to amount of laterality • If ht < ss, then A/BC = -1/2 ht • If ht = 0 or if it does not contribute to laterality, then A/BC = 0 • If BC > At like in a Type I with a large lower angle, then A/BC = +1 for the first degree extra
Height Vector Calculations • C/A • This is equal to + (a-c)⁄2
Height Vector Calculations • Ang • Take the difference of At – lower angle • For contralateral acute angles • + ¼” for every 1° difference • For ipsilateral acute angles • - ¼” for every 1° difference • If the lower angle is less than or equal to atlas laterality, then Ang = 0
Height Vector Calculation Practice • At R2 • OD R2 • BC R2 • SP R2 3c + 4/16th 8a L6 PL = + 1 ¼ A/BC = 0 C/A = + 2 ½ Ang = + 1 _______________ + 4 ¾
Height Vector Calculation Practice • At R4 (RS) • OD R4 • BC R1 • SP R4 3c + 2/16th 10a L4 PL = + ¾ A/BC = - 1 ½ C/A = + 3 ½ Ang = 0 _______________ + 2 ¾
Height Vector Calculation Practice • At R4 (R4) • OD R4 • BC R0 • SP R4 3c 5 ½a L0 PL = 0 A/BC = - 2 C/A = + 1 ½ Ang = 0 _______________ - ½
Vertex Film PURPOSE: • To determine C1 rotation • To determine anterior/posterior vector
Vertex Film • Mark the anterior and posterior aspect of both lateral masses • Mark the center of the transverse foramen and draw a line connecting the two points • Use the vertex square to box in atlas using the lateral masses to make sure all those points/lines are parallel • If the line of the transverse foramen isn’t parallel to the lateral masses, use the lateral masses • Measure the angle between the true vertical line and the transverse foramen or lateral mass line on the side of laterality • If the angle is acute = anterior rotation • If the angle is obtuse = posterior rotation • Vector = 1” for every 1° anterior or posterior