Download
1 / 40
410 likes | 621 Views
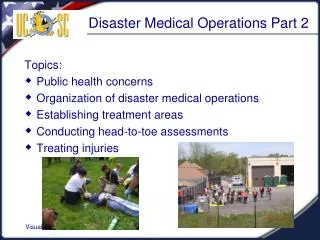
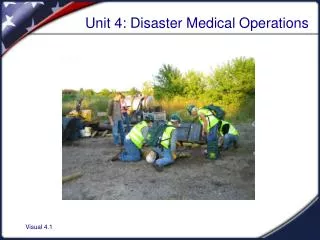
Unit 4: Disaster Medical Operations. Unit 4 Introduction. Topics: Public health concerns Organization of disaster medical operations Establishing treatment areas Conducting head-to-toe assessments Treating injuries. Public Health Considerations. Maintain proper hygiene.

E N D
Unit 4 Introduction Topics: • Public health concerns • Organization of disaster medical operations • Establishing treatment areas • Conducting head-to-toe assessments • Treating injuries
Public Health Considerations • Maintain proper hygiene. • Maintain proper sanitation. • Maintain pure water.
Isolation Precautions • If there is any reason that some victims may be contagious, isolate them immediately. • DO NOT forget about them. Delegate someone to “stand guard” to lesson the chance of accidental exposures.
Steps to Maintain Hygiene • Wash hands frequently using soap and water. • Sing The Pledge of Allegiance • Wear latex gloves; change or disinfect after each patient. • 1:10 ratio of bleach to water • Wear a mask and goggles. • Keep dressings sterile. • Avoid contact with body fluids.
Maintaining Sanitation • Control disposal of bacterial sources. • Put waste products in plastic bags, tie off, and mark as medical waste. • Bury human waste.
Water Purification • Mix 8 drops of bleach per gallon of water (16 drops if water is cloudy). • Let the solution stand for 30 minutes. • If the solution does not smell or taste of bleach, add an additional 6 drops.
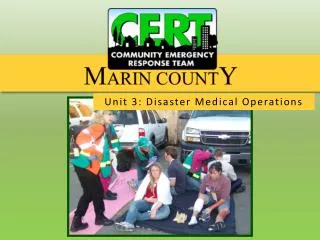
Functions of Disaster Medical Operations • Triage • Treatment • Transport • Morgue
Establish Treatment Areas The site selected should be: • In a safe area. • Close to (but upwind and uphill from) the hazard. • Accessible by transportation vehicles. • Expandable.
Treatment Area Organization • CERT Leaders MUST assign Supervisors to maintain control in the functional areas. These Supervisors will: • Ensure orderly placement. • Head-Toe configuration • 2-3ft between victims • Direct assistants head-to-toe assessments.
Treatment Area Documentation • Supervisors need to oversee and make sure thorough documentation is being performed on all victims. • Use a Treatment Documentation Form
Consent To Treat • CERT members need to ask the victim for permission to conduct the assessment. The victim has a right to refuse treatment (make sure you document it!). • If the victim is unconscious treat the injuries under implied consent and assume they have a spinal injury.
Conducting Head-to-Toe Assessments • Head-to-Toe assessments are performed to go beyond “the killers” to gain more information to determine the nature of the victims injury.
Head-to-Toe Assessment • Head • Neck • Shoulders • Chest • Arms • Abdomen • Pelvis • Legs • Back
Multiple Assessments • If medical teams run out of or low on latex gloves, use rubber gloves and clean between treatment of victims in a bucket of bleach-water solution (1:10 ratio) to reduce the risk of cross contamination.
Indicators of Injury • Bruising • Swelling • Severe pain • Disfigurement CERT members need to pay careful attention to how the victim has been hurt (mechanism of injury) because it provides insight to probable injuries suffered.
Head, Neck and Spinal Injuries • CERT members main objective with a suspected head or spinal injury patient is to do no harm. • Minimize movement of the head and spine while treating any of “the killers”.
Closed-Head Injury Signs • ALOC • Inability to move a body part • Severe head, neck or back pain(s) • Tingling or numbness • Difficulty seeing or breathing • Facial trauma • Bruising behind ears (late sign) • Bruising under the eyes • Equal pupils • Unexplained seizures • Nausea or vomiting • Mechanism of injury
Burn Severity May be from heat, chemical, electrical or radiation. • Severity depends on: • Temperature of the burning agent • Period of exposure • Area effected • Depth of burn
Layers of Skin • Epidermis • Dermis • Subcutaneous layer
Treatment of Burns • Remove or cut away the burning source. • Cool skin or clothing (if still hot) by immersing in water for no more then 1 minute or cover with a clean compress. • Cover with a dry sterile dressing. • Elevate the extremity, if possible. • Remove rings, bracelets, watches! • Do not use ice • Do not apply butter or antiseptics • Do not remove skin or break blisters • TREAT FOR SHOCK!
Wound Care • Control bleeding (discussed in Unit 3) • Prevent secondary infection • Wear gloves • Clean wound—don’t scrub • Use a turkey baster or bulb syringe to irrigate • Mild soap and water • Apply dressing and bandage
Rules of Dressing • In the absence of active bleeding, remove dressing and flush, check wound at least every 4-6 hours. • If there is active bleeding, redress over existing dressing and maintain pressure and elevation.
Treating Amputations • Control bleeding • Treat for shock • Save tissue parts, wrapped in clean cloth • Keep tissue cool (do not place directly on ice) • Keep tissue with the victim
Treating Impaled Objects Impaled Objects: • Immobilize the body part. • Don’t move or remove. • Control bleeding. • Clean and dress wound. • Wrap with bulky dressings. • Treat for shock.
Treating an Open Fracture DO: • Cover wound. • Splint fracture without disturbing wound. • Place a moist 4" x 4" dressing over bone end to prevent drying. DO NOT: • Irrigate the wound. • Draw the exposed bones back under the skin.
Dislocation • Displaced or misaligned joint. Ligaments always become damaged. • Do not try to reduce the injury. • Immobilize the joints.
Strain • Muscle fibers tear as a result of overstretching. • Pain • Stiffness • Inflammation • Bruising R-Rest I- Ice C- Compression E-Elevation
Sprain Overstretching or tearing of a ligament at a joint. • Tenderness at injury site • Swelling and/or bruising • Restricted use or loss of use R-Rest I-Ice C- Compression E-Elevate
Guidelines for Splinting • Support the injured area. • Splint injury in the position that you find it. • Don’t try to realign bones. • Check for color, warmth, and sensation. • Immobilize above and below the injury.
Nasal Bleeding • Causes: • Blunt force • Skull fracture • Nontrauma-related conditions • Blood loss can lead to shock. • Victims may become nauseated and vomit if they swallow blood. • Treatment: • Lean forward • Apply ice to bridge of nose • Allow drainage
Symptoms of Hypothermia Primary signs and symptoms: • A body temperature of 95o Fahrenheit (37o Celsius) or less • Redness or blueness of the skin • Numbness accompanied by shivering
Symptoms of Hypothermia At later stages, hypothermia will be accompanied by: • Slurred speech. • Unpredictable behavior. • Listlessness.
Treatment for Hypothermia • Remove from wind and rain • Remove all wet clothing • Give warm drinks by mouth (if conscious) • Bundle in warm blankets, cover the head