Download
1 / 132
1.32k likes | 1.36k Views
Learn to identify and treat the 3 killers in disaster settings: airway obstruction, excessive bleeding, and shock control. Master splinting, head-to-toe assessment, and triage. Explore the phases of trauma deaths and Peter Safer's research on saving victims. Engage in hands-on exercises for opening airways, controlling bleeding, and recognizing shock. Uphold the philosophy of doing the greatest good for the greatest number.

E N D
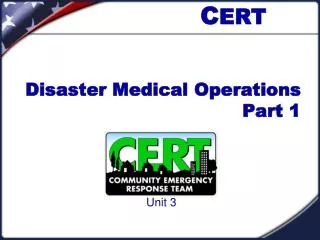
Disaster Medical Operations “Introduction”
Identify the 3 Killers. Describe how to and perform: Treatment procedures for the 3 Killers; Splinting procedures; Head-to-Toe Assessment procedures’ Triage Objectives
In a Disaster there are 3 Phases of Trauma Death: Phase 1: Death in Minutes Phase 2: Death in Hours Phase 3: Death in Days to Weeks Phases of Trauma Deaths
Peter Safer’s Research: 40 percent of disaster victims in the second and third phases of death from trauma could be saved by providing simple medical care. Phases of Trauma Deaths
Do the GREATEST GOOD for the GREATEST NUMBER of people! Medical Operations Philosophy
The 3 “Killers”: • Airway obstruction • Excessive Bleeding • Control Shock The 3 Killers Life-threatening conditions must receive immediate treatment!
Disaster Medical Operations “Opening the Airway”
Upper Airway Nasopharynx Oropharynx Tongue Epiglottis Trachea Esophagus
Action Steps 1. Check for Responsiveness
Action Steps 2. Head-Tilt / Chin-Lift
Action Steps 3. Look, Listen, Feel
“Opening the Airway” Exercise Purpose: This exercise allows you to practice using the Head-Tilt / Chin-Lift method on each other. Instructions: 1. Work in pairs with your buddy – one person will be the victim and the other person the rescuer. 2. Victims should lie on the floor on their backs and close their eyes. 3. The rescuer should use the Head-Tilt / Chin-Lift method on the victim to open the airway. After the rescuer has made two or three attempts at using the Head-Tilt / Chin-Lift method, the victim and the rescuer should change roles.
“Opening the Airway” Questions
Disaster Medical Operations “Bleeding Control”
Anatomy / Physiology The average adult has between 5-6 liters of blood in their body. Losing one liter can result in death.
Blood Loss There are 3 types of blood loss: Capillary Venous Arterial
Controlling Blood Loss There are 3 methods to control blood loss: 1. Direct Pressure 2. Elevation 3. Pressure Points
Controlling Blood Loss Direct Pressure Placing pressure directly over the wound, using a clean dressing. Followed by a pressure bandage.
Controlling Blood Loss Elevation Placing the wound above the level of the heart. It can take 5-7 minutes to stop the bleeding using Direct Pressure and Elevation.
Controlling Blood Loss Pressure Points A pulse point for a major artery. - Brachial point - Femoral point Put pressure with your hand at the proximal pressure point.
Controlling Blood Loss Tourniquet • A “Last Resort” • Leave in plain sight • Mark the patient’s forehead with “T” and time it was applied • Only a physician should remove
Controlling Blood Loss Applying a Tourniquet – A “LAST RESORT”
Treating Amputations • Control bleeding • Treat for shock • Save tissue parts, wrapped in clean cloth • Keep tissue cool • Keep tissue with the victim
Treating Impaled Objects Impaled Objects: • Immobilize. • Don’t move or remove. • Control bleeding. • Clean and dress wound. • Wrap.
Controlling Blood Loss Special Circumstances – Head Wound
Controlling Blood Loss Special Circumstances – Nose Bleed
Controlling Blood Loss Special Circumstances – Won’t Stop
“Bleeding Control” Exercise I Purpose: This exercise allows you to practice the techniques for controlling bleeding. Instructions: 1. Work in pairs with your buddy – victims lie on the floor with their eyes closed. 2. The rescuer should use direct pressure to control bleeding from a simulated wound on the right forearm just below the elbow. The rescuer should: - apply a pressure bandage - elevate the arm After the rescuer has made one attempt to control bleeding, the victim and the rescuer should change roles. Complete two attempts each, the second one for speed.
“Bleeding Control” Exercise II Purpose: This exercise allows you to practice the techniques for controlling bleeding. Instructions: 1. Work in pairs with your buddy – victims lie on the floor with their eyes closed. 2. Complete different bleeding control exercises to stop head wounds, lower extremity wounds, etc… After the rescuer has made one attempt to control bleeding, the victim and the rescuer should change roles. Complete two attempts each, the second one for speed.
“Bleeding Control” Questions
Disaster Medical Operations “Recognizing & Treating for Shock”
Definition of Shock • Shock is a disorder from ineffective circulation of blood. • In a disaster situation, • this ineffective • circulation of blood • usually results from • uncontrolled bleeding.
Definition of Shock • The loss of blood volume will ultimately lead to the death of cells, tissue, & entire organs.
Signs of Shock • Rapid, shallow breathing • Capillary refill >2 sec. • Unable to follow simple commands • Skin color & temperature
Action Steps for Treating Shock • Lay victim on his back • Elevate feet 6 – 10” • Control obvious bleeding • Maintain body temperature • Avoid rough handling
“Treating for Shock” Exercise Purpose: This exercise allows you to practice the steps for treating shock. Instructions: 1. Work in pairs with your buddy – victims lie on the floor with their eyes closed. 2. The rescuer should treat the victim based on the scenario given by the instructor. The rescuer and the victim should switch roles.
“Recognizing & Treating Shock” Questions
Disaster Medical Operations “Triage”
French Term meaning – “to sort” Victims are sorted by the urgency of their need for treatment. Definition of Triage
Military Tested Effective Strategy used when: • Mass Casualty Incident • Limited Resources • Time is Critical V
TRIAGE EXERCISE Triage
Functions of Disaster Med. Ops. Incident Location Triage Medical Treatment Delayed Care Area Immediate Care Area Search & Rescue Morgue
Medical Treatment Site • SELECTION PROCESS: • Safe Area free of debris & hazards • Close to the hazard but upwind & uphill • Accessible • Expandable WIND Hazard Treatment Site