Download
1 / 12
120 likes | 221 Views
Learn about line usage, types of lines, and techniques like hatching and shading with pencils and pens. Explore how to convey different personalities through line work and create stunning pieces of art. Dive into the world of drawing and sharpen your skills through practical projects. Enhance your artistry and communication using various line methods and tools.

E N D
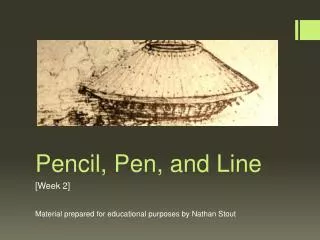
Pencil, Pen, and Line [Week 2] Material prepared for educational purposes by Nathan Stout
Previous Project:Selecting a subject • Present your subject • Offer 5 ideas to explore within that world or idea
Line Usage • Line purpose: every line must have purpose, lines are optical illusion, boundaries between two forms • Types of lines and their personalities: • Fine line – light, thin features • Broad or dominant line – firm boundary • Curved line – natural, comfortable, acceptable • Straight line – strength, rigidity, organization, oppression, dominance • Example – Al Hirschfeld, the King of Line • (Note how different line usage conveys various different personalities)
Techniques: (Cross) Hatching • Hatching: the process of building 3 dimensionality into a 2D piece through the addition of closely repeated lines • Cross Hatching: use of alternating or crossing lines • Stippling: related process for same purpose using small dots • Methods are old and can evoke timelessness or datedness
Techniques: Shading • Visual trick to add 3 dimensionality to a 2D piece; uses alternating pressure to apply build of graphite to paper • Can add paper stub to rub the graphite around and soften further
Tools: Pencils • Standard pencils: #2 pencils or yellow pencils, yellow pencils allow for shading but will require constant sharpening • Mechanical pencils: #2 pencils with a click, maintains a constant sharp tip but can carve easily into a sheet of paper • Art pencils: can become expensive quickly, offer variety of hardness and softness degrees for better shading options
Tools: Pens • Standard pens: ballpoint pen can work fine, works under situation of friction, can skip, plan ahead • Art pens: can become quite expensive, sizing uses system of metric units with larger numbers meaning larger size of tip
Tools: Additional Equipment • Blending stumps: great for pencil work when you are trying to soften forms or provide increased blending effects, require sharpening, can be cheap
Tools: Additional Equipment • Erasers: • Kneaded – good for large, general work, can create a point for fine work as well, need to be replaced after a while • Soft pink – good for general work, can help with dark or deep lines, blow off the dust after use • Pencil top – these make for great line work when sharpened
Weekly Project:Create a pencil piece • Take your subject matter and create one piece in pencil • Think about line usage and how your lines communicate your intended message • Decide how you want to convey form (hatching, shading, etc.), experiment before if needed
Take Home Message • Pencil and line work can make solid and beautiful art, clarify your message while composing your piece • Get going towards your 10,000 hours today! Thank You for Participating