Download
1 / 30
340 likes | 794 Views
CPR First Aid and AED training. When Emergencies Arise. Emergencies happen all too often and early intervention can save a life. CPR and first aid skills are important for all people to know.

E N D
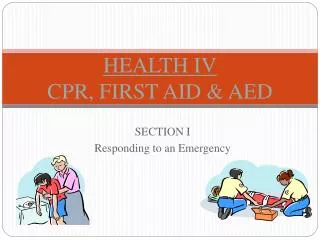
When Emergencies Arise • Emergencies happen all too often and early intervention can save a life. • CPR and first aid skills are important for all people to know. • Starting Chest compressions while waiting for an ambulance not only can save a life but it can also prevent lasting brain injury.
CPR • CPR combines rescue breathing and chest compressions. • Rescue breathing provides oxygen to the person's lungs. • Chest compressions keep oxygen-rich blood flowing until the heartbeat and breathing can be restored. • CPR is used to return the flow of blood and oxygen throughout the body to delay tissue death and brain damage. • CPR is one link in what the American Heart Association calls the "chain of survival." The chain of survival is a series of actions that, when performed in sequence, will give a person having a heart attack the greatest chance of survival.
Assess and Phone 911 • When you come across a person whose heart may not be beating the following steps are used to assess the emergency and to get help. • Make sure the scene is safe for you and the person you are helping • Check the area to make sure you are not putting yourself in harms way or the person you are assisting. • Busy street, downed power lines, toxic fumes, fire, area where heavy objects may fall on you. • Tap and Shout checking for responsiveness • Tap the person shoulders and ask if they are okay • If they move or speak they are responsive ask if they need help • If they do not move, speak or blink they are unresponsive shout for help • Shout for help if in a populated area • The sooner you can get more help to aid you the better the chances for the person in cardiac arrest. • When more people are helping you are able to provide better care to the person. • If someone is nearby to help have them call 911 and get an AED • Phone 911 and get an AED if possible • If you are alone and have called 911 put it on speaker and follow the dispatchers instructions • If you are alone and do not have a phone, leave the person go call 911 and get an AED and return to provide help until the EMT’s arrive • Stay on the phone with the 911 dispatcher until they tell you to hang up. Answering questions will NOT delay help • Check for normal breathing. • Scan the check from head to waist repeatedly for at least 5 seconds but no more than 10, look for the chest rising and falling. • If they are not breathing normally or is gasping they need CPR • If the person is unresponsive but breathing normally they do not need CPR. Stay with them and roll them on their side if not neck or back injury is suspected. • If the person is unresponsive and not breathing or gasping give CPR. Make sure they are on a flat, firm surface on their back. • Depending on the circumstances you can perform some of the activities at the same time such as calling 911 on a cellphone on speaker while checking for breathing.
What to do if your not sure • If you think someone needs CPR but you are not sure, provide CPR because you may save a life. • CPR is not likely to cause harm if the person is not in cardiac arrest. • It is better to give it to someone who does not need it than to not give it to someone who does need it.
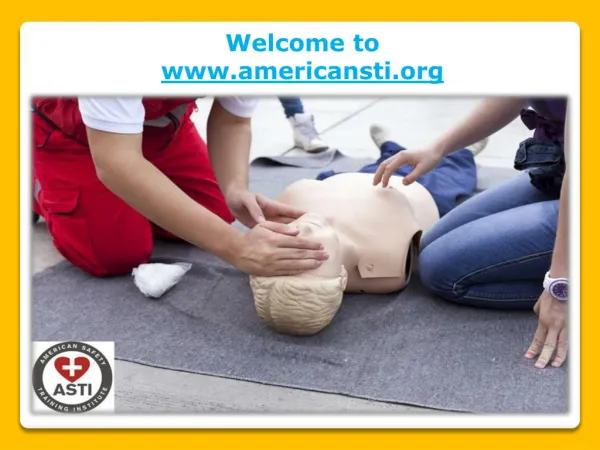
CPR Skills • CPR has 2 main skills • Providing compressions • Giving breaths • Provide Compressions • A compression is the act of pushing hard and fast on the chest. When you push on the chest you pump blood to the brain and heart • Make sure the person is lying on a firm, flat surface • Quickly move clothes out of the way if possible • Put the heel of one hand on the center of the chest over the lower half of the breastbone. Put your other hand on top of the first hand • Push straight down at least 2 inches deep • Give 30 compression at the rate of 100-120 compressions per minute. Count the compressions out loud. • Let the chest come back to its normal position after each compression. • Try not to interrupt compressions for more than 10 sec even when you give breaths
Giving Breaths • The 2nd skill of CPR is giving breaths • After each set of 30 compression you need to give 2 breaths • They can be given with or without a barrier device such as a pocket mask • When you give 2 breaths make sure the chest rise is visible. • Make sure to open the airway before giving breaths. • Put one hand on the forehead and fingers of your other hand on the chin and tilt the head back and lift the chin.
Giving Breaths • While holding the airway open, pinch the nose closed with your thumb and forefinger • Take a normal breath cover the person’s mouth with your mouth • Give 2 breaths (blow for 1sec). Watch the chest to begin to rise as you give each breath • Try not to interrupt compressions for more than 10 seconds.
Giving Breaths • If the chest does not rise allow the head to go back to normal position • Open the airway again then give another breath making sure the chest rises. • If you have been unable to give 2 rescues breaths in 10 seconds go back to compressions then try after 30 compressions.
Compressions • When providing CPR give 30 compressions to 2 breaths • Make sure the person is laying on a firm, flat, surface • Put the heel of one hand on the center of the chest (over the lower half of the breastbone) place other hand on top of first hand • Push straight down at least 2 inches • Push at a rate of 100 to 120 compressions per minute and count the compressions out loud. • Let the chest come back to normal position after each compression.
Use of an AED • Automated External Defibrillator (AED) • Is a portable device that checks the heart rhythm. • When combined with CPR it provides the best chance of saving a life. • When one is used it will analyze if the person needs to be shocked and will tell you what to do in order to give one.
AED • To use an AED turn it on by either pushing the On button or lifting the lid. Once it is turned on you will hear prompts which will tell you everything you need to do. • AED’s should have adult and child pads. Make sure to use the adult pads on a person 8 yrs or older. • Before placing the pads on the persons chest make sure there are no special situations that need to be remedied first. • Special situations • Chest hair: If the person has a hairy chest it may prevent the pads from sticking. Use a second set of pads, stick them to the chest and pull off to remove the hair then place a new set of pads on the chest. • Lying in water: move them to a dry area • Lying in snow or small puddle: may use the AED the chest does not have to be completely dry. If covered in water dry off first. • Has an implanted pacemaker: do not put the AED pad directly over the implant, follow normal steps of AED • Has a medicine patch where pad is to go: put on gloves if possible and remove medicated pad and wipe area clean then place AED pad.
How to use and AED • Turn on the AED either by lifting the lid or pushing the ON button. • Follow the prompts it will tell you everything you need to do. • Attach the adult pads • Use adult pads for anyone 8 years old or older • Peel away the backing • Follow the pictures on the pads and attach them to the person’s bare chest • Let the AED analyze • Loudly state “CLEAR” and make sure no one is touching the person • Push the “SHOCK” button • Immediately resume CPR • Continue to follow the AED prompts which will guide the rescue. Continue until one of the follow occur • Someone else arrives who can take turns providing CPR with you • The person begins to move, speak, blink or otherwise react • Someone with more advance training arrives.
Child CPR • Definition of a Child is 1yr to 12 yrs. AED definition is different follow those guidelines when using an AED. • If you are alone and do not have a phone nearby provide CPR for 2 minutes or 5 rounds of 30 compressions and 2 breaths before leaving to call 911 • Make sure the scene is safe • Tap and shout to check for responsiveness • Shout for help • Make sure the child is laying on their back on a firm, flat surface. • Quickly move clothing out of the way • Begin CPR, phone 911 and get an AED
Child CPR • If a person comes with a cell phone to help have them call 911 and put it on speaker and send them to go get an AED. • If a person comes with no phone send them to find one to call 911 and to get an AED. • If you are alone and have a cellphone call 911 and put it on speaker while you begin CPR • Give 5 sets of 30 compressions and 2 breaths. • Go get an AED • Return to the child and continue CPR • If you are alone and do not have a cell phone give 5 sets of 30 compressions and 2 breaths. • Go call 911 and get and AED • Return to child and continue CPR
First Aid • When you come upon an ill or injured person and the person responds let them know you are there as a first aid responder. • Before you touch the person ask them if you may help them. Anyone has the right to refuse help. • If the person refuses help, call 911 and stay with him until help arrives • If the person is confused or can’t answer, assume the person wants help. • Questions about whether or not it is legal to provide first aid to someone all states have a Good Samaritan law. • These laws protect anyone who provides first aid • Key steps of First Aid • Assess the scene • Phone for help • Take universal precautions (wearing of nonporous articles such as medical gloves, goggles, and face shields) • Find the problem • Protect the person’s privacy.
Assess the Scene • First make sure the scene is safe be aware of danger for you the ill or injured person and anyone else nearby. • Continue to assess the scene while you provide first aid to be aware of anything that might change or make it unsafe. • Ask these questions as you are assessing • Is there danger for you or the ill or injured person? • Move an injured person only if they are in danger or if you need to move them to safely provide CPR • Are others around to help? • If so, have someone phone 911. if no one else is near, phone for help yourself. • Who is ill or injured? • Can you tell how many people are hurt or what happened? • Where are you? • You will need to tell others how to get to you especially 911 dispatcher. If here are other bystanders at the scene send one of them to meet the emergency responders and lead them to the scene.
Phone for help • Calling 911 activates the EMS network of responders. Make sure to know the nearest location of a phone to use in an emergency. • When to call 911 • Person does not respond to voice or touch * Has chest discomfort, signaling possible heart attack • Signs of a stroke * Exposed to poison • Problem breathing * Received an electrical shock • Severe injury or burn * Cant move a part of the body • Severe bleeding * Seizure • Who should phone for help • When Alone: • Shout for help • No one answers and the person needs immediate care use cell phone call 911 and put it on speaker • Dispatcher will provide further instruction such as how to give first aid, CPR and use an AED • With Others • Stay with the ill or injured person and be prepared to give first aid or CPR if you know how. • Send someone else to phone 911 and get the first aid kit and AED if available • Have the person put the phone on speaker so you can receive further instruction from the dispatcher.
Universal Precaution • When on the phone with 911 do not hang up until they tell you to. Answering the questions will not delay the arrival of help. • Universal precautions means to treat all blood, and other body fluids as if they contain germs that can cause diseases • The first aid kit if you have one available should have personal protective equipment such as medical gloves, a mask for CPR and possibly goggles. • If exposure to blood do the following • Remove glove inside out if you are wearing them • Immediately wash your hands and rinse the contact area with soap and lots of water for 20 seconds • Rinse your eyes, nose or the inside of your mouth with plenty of water if body fluids splattered in any of these areas • Contact a health care provider as soon as possible.
Finding the problem • Before you give first aid, you must assess the ill or injured person to find out what the problem is. • Check to see if the person is responsive if they are unresponsive check for breathing. • If the person is breathing and does not need immediate first aid, look for any obvious signs of injury, such as bleeding, broken bones, burns or bites. • Look for any medical information jewelry, this may tell you if the person has a serious medical condition. • When giving first aid you might wonder, “Should I move an ill or injured person?” • Usually NO especially if you suspect that the person may have a pelvic or spinal injury • If the area is unsafe for you or the injured person move them to a safe place. • If a person is unresponsive and breathing normally you may roll the person onto his side. This helps to keep their airway open if they vomit. • One way to move someone is to drag the person by their clothing. Protecting the person’s privacy • If you learn private things about the person you are helping such as their medical condition share that information only with the EMS workers. You should not share the information with other people.
Allergic Reactions • Allergies are quite common. A severe allergic reaction can quickly turn into a medical emergency. • Some things that can cause a severe allergic reaction are • Eggs Medications Insect bites/stings • Peanuts Chocolate • A mild reaction may present as a stuffy nose, sneezing and itching around the eyes. Possibly itching of the skin, raised, red rash on the skin (hives) • Severe reaction may present trouble breathing, swelling of the tongue and face, or signs of shock. • How to treat Severe allergic reactions. • Epinephrine is a drug that can stop a severe allergic reaction. If the person is known to have severe allergies they may have an Epi Pen with them. The person should know how to use the pen and depending on the severity of the attack you may have to help them administer the medicine. • The injections are given in the side of the thigh. Follow the directions on the side of the pen. • Take the safety cap off the pen • Press the tip of the injector hard against the side of the person’s thigh, halfway between the hip and the knee. • Hold the pen in place for 10 seconds • Pull the pen straight out, making sure you don’t put your fingers over the end that has been pressed against the person’s thigh • Either the person should rub the injection spot for 10 seconds. • Note the time of the injection. Give the pen to the EMS responders for proper disposal. • Call 911 if the person doesn’t get better or it there is a delay greater than 10 min for advanced help to arrive consider giving another injection.
External Bleeding • It is important to stay calm when bleeding occurs it often looks worse than it is. • 2 items are used to help with bleeding • A Dressing: is a clean material used directly on a wound to stop bleeding, example a piece of gauze or cloth • A Bandage: is material used to protect or cover an injured body part. It may also be used to help keep pressure on a wound. • Actions to control bleeding • Make sure the scene is safe • Send someone to get the first aid kit • Put on gloves and mask if you have them. • If possible have the person apply direct pressure to the wound while you put on your gloves. • Apply dressings from the first aid kit. Put direct pressure on the dressing over the bleeding area. Use the flat part of your fingers or the palm of your hand. • If bleeding doesn’t stop you will need to add a second dressing and press harder. Do not remove a dressing once it is in place because this could cause the wound to bleed more. • Once the bleeding has stopped or if you can’t keep pressure on the wound, wrap a bandage firmly over the dressings to hold them in place. • For minor cuts, wash the area with soap and water. Then, apply a dressing to the wound.
External Bleeding • Use of a tourniquet • If an arm or leg has severe bleeding and you can’t stop the bleeding with direct pressure you can use a tourniquet. • You should make sure to call 911 and get and AED because uncontrolled bleeding can lead to more complications. • The first aid kit should contain a premade tourniquet, it is a strap that you wrap around the injured person’s arm or leg and a straight, stick-like object called a windlass. • The windlass is used to tighten the tourniquet, if it is applied correctly it should stop the bleeding. • Once it is in place note the time and leave it alone until someone with more advance training arrives and takes over. • Applying the tourniquet • Make sure the scene is safe * If you do not have a premade tourniquet • Call 911 and get a first aid kit and an AED * Make one by folding a cloth or bandage so that it • Put on gloves and face mask if available is long and at least 1in wide. • Place the tourniquet about 2 inches above the injury if possible * Wrap the bandage 2in above the injury if possible • Tighten the tourniquet until the bleeding stops * tie the ends of the bandage around a small hand • Note what time it was placed on the body. Tool, stick, or something similar. • Once the bleeding has stopped leave it alone until EMS arrive. * Turn the item used to tighten the tourniquet until the bleeding stops and secure the hand tool.
Bleeding • Shock occurs when a person is losing a large amount of blood. It can also be caused by • Warning signs someone may be in shock • Feel weak, faint, or dizzy * Have pale or grayish skin • Feel nauseated or thirsty * Be restless, agitated or confused • Be cold and clammy to the touch • Treating Shock 1. Make sure the scene is safe and call 911 3. Cover them with a blanket to keep warm 2. Help the person to lie on their back 4. Check to see if CPR is needed • Internal Bleeding • This is bleeding that is occurring inside the body and may only be seen as a bruise under the skin or not all. • You should suspect internal bleeding if • Injury from car crash or fall from a high height * Pain in the abdomen or chest after injury • Injury to the abdomen or chest * Shortness of breath after injury • Sports injuries, slamming into another person or being hit with a ball * Signs of shock • Coughed up or vomited blood after injury * A knife or gunshot wound • Treating Internal Bleeding • Make sure the scene is safe call 911 and get a first aid kid • Wear gloves and mask • Have them lie down and keep still check for signs of shock
Signs of Head Injury/Concussion • Signs of a possible head injury • Does not respond or only moans * Vomits • Acts sleepy or confused * Has a seizure • Has trouble seeing, walking, or moving any part of the body • If a person has a head injury that results in a change in consciousness, worsening signs or symptoms or other causes for concern the person should be evaluated by a medical professional. • Concussion • May occur when the head or body is hit so hard that the brain moves inside the skull bumping into the skull causing bruising to occur. • Signs of a concussion • Feeling stunned or dazed * Headache • Confusion * Nausea or vomiting • Dizziness, unsteadiness, difficulty in balancing * Double vision or flashing lights • Loss of memory of events that happened before or after the injury • How to treat a Head Injury • Make sure the scene is safe and call 911and get the first aid kit • Have the person remain as still as possible. Wait for someone with more training to arrive and take over. • Do not twist or turn the person’s head or neck unless absolutely necessary.
Fractures • Injuries to bones and joints and muscles are common. Without an x-ray it may be impossible to tell if a bone is broken or injured. • Steps to follow is possible broken bone or sprain • Make sure the scene is safe and get the first aid kit • Put on your gloves if available • Cover any open wound with a clean dressing • Put a towel on top of the injured body part. Place a bag of ice with water in it on top of the towel for 20 minutes. • Call 911 if there is a large open wound, the body part is bent abnormally or your not sure what to do • If the injured body part hurts, the person should avoid using it until checked by a doctor.
Splinting • Splinting keeps an injured body part from moving. If a broken bone has come through the skin or is bent, it should not be straightened. • The injury need to be protected until someone with more advanced training arrives to take over • If the injured part is bleeding, apply direct pressure to stop the bleeding. Apply a dressing to the wound before applying the splint. • Leave the deformed or bent body part in their bent position as you apply the splint. If the bone has come through the skin, cover the wound with a clean dressing and splint as needed. • Steps on how to apply a splint • Make sure the scene is safe, get first aid kid and put on gloves. • Find an object that you can use to keep the injured arm or leg from moving. • Rolled up towels, magazine, and pieces of wood can be used as splints. Splint in a way to reduce pain and limit further injury. The splint should be longer than the injured area and should support the joints above and below the injury. • After covering any broken skin with a clean or sterile cloth, tie or tape the splint to the injured limb so that it supports the injured area • Use tape, gauze, or cloth to secure it. It should fit snugly but not cut off circulation • If you are using a hard splint, like wood, make sure you pad it with something soft, like clothing or a towel. • Keep the limb still until the injured person can be seen by a healthcare provider.