Lighting/Utilities
This document outlines the essential steps and considerations for designing a safe, energy-efficient, and economical lighting system that meets visibility requirements. It covers the location and integration of utilities, including overhead and underground, through thorough survey and mapping. Emphasis is placed on the selection of lighting elements, luminaire types, and mounting specifications, ensuring compliance with utility standards. It also details the electrical design and preparation of comprehensive lighting plans and specifications, essential for successful project execution and utility coordination.

Lighting/Utilities
E N D
Presentation Transcript
Lighting/Utilities HDM Ch. 12/13
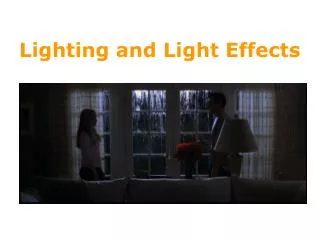
Goal: Safe, energy efficient, economical lighting system which will produce the desired visibility
Design Steps • Locate all utilities (overhead/underground) • Planimetrics (base mapping) • Survey • Utility companies • As-builts • Plot utilities on plans, cross-sections & profiles • Incorporate utility locations in design • Send prel. plans to utilities (conflicts) • Utilities will show proposed relocations • Incorporate all utility info in PS&E • Make sure all utility resolutions and agreements are initiated early
Lighting • Local municipality assumes O&M cost/responsibility • Design elements • Light source (lamp) • Luminaire (lamp& reflector) type and position • Mounting Height • Pole offset from traveled way • Electrical design
Equipment • Luminaire (lamp & reflector/refractor) • Luminaire Support) • Arm (single arm; truss; davit) ( • Pole (aluminum, wood, fiberglass) • Base (breakaway, anchor, direct-embedment) • Foundation • CIP/precast or direct embedment (check soils)
Typical • High pressure sodium (HPS) • Common combinations: • 150W / 9m height • 250W / 12m height • 400W / 12-15m height
Luminaire Spacing • Design guides: • Outdoor Illumination Recommendations • Roadway Lighting Quick Selector http://www.gelightingsolutions.com/ • Computer Software • Equations; see HDM
Handout Design Guides • Determine minimum average fcs • fcs (avg foot-candles @ end of lamp life) • Higher numbers mean more light • Determine uniformity ratio • (avg/min uniformity) • Defines quality of illumination • Better to have low #’s • Determine spacing from “Roadway Lighting Quick Selector”
Example • 4-lane, collector, commercial (ped conflict high) • GE M-400 Prismatic Luminaire • 40 ft mount ht; 4-ft overhand • 400W HPS • Answer • FCS: 0.8 (or greater) • Ratio: 3:1 (or less) • Spacing: approx. 75 feet
Collector (high ped conflict): Avg Luminance: 0.8 Uniformity Ratio (Lavg/Lmin=3)
3:1 (or less)----Spacing less than 75’ (Controls) & 0.8 fc (or more)----Any spacing will work
Electrical • Electrical distribution (connection to utility poles) • Wiring (size/type) • Conduit (galv steel or PVC) • Pullboxes (CIP/precast) • Junction Box (one for each luminaire) • Photoelectric control (individual or central)
Lighting Report • Light source type • Size/mounting height • Luminaire type and location • Luminaire spacing and arrangement • Power supply point • Hardware • Calculations/computer printouts
Lighting Plans & Specs-1/2 • Roadway lighting plan • EP,ES, Edge of Curb • Luminaire supports and spacing • Other facilities (conduit, cables, jacking, pole numbering, controller, power supply, and pullboxes) • Table of luminaire installation • Luminaire # (correlates to plan) • Location by station • Lateral offset • Foundation elevation • Foundation type • Pole type • Luminaire type and lamp size, voltage requirements • Luminaire mounting height
Lighting Plans & Specs-2/2 • Wiring details • Circuit wiring • Transformer, base wiring • Controller wiring • Pole foundation details • Special installation details for cut/fill • Dimensional requirements for foundation/conduit placement • Pole details (general configuration) • Misc. details • Limits of clearing and grubbing
Miscellaneous • Exit ramps---Poles should be located approximately 50m away from the gore area (to avoid being hit) • Bridge lighting—Locate poles approx. 25 m to provide light under the bridge (if bridge does not have under-bridge lighting) • Signs-poles should be placed >15 m in front of lighted signs or >10m in front of unlighted signs
Special Lighting • High Mast (interchanges/rest stops) • Increased safety/visibility • Light “spillover” • Municipality responsible for O&M • Ornamental/Decorative • Considered a betterment and local municipality must pay add’l costs
Utilities-Definition: Privately, publicly, or cooperatively owned lines, facilities, or systems for producing transmitting or distributing:
Utilities • Communications, Power, Electricity • Light, Street Lighting Heat • Gas, Oil, Crude Products • Heat, Steam • Water, Stormwater, Wastes • Fire/Police Signal Systems
Utilities • It is in the public interest to accommodate utilities on state ROW
General Design Steps • Locate all utilities (ovh/ugd) • Plot utilities on plans/cross-sections/profiles • Incorporate utilities in design • Send preliminary plans to utilities • Incorporate all comments and resolve problem areas • Make sure all utility resolutions/agreements are initiated early
Controlled Access • Usually no utilities except right-angle crossings • Crossings are usually encased
Non-Controlled Access • Install utilities close to ROW and outside of curb line/ditch line
Responsibility • Private Utilities • If w/in state ROW, utility owner must pay • If outside ROW, state will pay • Municipal Utilities • Reimbursable if relocation required due to construction • Some utilities might be considered a betterment and municipality might have to pay incremental costs
Dig Safely NY • http://www.digsafelynewyork.com/