Download
1 / 5
50 likes | 58 Views
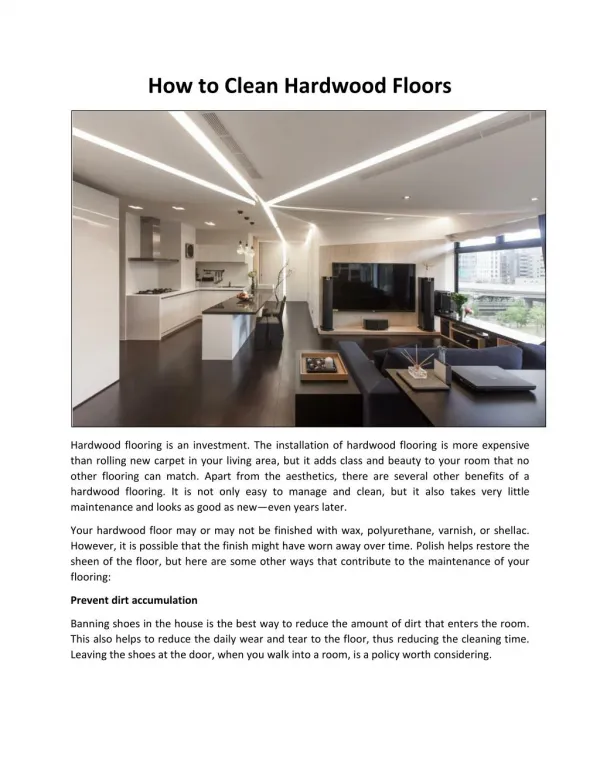
Kingsmen, a professional wooden flooring company in Bangalore that remodels your place, either it's your residential or official one. we design your place with impressive styles and a collection of different wooden species as per your requirement. We have the largest centralized sourcing, warehouse, and distribution network, which makes us reach every location.<br>

E N D
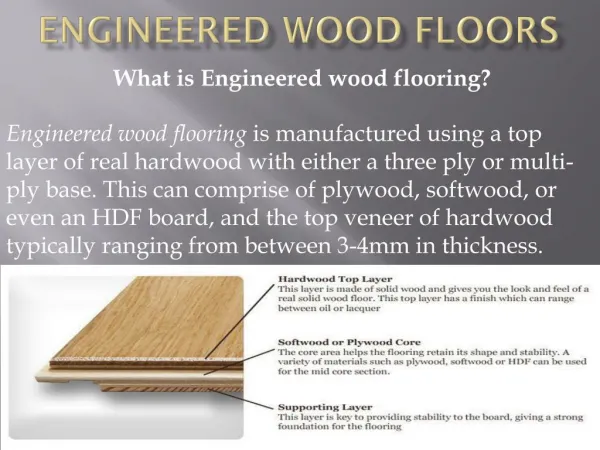
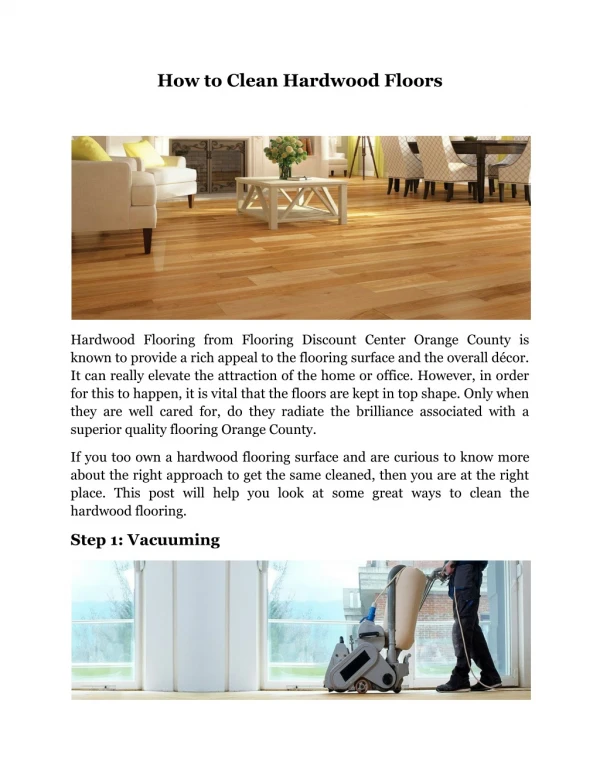
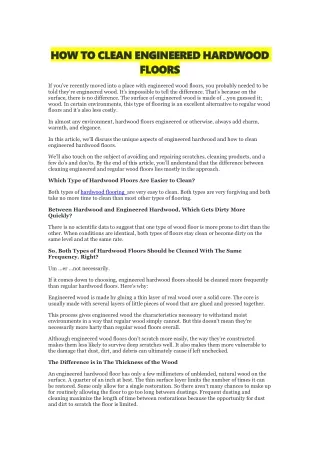
HOW HOW TO TO CLEAN CLEAN ENGINEERED ENGINEERED HARDWOOD FLOORS FLOORS HARDWOOD If you’ve recently moved into a place with engineered wood floors, you probably needed to be told they’re engineered wood. It’s impossible to tell the difference. That’s because on the surface, there is no difference. The surface of engineered wood is made of …you guessed it; wood. In certain environments, this type of flooring is an excellent alternative to regular wood floors and it’s also less costly. In almost any environment, hardwood floors engineered or otherwise, always add charm, warmth, and elegance. In this article, we’ll discuss the unique aspects of engineered hardwood and how to clean engineered hardwood floors. We’ll also touch on the subject of avoiding and repairing scratches, cleaning products, and a few do’s and don’ts. By the end of this article, you’ll understand that the difference between cleaning engineered and regular wood floors lies mostly in the approach. Which Type of Hardwood Floors Are Easier to Clean? Both types of hardwood flooring are very easy to clean. Both types are very forgiving and both take no more time to clean than most other types of flooring. Between Hardwood and Engineered Hardwood, Which Gets Dirty More Quickly? There is no scientific data to suggest that one type of wood floor is more prone to dirt than the other. When conditions are identical, both types of floors stay clean or become dirty on the same level and at the same rate. So, Both Types of Hardwood Floors Should be Cleaned With The Same Frequency. Right? Um …er …not necessarily. If it comes down to choosing, engineered hardwood floors should be cleaned more frequently than regular hardwood floors. Here’s why: Engineered wood is made by gluing a thin layer of real wood over a solid core. The core is usually made with several layers of little pieces of wood that are glued and pressed together. This process gives engineered wood the characteristics necessary to withstand moist environments in a way that regular wood simply cannot. But this doesn’t mean they’re necessarily more harty than regular wood floors overall. Although engineered wood floors don’t scratch more easily, the way they’re constructed makes them less likely to survive deep scratches well. It also makes them more vulnerable to the damage that dust, dirt, and debris can ultimately cause if left unchecked. The Difference is in The Thickness of the Wood An engineered hardwood floor has only a few millimeters of unblended, natural wood on the surface. A quarter of an inch at best. The thin surface layer limits the number of times it can be restored. Some only allow for a single restoration. So there aren’t many chances to make up for routinely allowing the floor to go too long between dustings. Frequent dusting and cleaning maximize the length of time between restorations because the opportunity for dust and dirt to scratch the floor is limited.
With regular wood floors, there’s room to be a little less fastidious. But with the engineered type, dusting and keeping them dusted is a pretty big deal. But it’s certainly far from impossible. With the right tools, a little effort, and a bit of know-how, keeping your engineered hardwood floors in shape is very easy. So easy that it’s likely to become one of the incidental aspects of your housekeeping routine. Cleaning Your Engineered Wood Floor; Things To Keep in Mind Less is more! Less dust, less dirt, less debris. This is what you’re after. Less is also more when it comes to methodology. It doesn’t need to be fancy. It just needs to be done and it needs to be done very gently. Sometimes, more is more! Cleaning your engineered hardwood floors also needs to be done frequently. If you see a film of dust or a clod of dirt, remove it before someone walks on it. Grinding dirt and dust into the floor’s surface is never helpful. Enough of this grinding will dull the finish and leave your floor looking cloudy and lifeless. More is also more when it comes to protecting your investment. While the nothing-fancy rule still applies, you should be prepared to pay more for quality cleaning tools, supplies, and materials. You don’t need a lot of these things. So spending a little more on them probably won’t break the bank. Doing this will keep you from having to spend a lot to restore or replace your floors sooner than necessary. Tools, Supplies, And Materials Broom: These are usually sold with a matching dustpan. Your broom’s bristles don’t need to be made of horsehair or bleached hair from the tail of a wombat, or valuable in a rut, etc. Man-made materials are fine. Look for soft, densely packed bristles or twisted bristle strands that are flared at the ends. Floor Mop: Buy the kind that’s designed to accommodate a removable microfiber pad. Something with a mophead that can flip onto its other side is also nice. Also, the wider the mop head, the greater the coverage of each pass taken with it. 18 inches wide is ideal. 24 inches wide is also good. But anything wider can be a bit cumbersome and difficult to maneuver between pieces of furniture. Spare Microfiber Mop Pads: Double-sided pads are preferable (One side for application of a cleaning solution, the other, for wiping). You might need to use your mop often. So, you’ll need to have a healthy supply of mop pads on hand. Spray Bottle: Fill this with water. If your kitchen faucet has a filter on the end of it, go ahead and use filtered water. It couldn’t hurt. Floor Vacuum: Yes, there IS a difference between a vacuum and a floor vacuum. Regular vacuums have beater bars. A beater bar is a roller located inside the vacuum head that spins at several hundred or more RPM. These also have stiff bristles that are intended to fluff up the pile of carpets in order to better remove the dirt from them. The bristles are also stiff enough to scratch the surface of a floor also at several hundred RPM. Instead of a beater bar, the head of a floor vacuum has short, soft bristles. These are usually located just inside the housing. Many floor vacuum heads also have small wheels to help move the vacuum back and forth. If your carpet vacuum is equipped with a floor accessory, this will do just as well. One with rubber wheels is best. Plastic wheels tend to scratch surfaces. No wheels at all are preferable to plastic ones.; Step 1 – Sweep or Vacuum Your Floor Frequently
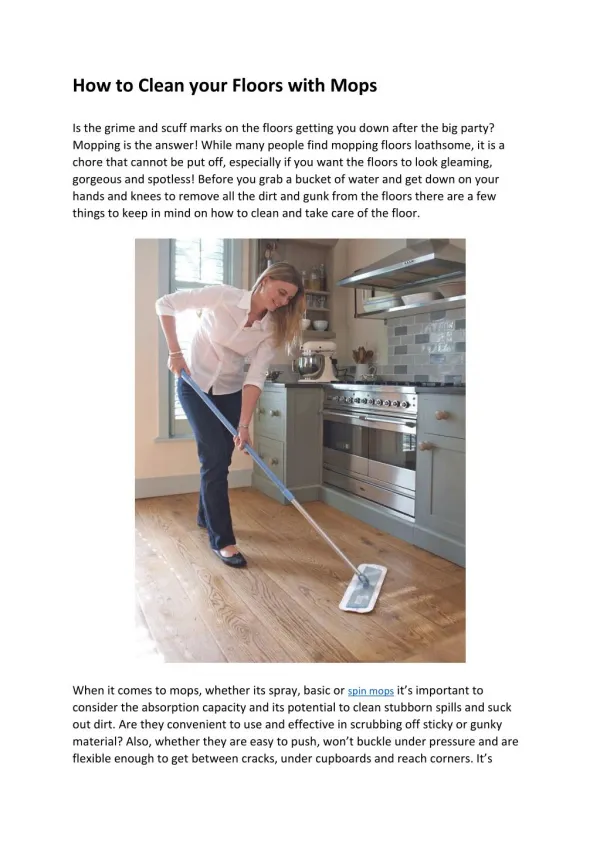
High-traffic areas may require sweeping on a daily basis. Other areas might only need to be swept weekly. Sweeping is an excellent way to stay ahead of dust and debris and minimize allergens. Sweeping is good, but sweeping debris into a single pile in the center of the floor is not. As debris is dragged across the floor, it can leave a trail of tiny scratches along the way. Sweep dust and debris over shorter distances and into smaller piles for transfer into a dustpan. If your household is a busy one with heavy foot traffic, dust, dirt, and debris will be heavier. Spills and messes will happen more frequently. Although it comes in handy in almost any situation, a cordless stick vacuum can be a busy household’s best friend. 45 minutes of continuous operation is easy enough to vacuum occasional dry spills and keep the floors dusted in a 2,000 square foot home. Stick vacuums are lightweight (not more than five pounds) and many come complete with mounting brackets that you can install near an outlet. When you’re done using the vacuum, simply hang it on the wall and plug it into recharge. Step 2 – Damp Mop Your Floor Periodically The amount of traffic determines this schedule. For heavy traffic areas, your floors might need to be damp mopped weekly. Other areas, bi-weekly. If your floors tend to become a little cloudy or foggy looking in between damp moppings, you’ll need to shorten the intervals. To damp mop your floor, this is where “less is more” comes into full play; Attach a double-sided microfiber pad to the head of your floor mop, cleaning side down. Working in sections, use your spray bottle to spray some water on the floor. Wipe the water with your mop until the section is dry. Repeat this process in each section until all sections are complete. If at some point, your mop becomes too saturated to wipe the floor dry, switch out the microfiber pad with a fresh, dry one… If the members of your household wear their shoes at home rather than slipping them off when they enter, you might prefer to spray a disinfectant on your floor. In that case, you can use 3% hydrogen peroxide instead of water. Let the hydrogen peroxide remain wet on the floor for 30 seconds before wiping it dry. Step 3 – Deep Clean Your Floor Occasionally Grime happens. It’s a fact of life. In busy households with kids and pets, dirt gets tracked infrequently, but somehow, dirt is never tracked out. Because of this, sweeping and damp mopping occasionally need to be supplemented with deep cleaning. For some, “occasionally” is defined as once monthly. For others, a deep cleaning may take place on a bi-weekly basis. necessity is the determining factor. This is where a cleaning solution might be helpful. We’ve already discussed the benefits of hydrogen peroxide to disinfect your engineered wood floors. But many people report that after using it, their floors look new again. Nevertheless, if you want to check out some of the available products on the market, now is the time. Simply replace the water in your damp mopping routine (above) with the product of your choice. There are lots of products out there. Be sure to follow the directions on the label of the product you choose..
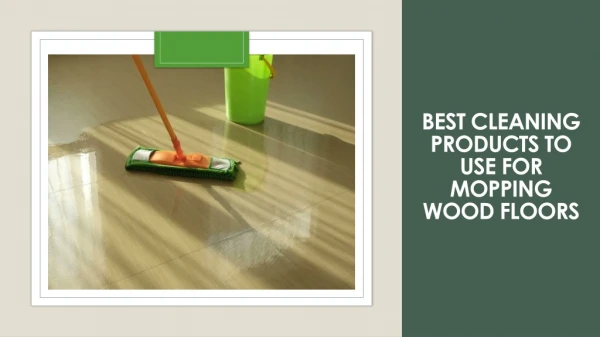
Best Products For Cleaning Engineered Hardwood Floors Choosing from all the available hardwood floor cleaning products can be difficult. There are so many of them. A trip to the home improvement center won’t uncomplicate this effort as much as it will add even more products to choose from. So feel free to borrow from our very short list of favorites. We’ve narrowed it down to three. For what it’s worth, we’ll acknowledge that choosing between these three isn’t easy either, but it helps. Please note that these products are intended for finished floors only. Always first test products in an inconspicuous place on your floor. Bona Hardwood Floor Cleaner Bona’s entire line of hardwood floor cleaners is far and away the best and easiest products to use for cleaning hardwood or engineered hardwood floors. Spray it on and wipe it off. No rinsing, no problem. Weiman Hardwood Floor Cleaner Weiman is another brand we like. Weiman cleaning products include stainless steel cleaner and polish, and even metal and jewelry cleaner. All are excellent. For our purposes, Weiman’s Hardwood Floor Cleaner does the job very nicely. Murphy’s Oil Soap Wood flooring, wood furniture, wood cleaning, wood polish… If wood is involved, Murphy’s is all over it in the best way. Their Squirt and Mop Hardwood Floor Cleaner won’t let you down. Care and Maintenance of Engineered Hardwood Floors: Do’s and Don’ts There are some excellent and popular ways to take care of your floor along with some popular methods that simply don’t work. The latter can actually damage your floor. Here’s a breakdown of some of the important things to do and some to avoid doing. Spills Do get these off your floor as soon as you see them. Any spill that contains moisture will damage your floor if it’s allowed to remain. Soak and wipe up puddles. If more than water is involved, follow up by cleaning the area with water to make sure there’s no residue. Then wipe the area dry. Scratches Don’t leave a scratch untreated. Untreated scratches have a way of quickly becoming exponentially ugly. This is because they allow dirt and moisture to penetrate the floor. There are many scratch repair kit products available to help you fix these as soon as possible. For more details, read our guide on fixing scratches on engineered hardwood floors. Mop and Bucket Cleaning Definitely, a “don’t”. This outdated method drenches floors with water and usually, some sort of harsh chemical is also involved. There’s no need to keep a string mop and bucket anywhere near your beautiful floors.
Steam Steam is good for blocking felt hats and cleaning grout. It’s also good for weakening adhesive properties in floor glue and causing it to warp. Applied to engineered hardwood floors, it will also help to lift and curl the layers and swell floorboards. Steam is another “don’t”. Cleaning with vinegar This is a very popular cleaning method. So popular in fact that saying “don’t” to this one often goes unheard. For an effective homemade and/or natural cleaning solution, there’s water. Small amounts are key. Damp-mop with it. Not enough? Okay, let’s move on… Hydrogen peroxide is another natural cleaning solution. It’s also extremely effective. One of the really nice things about both these natural products is that they don’t smell like a bottle of vinegar fell from the pantry shelf. Also, water won’t stain as quickly as vinegar can and hydrogen peroxide is also used to remove water stains. But hydrogen peroxide might not remove the stains that vinegar can cause. If hydrogen peroxide doesn’t remove the vinegar stains, the stained floorboards will need to be replaced… If you’re still intent on using vinegar in whatever concentration, to clean your engineered hardwood floor, at least you’ll be making an informed decision. Streak-Free Formulas This is more of a “why bother?” If a surface is wiped completely dry as soon as a cleaning solution is applied to it, there won’t be any streaks. That is, unless of course, the solution isn’t intended for application to the particular surface. The Most Important Thing To Know About Engineered Hardwood Floors Keeping your engineered hardwood floors looking their best doesn’t need to be a time- consuming, back-breaking chore. In fact, the opposite should be the case. There’s a reason for this. Your floor is made from natural products. Technology has brought the outside in. The natural qualities are part and parcel of the beauty of wood floors. This is chiefly, what accounts for their lasting popularity. Think about it; you won’t find more beautiful floors than those made from natural products. Wood, marble, slate, etc. Saltillo tiles remind us that even the rawest form of clay is beautiful. With this in mind, there’s only one way to save your back and your time along with the beauty of your engineered hardwood floor — keep your floors’ cleaning program as simple and as natural as possible. Check Out the Best Wooden Flooring Company in Bangalore, They provide Premium Wooden Flooring, Laminate Floors, Vinyl Floors, Tiles, Wall Cladding, and Sports flooring Products. You can now go ahead and choose beautiful wooden flooring to add that extra touch of class and elegance. ----THANK YOU----