PART 4 EXPERT LAND NAVIGATION Supplement
580 likes | 833 Views
PART 4 EXPERT LAND NAVIGATION Supplement. USING THE MILITARY LENSATIC COMPASS. PART 4 Expert Land Navigation Supplement. PART 4 Expert Land Navigation Supplement. WARNING.

PART 4 EXPERT LAND NAVIGATION Supplement
E N D
Presentation Transcript
PART 4 EXPERT LAND NAVIGATION Supplement
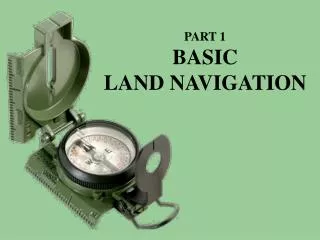
USING THE MILITARY LENSATIC COMPASS PART 4 Expert Land Navigation Supplement
PART 4 Expert Land Navigation Supplement WARNING This presentation is intended as a quick summary, and not a comprehensive resource. If you want to learn Land Navigation in detail, either buy a book; or get someone, who has the knowledge and skills, to teach you in person.
PART 4 Expert Land Navigation Supplement NOTE To get the ideas across presented on these slides, many figures, pictures, and calculations may not be to scale and may be exaggerated for clarity.
PART 4 Expert Land Navigation Supplement Note: Prior to being issued any training *equipment, you will be required to sign a “statement of liability” agreeing to pay for anything you damage or lose. All items will be inspected and inventoried prior to your signature and at the end of the training day too. If you do not intend to sign this statement, then you may be denied training. *You may use your own equipment.
PART 4 Expert Land Navigation Supplement Any Questions?
PART 4 Expert Land Navigation Supplement BREAK TIME
PART 4 Expert Land Navigation Supplement . . . and now on with the . . . PRESENTATION
PART 4 Expert Land Navigation Supplement LAND NAVIGATION WITH MAP ANDLENSATIC COMPASS
PART 4 Expert Land Navigation Supplement LAND NAVIGATION • Why Learn Land Navigation? • Tracking present location • Determining Distance • Sense of direction • How to read a topographic map • Terrain and map association • Spatial skills • Planning safe, practical routes • And more Navigational skills • The best way to learnLAND NAVIGATION is to get "dirt time", that is, get out there with a map and compass! • Navigation is not about finding yourself after you are lost (although that’s what happens sometimes); it’s about keeping track of your position as you move away from a known point. As you move you have to remain cognizant of the terrain you are leaving, of the terrain you are passing, and of the terrain that is ahead. • Navigation in the wilderness means knowing your starting point, your destination, and your route to get there. • These skills will allow you to venture farther off the beaten path than you ever thought before. Training and practicing land navigation on foot provides the following everyday navigation (how not to get lost) benefits; (Where am I?) (How far is it and am I there yet ?) (Where do I want to go and where am I actually going ?) (Do I understand the map ?) (What hill or river am I looking at ?) (Can I mentally visualize the landscape in 3D ?) (Take a long safe route or a short risky route ?)
PART 4 Expert Land Navigation Supplement • THIS PRESENTATION IS DIVIDED INTO FOUR PARTS • ________________________________________________________________________________________________________________________________________________________ • PART 1 Basic Land Navigation • The Lensatic Compass • The Topographic Map • The Land and Map Association • PART 2 Intermediate Land Navigation • Making Sense of Direction • Tracking Present Location • Determining Travel Distance • PART 3 Advance Land Navigation • Planning to Navigate • Navigation Methods to Stay On Course • Additional Skills of Land Navigation • PART 4 Expert Land Navigation • Navigation in different types of Terrain • Night Navigation • Sustainment
PART 4 Expert Land Navigation Supplement Any Questions?
PART 4 Expert Land Navigation Supplement PART 4EXPERT LAND NAVIGATIONsupplement • Navigating WITHOUT a MAP • Description • Skills
PART 4 Expert Land Navigation Supplement NAVIGATING WITHOUT A MAPDESCRIPTION The LAND NAVIGATION information, concepts, and skills already presented in the other lessons will help you to navigate anywhere in the world. However, there will be a time when you DO NOT have a map, and all you have is a Lensatic Compass. With this technique you can navigate, plan your route, stay on course, and keep track of your location from start to finish, at all times. • There are dozens of situations when you may have to navigate without a map. • This can make you uneasy. Unless you know what you are doing, and have very high confidence in your navigation skills, without a map. • Once these skills are mastered, you can even navigate without a compass !!!
PART 4 Expert Land Navigation Supplement NAVIGATING WITHOUT A MAP Using a Lensatic Compass • This process means using Mathematics and Measurements for navigation; a process • for plotting lines or angles on a chart. The technique is based on the CARTESIAN COORDINATE SYSTEM. • With this technique, one can be more precise on their location and never be lost. • This technique is very useful when one does not have a map available. • When going from Point A to Point B, you can travel in any direction/multiple directions, and still reach Point B. • You do not have to travel in a straight line to reach Point B. And you do not need a map. • When someone else communicates a location, you can meet them there. Even if both parties do not have a map. • One can establish their position in featured or featureless terrain, foul weather, or even in complete darkness. • Required equipment … • Lensatic Compass (use as a protractor for headings, measurements, and drawing lines on paper) • Paper(water proofed for durability – able to write on and erase) • Pencil(preferably one that can write in rain or wet paper) • Calculator ( optional – for adding positive and negative numbers) • Protractor ( optional – used to determine direction and draw/plot lines on paper) • Plotter Ruler ( optional – similar to a protractor ) • Mechanical Compass ( optional – for drawing circles ) • This technique can also ... • Be used for making an accurate one dimensional map of the area. • Be used on a topographical map instead of a plotter graph. • Be used with a number system that two or more people (at different locations) will understand, when communicating via radio or other means of communication, of their location. • Be used for many other purposes, that you can think of.
PART 4 Expert Land Navigation Supplement NAVIGATING WITHOUT A MAP Using a Lensatic Compass This is all you need. LENSATIC COMPASS Pencil Paper
PART 4 Expert Land Navigation Supplement NAVIGATING WITHOUT A MAP Using a Lensatic Compass OPTIONAL - Here are some examples of PROTRACTORS and PLOTTER RULERS. PROTRACTORS PLOTTER RULERS vary in size and format, but this is a fair representation of one. Notice that there is a protractor on the top. This protractor is marked off in 360 degree segments. The horizontal lines are for orientation with your course, and also have various scales so that the device can be used on a variety of charts that may utilize different measurement scales. Mechanical Compass
PART 4 Expert Land Navigation Supplement NAVIGATING WITHOUT A MAP Using a Lensatic Compass OPTIONAL - Here are some examples of PLOTTERS and GRAPH PAPER. PLOTTER RULERS vary in size and format, but this is a fair representation of one. Notice that there is a protractor on the top. This protractor is marked off in 360 degree segments. The horizontal lines are for orientation with your course, and also have various scales so that the device can be used on a variety of charts that may utilize different measurement scales. SEA PLOTTER for ship navigation on water. With an integrated adjustable parallel arm fitted with a moveable compass rose. This permits the direct plotting of magnetic compass courses. Graph Papers and Coordinate Graphs. Draw your own Cartesian Coordinate System on blank paper or Graph Paper.
PART 4 Expert Land Navigation Supplement NAVIGATING WITHOUT A MAP Using a Lensatic Compass The technique is based on the CARTESIAN COORDINATE SYSTEM. The following pages will explain how to use this system for land navigation.
PART 4 Expert Land Navigation Supplement NAVIGATING WITHOUT A MAP Using a Lensatic Compass Here is the basics of using the System. Step One N 1. On a blank sheet of paper draw a Cartesian Coordinate system. 2. Use the Lensatic Compass to draw straight lines and equal tick marks. 3. Number the tick marks as shown. NOTE Remember that . . . LEFT & BOTTOM is negative numbers RIGHT & TOP is positive numbers 4. Use any number system desired. 5. Also leave space to be able to draw your path traveled. +8 +7 +6 +6 +7 +8 -8 -3 -4 -2 -1 -7 -6 -5 -2 -3 B -4 Leg 4 -5 -6 Leg 2 -7 Leg 3 Leg 1 -8 Also draw path traveled. A
PART 4 Expert Land Navigation Supplement NAVIGATING WITHOUT A MAP Using a Lensatic Compass Here is the basics of using the System. Step Two • From your current location (A), you decide on a heading of 50° and a distance of 8 units of measurement to (B). • 2. Units of measurement can be any desired distance, count, or number system. • Feet • Meter • Time • Pace Count • Mile • Kilometer • Number System N +8 +7 +6 B +5 +4 +3 +2 +1 +2 +3 +4 +5 +6 +7 +8 A DIFFERENT UNITS OF MEASUREMENTS -8 -3 -4 -2 -1 -7 -6 -5 -2 -3 -4 -5 -6 Zero 1 2 4.5 5 1.5 5.5 0.5 4 0.1 2.5 3.5 3 6 -7 2 4 9 10 3 11 1 8 0.2 5 7 6 12 10 20 45 50 15 55 5 40 1 25 35 30 60 -8 20 40 90 100 30 110 10 80 2 50 70 60 120 5 50 225 100 250 75 275 200 25 175 125 150 300 20 200 900 400 1000 300 1100 800 100 700 500 600 1200
PART 4 Expert Land Navigation Supplement NAVIGATING WITHOUT A MAP Using a Lensatic Compass Here is the basics of using the System. Step Three • From your current location (A), you decide on a heading of 50° and a distance of 8 units of measurement to (B). • 2. Units of measurement can be any desired distance, count, or number system. • Feet • Meter • Time • Pace Count • Mile • Kilometer • Number System • However, you decide that you DO NOT want to go in a straight line from (A) to (B). But instead, in multiple directions. • Leg 1 = 345° and 3 units N +8 +7 +6 B +5 +4 Leg 1 +3 +2 +1 +2 +3 +4 +5 +6 +7 +8 A -8 -3 -4 -2 -1 -7 -6 -5 -2 -3 B -4 -5 -6 -7 Leg 1 -8 A Also draw path traveled.
PART 4 Expert Land Navigation Supplement NAVIGATING WITHOUT A MAP Using a Lensatic Compass Here is the basics of using the System. Step Three • From your current location (A), you decide on a heading of 50° and a distance of 8 units of measurement to (B). • 2. Units of measurement can be any desired distance, count, or number system. • Feet • Meter • Time • Pace Count • Mile • Kilometer • Number System • However, you decide that you DO NOT want to go in a straight line from (A) to (B). But instead, in multiple directions. • Leg 1 = 345° and 3 units • Leg 2 = 105° and 4.5 units N +8 +7 +6 B +5 +4 Leg 1 +3 +2 +1 +2 +3 +4 +5 +6 +7 +8 A -8 -3 -4 -2 -1 -7 -6 -5 Leg 2 -2 -3 B -4 -5 -6 Leg 2 -7 Leg 1 -8 A Also draw path traveled.
PART 4 Expert Land Navigation Supplement Here is the basics of using the System. Step Three • From your current location (A), you decide on a heading of 50° and a distance of 8 units of measurement to (B). • 2. Units of measurement can be any desired distance, count, or number system. • Feet • Meter • Time • Pace Count • Mile • Kilometer • Number System • However, you decide that you DO NOT want to go in a straight line from (A) to (B). But instead, in multiple directions. • Leg 1 = 345° and 3 units • Leg 2 = 105° and 4.5 units • Leg 3 = 75° and 6 units • Leg 4 = 300° and 3.3 units N +8 +7 +6 B +5 +4 Leg 1 +3 Leg 3 +2 Leg 4 +1 +2 +3 +4 +5 +6 +7 +8 A -8 -3 -4 -2 -1 -7 -6 -5 Leg 2 -2 -3 B -4 Leg 4 -5 -6 Leg 2 -7 Leg 3 Leg 1 -8 A Also draw path traveled.
PART 4 Expert Land Navigation Supplement NAVIGATING WITHOUT A MAP Using a Lensatic Compass Here is the basics of using the System. Step Three • From your current location (A), you decide on a heading of 50° and a distance of 8 units of measurement to (B). • 2. Units of measurement can be any desired distance, count, or number system. • Feet • Meter • Time • Pace Count • Mile • Kilometer • Number System • However, you decide that you DO NOT want to go in a straight line from (A) to (B). But instead, in multiple directions. • Leg 1 = 345° and 3 units • Leg 2 = 105° and 4.5 units • Leg 3 = 75° and 6 units • Leg 4 = 300° and 3.3 units N +8 +7 +6 B +5 +4 Leg 1 +3 Leg 3 +2 Leg 4 +1 +2 +3 +4 +5 +6 +7 +8 A -8 -3 -4 -2 -1 -7 -6 -5 Leg 2 -2 -3 B -4 Leg 4 -5 -6 Leg 2 -7 Leg 3 Leg 1 -8 A Also draw path traveled.
PART 4 Expert Land Navigation Supplement NAVIGATING WITHOUT A MAP Using a Lensatic Compass Here is the basics of using the System. Step Three • Every Time you change directions, draw and write down the … • LEG # or Route • Heading • Units of Measurements • Always use Intermediate Landmarks or some reference point, to stay on course. N +8 +7 +6 B +5 +4 Leg 1 +3 Leg 3 +2 Leg 4 +1 +2 +3 +4 +5 +6 +7 +8 A -8 -3 -4 -2 -1 -7 -6 -5 Leg 2 -2 -3 B -4 Leg 4 -5 -6 Leg 2 -7 Leg 3 Leg 1 -8 A Also draw path traveled.
PART 4 Expert Land Navigation Supplement NAVIGATING WITHOUT A MAP Using a Lensatic Compass Here is the basics of using the System. Step Four • Measure Vertical and Horizontal Distance of MAIN Route (A) to (B) . • Vertical = +4.6 N +8 +7 +6 B +5 +4 Leg 1 +3 Leg 3 +2 Leg 4 +1 +2 +3 +4 +5 +6 +7 +8 A -8 -3 -4 -2 -1 -7 -6 -5 Leg 2 -2 -3 B -4 Leg 4 -5 -6 Leg 2 -7 Leg 3 Leg 1 -8 A Also draw path traveled.
PART 4 Expert Land Navigation Supplement NAVIGATING WITHOUT A MAP Using a Lensatic Compass Here is the basics of using the System. Step Four • Measure Vertical and Horizontal Distance of MAIN Route (A) to (B) . • Vertical = +4.6 • Horizontal = +6.5 • This is the MAINV +4.6 , H +6.5 numbers N +8 +7 +6 B +5 +4 Leg 1 +3 Leg 3 +2 Leg 4 +1 +2 +3 +4 +5 +6 +7 +8 A -8 -3 -4 -2 -1 -7 -6 -5 Leg 2 -2 -3 B -4 Leg 4 -5 -6 Leg 2 -7 Leg 3 Leg 1 -8 A Also draw path traveled.
PART 4 Expert Land Navigation Supplement NAVIGATING WITHOUT A MAP Using a Lensatic Compass Here is the basics of using the System. Step Four • Measure Vertical and Horizontal Distance of MAIN Route (A) to (B) . • Vertical = +4.6 • Horizontal = +6.5 • This is the MAINV +4.6 , H +6.5 numbers • 2. Next measure LEGS Vertical and Horizontal • Leg 1 • Vertical = +2.9 • Horizontal = -0.7 • Leg 2 • Vertical = -1.5 • Horizontal = +4.1 • Leg 3 • Vertical = +1.5 • Horizontal = +5.8 • Leg 4 • Vertical = +1.7 • Horizontal = -2.9 N +8 +7 +6 B +5 +4 Leg 1 +3 Leg 3 +2 Leg 4 +1 +2 +3 +4 +5 +6 +7 +8 A -8 -3 -4 -2 -1 -7 -6 -5 Leg 2 -2 -3 B -4 Leg 4 -5 -6 Leg 2 -7 Leg 3 Leg 1 -8 A Also draw path traveled.
PART 4 Expert Land Navigation Supplement NAVIGATING WITHOUT A MAP Using a Lensatic Compass Here is the basics of using the System. Step Five • SUM all theLEGVerticals • SUM all the LEG Horizontals • Leg 1 • Vertical = +2.9 • Horizontal = -0.7 • Leg 2 • Vertical = -1.5 • Horizontal = +4.1 • Leg 3 • Vertical = +1.5 • Horizontal = +5.8 • Leg 4 • Vertical = +1.7 • Horizontal = -2.9 • Verticals = (+2.9)+(-1.5)+(+1.5)+(+1.7) = +4.6 • Horizontals = (-0.7)+(+4.1)+(+5.8)+(-2.9) = +6.5 • 2. The LEG Vertical and Horizontal totals will equal the MAIN Route (A) to (B) . • Vertical = +4.6 • Horizontal = +6.5 • This is the MAINV +4.6 , H +6.5 numbers N +8 +7 +6 B +5 +4 Leg 1 +3 Leg 3 +2 Leg 4 +1 +2 +3 +4 +5 +6 +7 +8 A -8 -3 -4 -2 -1 -7 -6 -5 Leg 2 -2 -3 -4 -5 -6 -7 -8
PART 4 Expert Land Navigation Supplement NAVIGATING DIFFERENT TERRAINSDEAD RECKONING (advanced – compass and plotter) Here is the basics of using the System. • Why are these numbers important? • Verticals = (+2.9)+(-1.5)+(+1.5)+(+1.7) = +4.6 • Horizontals = (-0.7)+(+4.1)+(+5.8)+(-2.9) = +6.5 • The LEG Vertical and Horizontal totals equaled • the MAIN Route (A) to (B) . • Vertical = +4.6 • Horizontal = +6.5 • Suppose you only traveled LEGS 1 thru 3. . . • Stopped to radio in your position • Decided to head to a new location other than (B) • Wanted to know what heading and distance to (B) is, from current location at end of LEG 3. • Decided to head back to Point (A). N +8 +7 +6 B +5 +4 Leg 1 +3 Leg 3 +2 +1 +2 +3 +4 +5 +6 +7 +8 A -8 -3 -4 -2 -1 -7 -6 -5 Leg 2 -2 -3 B -4 -5 -6 Leg 2 -7 Leg 3 Leg 1 -8 A Also draw path traveled.
PART 4 Expert Land Navigation Supplement NAVIGATING DIFFERENT TERRAINSDEAD RECKONING (advanced – compass and plotter) Here is the basics of using the System. • With only LEGS 1 thru 3 traveled. Add the Verticals and Horizontals. • Verticals = (+2.9)+(-1.5)+(+1.5) = +2.9 • Horizontals = (-0.7)+(+4.1)+(+5.8) = +9.2 • The LEG Vertical and Horizontal totals DO NOT • EQUAL the MAIN Route (A) to (B) . • Vertical = +4.6 • Horizontal = +6.5 • Draw a Vertical Plotter Line that equals +2.9 and a HorizontalPlotter Line that equals +9.2. • Where the Plotter Lines cross, this is your current location ( ), in relation to Points (A) and (B) . • Now you can plan your next LEG or Route to travel. N +8 +7 +6 B +5 +4 Leg 1 Vertical +3 Leg 3 +2 +1 +2 +3 +4 +5 +6 +7 +8 A -8 -3 -4 -2 -1 -7 -6 -5 Leg 2 -2 -3 B -4 Horizontal -5 -6 Leg 2 -7 Leg 3 Leg 1 -8 A Also draw path traveled.
PART 4 Expert Land Navigation Supplement NAVIGATING DIFFERENT TERRAINSDEAD RECKONING (advanced – compass and plotter) Here is the basics of using the System. • SCENARIO one • You wanted to know what heading and distance to • (B) is, from current location at end of LEG 3. This • would be LEG 4 calculation. • With the Lensatic Compass laid out from current location ( )to Point (B), you can get the Heading and Units of Measurement. • Leg 4 = 300°and 3.3 units • This would be LEG 4 calculations. Now you have the directions to get to Point (B). • And to measure LEG 4Vertical and Horizontal numbers, just draw LEG 4 from zero. • Leg 4 • Vertical = +1.7 • Horizontal = -2.9 N +8 +7 +6 B +5 +4 Leg 1 +3 Leg 3 +2 Leg 4 +1 +2 +3 +4 +5 +6 +7 +8 A -8 -3 -4 -2 -1 -7 -6 -5 Leg 2 -2 -3 B -4 ? -5 -6 Leg 2 -7 Leg 3 Leg 1 -8 A Also draw path traveled.
PART 4 Expert Land Navigation Supplement NAVIGATING DIFFERENT TERRAINSDEAD RECKONING (advanced – compass and plotter) Here is the basics of using the System. • SCENARIO two • You decided to head back to Point (A). This • would be a NEW LEG 4calculation. • With the Lensatic Compass laid out from current location ( )to Point (A), you can get the Heading and Units of Measurement. • NEW LEG 4 = 255°and 9.6 units • This would be LEG 4 calculations. Now you have the directions to get back to Point (A). • But you want to verify your calculations. . . • (see next page) N +8 +7 +6 B +5 +4 Leg 1 +3 +2 Leg 3 +1 +2 +3 +4 +5 +6 +7 +8 A -8 -3 -4 -2 -1 -7 -6 -5 Leg 2 -2 -3 B -4 -5 -6 Leg 3 Leg 2 -7 ? Leg 1 -8 A Also draw path traveled.
PART 4 Expert Land Navigation Supplement NAVIGATING DIFFERENT TERRAINSDEAD RECKONING (advanced – compass and plotter) Here is the basics of using the System. • SCENARIO two ( continued ) • You decided to head back to Point (A). This • would be a NEW LEG 4calculation. • BUT you want to verify your calculations . . . • 4. With the Lensatic Compass laid out at the center (zero), draw LEG 4 Heading and Units of Measure. • NEW LEG 4 = 255°and 9.6 units N +8 +7 +6 B +5 +4 Leg 1 +3 Leg 3 +2 +1 +2 +3 +4 +5 +6 +7 +8 A -8 -3 -4 -2 -1 -7 -6 -5 Leg 2 -2 -3 B -4 -5 -6 Leg 3 Leg 2 -7 ? Leg 1 -8 A Also draw path traveled.
PART 4 Expert Land Navigation Supplement NAVIGATING DIFFERENT TERRAINSDEAD RECKONING (advanced – compass and plotter) Here is the basics of using the System. • SCENARIO two ( continued ) • You decided to head back to Point (A). This • would be a NEW LEG 4calculation. • BUT you want to verify your calculations . . . • 4. With the Lensatic Compass laid out at the center (zero), draw LEG 4 Heading and Units of Measure. • NEW LEG 4 = 255°and 9.6 units • 5. Next, measure the Vertical and Horizontal numbers. LEG 4 = V -2.9 , H -9.2 • 6. Add LEG 4 numbers to LEGS 1 thru 3 • ( LEG 1 thru 3 =V +2.9 ,H +9.2 ) • 7. The total is zero, which equals Point (A) zero. Calculations are correct and you will be back to Point (A). N +8 +7 +6 B +5 +4 Leg 1 +3 Leg 3 +2 +1 +2 +3 +4 +5 +6 +7 +8 A -8 -3 -4 -2 -1 -7 -6 -5 Leg 2 -2 -3 B -4 -5 -6 Leg 3 Leg 2 -7 ? Leg 1 -8 A Also draw path traveled.
PART 4 Expert Land Navigation Supplement NAVIGATING DIFFERENT TERRAINSDEAD RECKONING (advanced – compass and plotter) Here is the basics of using the System. • SCENARIO three • You decided to head to a new location other than • Point (B). You want to go to Point (C) from • current location ( ). This would be a NEW • ROUTE or LEG, it is your choice. • With the Lensatic Compass laid out from current location ( )to Point (C), you can get the Heading and Units of Measurement. • NEW ROUTE = 195°and8 units • Now you have directions to get to Point (C). N +8 +7 +6 B +5 +4 Leg 1 +3 Leg 3 +2 +1 +2 +3 +4 +5 +6 +7 +8 A -8 -3 -4 -2 -1 -7 -6 -5 Leg 2 -2 -3 B -4 C -5 -6 Leg 2 -7 Leg 3 Leg 1 -8 Also draw path traveled. A C
PART 4 Expert Land Navigation Supplement NAVIGATING DIFFERENT TERRAINSDEAD RECKONING (advanced – compass and plotter) Here is the basics of using the System. • SCENARIO three ( continued ) • Now you want to know the Heading and Units of • Measurements from Point (C) to Point (A). • 3. With the Lensatic Compass laid out from end of Point (C) to Point (A), you can get the Heading and Units of Measurement. • DIRECTION to Point (A) = 305° and 8.4 units • 4. Now you have directions to get to Point (A). N +8 +7 +6 B +5 +4 Leg 1 +3 Leg 3 +2 +1 +2 +3 +4 +5 +6 +7 +8 A -8 -3 -4 -2 -1 -7 -6 -5 Leg 2 -2 -3 B -4 C -5 -6 ? Leg 2 -7 Leg 3 Leg 1 -8 Also draw path traveled. C A
PART 4 Expert Land Navigation Supplement NAVIGATING DIFFERENT TERRAINSDEAD RECKONING (advanced – compass and plotter) Here is the basics of using the System. • SCENARIO three ( continued ) • Now you want to know the Vertical and Horizontal • numbers of Point (C). • Next, draw the Cartesian Coordinate system at your current location ( ) for zero. • Measure Vertical and Horizontal numbers. • V = - 7.6H = - 2.2 • 7. Start the process again for new travel path. N +8 +7 +6 +5 +4 +3 B +2 +1 +2 +3 +4 +5 +6 +7 +8 -8 -3 -4 -2 -1 -7 -6 -5 -2 -3 A B -4 -5 -6 Leg 2 -7 Leg 3 C Leg 1 -8 Also draw path traveled. C A
PART 4 Expert Land Navigation Supplement NAVIGATING DIFFERENT TERRAINSDEAD RECKONING (advanced – compass and plotter) Here is the basics of using the System. • NOTE • If you have noticed, I drew the paths taken, as I • traveled. • exact HEADINGS • exact UNITS OF MEADUREMENT • If you give yourself room on the sheet of paper, • you can draw your path to exact scale that • matches the Cartesian Coordinate graph, as you • plot and calculate numbers. N +8 +7 +6 +5 +4 +3 B +2 +1 +2 +3 +4 +5 +6 +7 +8 -8 -3 -4 -2 -1 -7 -6 -5 -2 -3 A B -4 -5 -6 Leg 2 -7 Leg 3 C Leg 1 -8 Also draw path traveled. C A
PART 4 Expert Land Navigation Supplement NAVIGATING DIFFERENT TERRAINSDEAD RECKONING (advanced – compass and plotter) You decide how you want to design your PLOTTER CHART / COORDINATE GRAPH. On the next page is MY EXAMPLE of a coordinate graph and plotter chart, combined with other data entries. ( The next several pages will be explained on how to use it )
PART 4 Expert Land Navigation Supplement 0 PLOTTER 4 4 NOTE UNITS = yards or meters UNITS = miles or kilometers UNITS = foot steps or clock time UNITS = any measurement desired 10 2 16 12 6 2 0° 6 8 12 14 18 18 14 8 10 16 20 20 350° 10° 340° 20° V + V + 18 18 5 25 30 0 10 15 20 330° UNITS OF MEASURE SCALE H – H + 30° 16 16 320° 40° 14 14 310° 50° 12 12 300° 10 10 60° 8 8 290° 70° 6 6 N 4 4 280° 80° 2 2 0 0 270° 90° 2 2 260° 4 100° 4 6 6 110° 250° 8 8 10 10 240° 120° 12 12 230° 130° 14 14 220° 140° 16 16 V – V – 210° 18 18 150° H – H + 200° 160° 10 190° 2 16 12 6 2 6 8 12 14 18 18 14 8 10 16 170° 20 20 180° 4 4 0 FINISH POINT = V ____ , H ____ / LOCATION : __________________________________________________________________ V = ____, ____, ____, ____, ____, ____, ____, ____, ____, ____, ____, ____, ____, ____, ____, ____, ____, ____, ____, ____ = ____ H = ____, ____, ____, ____, ____, ____, ____, ____, ____, ____, ____, ____, ____, ____, ____, ____, ____, ____, ____, ____ = ____ NOTES : ____________________________________________________________________________________________________ ____________________________________________________________________________________________________________ ____________________________________________________________________________________________________________ ____________________________________________________________________________________________________________ ____________________________________________________________________________________________________________ ____________________________________________________________________________________________________________ ____________________________________________________________________________________________________________ ____________________________________________________________________________________________________________ ____________________________________________________________________________________________________________ ____________________________________________________________________________________________________________ 13 12 10 14 15 11 17 18 19 20 16 9 3 8 6 5 4 1 2 7
PART 4 Expert Land Navigation Supplement 0 PLOTTER 4 4 NOTE UNITS = yards or meters UNITS = miles or kilometers UNITS = foot steps or clock time UNITS = any measurement desired 10 2 16 12 6 2 0° 6 8 12 14 18 18 14 8 10 16 20 20 350° 10° 340° 20° V + V + 18 18 5 25 30 0 10 15 20 330° UNITS OF MEASURE SCALE H – H + 30° 16 16 320° 40° 14 14 START = FORK IN TRAIL Travel plan 142° / 250 Yards 310° 50° 12 12 LEG 1 = 100° / 50 YARDS 300° ° 10 10 60° LEG 2 = 135° / 70 YARDS 8 8 290° LEG 3 = 270° / 120 YARDS 70° DISCOVERED POND WITH FISH 6 6 ° ° N 4 4 5 280° 80° ° ° LEG 4 = 163° / 60 YARDS CROSSED SWAMP ( bush too thick to go around / swamp ankle deep ) 2 2 LEG 5 = 40° / 40 YARDS 3 LEG 6 = 107° / 150 YARDS ° 0 0 270° ° 90° ° 1 ° 2 2 DISCOVERED WATERFALL ( took 30 min rest ) 260° LEG 7 = 190° / 70 YARDS 4 100° 4 6 ° ° 2 4 ° 6 6 7 ° 110° 250° 8 ° 8 10 10 240° 120° FINISH = CAMP SITE Heading = 142° from trail Distance = 250 YARDS ( 25 units of measurement ) 12 12 230° 130° 14 14 220° 140° 16 16 * YPH = Yards Per Hour V – V – 210° 18 18 150° H – H + ° 200° 160° 10 190° 2 16 12 6 2 6 8 12 14 18 18 14 8 10 16 170° 20 20 180° 4 4 0 -19 CAMP SITE / HEADING FROM TRAIL 142° / 250 YARDS 15.5 FINISH POINT = V ____ , H ____ / LOCATION : __________________________________________________________________ V = ____, ____, ____, ____, ____, ____, ____, ____, ____, ____, ____, ____, ____, ____, ____, ____, ____, ____, ____, ____ = ____ H = ____, ____, ____, ____, ____, ____, ____, ____, ____, ____, ____, ____, ____, ____, ____, ____, ____, ____, ____, ____ = ____ NOTES : ____________________________________________________________________________________________________ ____________________________________________________________________________________________________________ ____________________________________________________________________________________________________________ ____________________________________________________________________________________________________________ ____________________________________________________________________________________________________________ ____________________________________________________________________________________________________________ ____________________________________________________________________________________________________________ ____________________________________________________________________________________________________________ ____________________________________________________________________________________________________________ ____________________________________________________________________________________________________________ - 0.8 - 4.7 0 - 5.6 - 19 3.1 - 4.2 - 6.9 5 5 -12 1.8 15.5 2.6 14.3 - 1.2 20 18 17 16 15 19 13 12 11 10 14 9 8 3 2 4 5 6 7 1 Intermediate Landmarks used to stay on course. Speed was calculated as group speed ( 3 people in group ). Pond from camp is 168° / 130 yards. EXAMPLE
PART 4 Expert Land Navigation Supplement 0 PLOTTER 4 4 NOTE UNITS = yards or meters UNITS = miles or kilometers UNITS = foot steps or clock time UNITS = any measurement desired 10 2 16 12 6 2 0° 6 8 12 14 18 18 14 8 10 16 20 20 350° 10° 340° 20° V + V + 18 18 5 25 30 0 10 15 20 330° UNITS OF MEASURE SCALE H – H + 30° 16 16 320° 40° 14 14 310° 50° 12 12 300° 10 10 60° 8 8 LEG 1 = 230° / 55 METERS LEG 2 = 281° / 90 METERS LEG 3 = 80° / 45 METERS 290° 70° 6 6 START = CAMP SITE ° N 4 4 ° 6 280° ° 80° 2 ° 2 2 LANDMARKS KEPT IN VIEW, WHILE EXPLORING. ° LEG 4 = 206° / 70 METERS ° 3 0 0 270° 90° ° 2 2 260° ° 1 4 LEG 7 = 13° / 145 METERS to get back to camp site 100° 4 LEG 5 = 180° / 105 METERS 6 6 ° 4 110° 250° 8 8 FINISH = SOUTH OF CAMP SITE ° 10 10 240° ° 120° 5 LEG 6 = 67° / 90 METERS 12 12 ° 230° 130° 14 14 ° 7 220° 140° 16 16 * Time not tracked / casual exploration of surrounding area. V – V – 210° 18 18 150° H – H + 200° 160° 10 190° 2 16 12 6 2 6 8 12 14 18 18 14 8 10 16 170° 20 20 180° 4 4 0 - 14.2 193° & 145 METERS SOUTH OF CAMPS SITE / BACK HEADING IS 13° - 2.9 FINISH POINT = V ____ , H ____ / LOCATION : ________________________________________________________________ V = ____, ____, ____, ____, ____, ____, ____, ____, ____, ____, ____, ____, ____, ____, ____, ____, ____, ____, ____, ____ = ____ H = ____, ____, ____, ____, ____, ____, ____, ____, ____, ____, ____, ____, ____, ____, ____, ____, ____, ____, ____, ____ = ____ NOTES : ____________________________________________________________________________________________________ ____________________________________________________________________________________________________________ ____________________________________________________________________________________________________________ ____________________________________________________________________________________________________________ ____________________________________________________________________________________________________________ ____________________________________________________________________________________________________________ ____________________________________________________________________________________________________________ ____________________________________________________________________________________________________________ ____________________________________________________________________________________________________________ ____________________________________________________________________________________________________________ - 3.2 1.8 0.7 - 6.2 - 14.2 - 10.5 3.2 - 3.9 - 8.8 4.5 - 3.1 - 2.9 0 8.4 16 15 12 17 11 14 13 19 10 20 18 5 3 2 1 6 7 8 9 4 Intermediate Landmarks used to stay on course. Casual exploration of surrounding area. EXAMPLE
PART 4 Expert Land Navigation Supplement NAVIGATING DIFFERENT TERRAINSDEAD RECKONING (advanced – compass and plotter) • 1. The Coordinate Chart is for… • LEG / ROUTE Headings • Units of Measurements • VERTICAL and HORIZONTAL numbers • Compass Card is in increments of 10° degrees. • Degrees can be in any increment • 1°, 5°, or 10°, etc. • The CIRCLES equal the Units of Measurement. • Units of Measurements can be any number and • size of squares. Here the squares are 40 x 40 • to get 20<0>20. • 10 x 10 = 5<0>5 • 50 x 50 = 25<0>25 • 200 x 200 = 100<0>100 • The squares can be any size, just as long it can fit on the paper. • Units of Measurement numbers can be any • value. Yard, pace count, time, decimal sys, etc. • 1 = 0.1 1 10 100 1000 • 5 = 0.5 5 50 500 5000 • 10 = 1.0 10 100 1000 10000 • 15 = 1.5 15 150 1500 15000 • 20 = 2.0 20 200 2000 20000
PART 4 Expert Land Navigation Supplement NAVIGATING DIFFERENT TERRAINSDEAD RECKONING (advanced – compass and plotter) • Coordinate Chart being used… • LEG / ROUTE - draw line or circle • Units of Measurements • Vertical / Horizontal numbers • Heading • Calculations • ROUTE = 135° / 16 UNITS. • LEG 1 = 190° / 5 UNITS • LEG 2 = 235° / 6 UNITS • LEG 3 = 100° / 17.5 UNITS ° LEG 2 ° LEG 3 LEG 1 ROUTE LEG 1 ROUTE LEG 2 LEG 3 ( - 11 ) ( - 11.5 ) 11.4 - 11.2 ROUTE IS 135° / 16 UNITS OF MEASUREMENT • DESTINATION • VERTICAL NUMBERS • HORIZONTAL NUMBERS • LEGS / ROUTES - 11.2 - 5 - 3.3 - 2.9 ( - 5 - 3 - 3 = - 11 ) - 11.4 ( - 1 - 5 17.5 = 11.5 ) - 1 - 5 17.4 ROUNDING NUMBERS – numbers can be rounded up and down. Round in increments of 0.5 ( 0 , 0.5 , 1.5 , 2.0 , 2.5 , etc ) Round to downif 0.1 , 0.2 , 0.3 Round to 0.5 if 0.4 , 0.5 , 0.6 , 0.7 Round to upif 0.8 , 0.9 1 2 0.6 0.2 0.1 0.8 0.4 0.5 0.7 0.9 0.3 1.2 0 1.1 1.6 1.8 1.4 1.5 1.7 1.9 1.3 0.5 0 1.5 1 2
PART 4 Expert Land Navigation Supplement PLOTTER NOTE UNITS = yards or meters UNITS = miles or kilometers UNITS = foot steps or clock time UNITS = any measurement desired • PLOTTER being used… • 1. To draw PATH TRAVELED • Draw lines to UNITS OF MEASURE SCALE 5 25 30 0 10 15 20 UNITS OF MEASURE SCALE LEG 1 = 190° / 50 YARDS ROUTE = CAMP SITE / HEADING 135° / 160 YARDS N LEG 2 = 235° / 60 YARDS LEG 3 = 100° / 175 YARDS MINER CAVE BACK HEADING TO CAMP 315° / 160 YARDS LEG 3 = 100° / 175 YARDS
PART 4 Expert Land Navigation Supplement PLOTTER NOTE UNITS = yards or meters UNITS = miles or kilometers UNITS = foot steps or clock time UNITS = any measurement desired • PLOTTER being used… • 1. To draw PATH TRAVELED • Draw lines to UNITS OF MEASURE SCALE • Use Lensatic Compass for HEADINGS and ruler to draw straight UNITS OF MEASURE lines. • Write information about lines. • ROUTE = 135° / 160 YARDS ( 16 UNITS ) • LEG 1 = 190° / 50 YARDS ( 5 UNITS ) • LEG 2 = 235° / 60 YARDS ( 6 UNITS ) • LEG 3 = 100° / 175 YARDS ( 17.5 UNITS ) 5 25 30 0 10 15 20 UNITS OF MEASURE SCALE LEG 1 = 190° / 50 YARDS ROUTE = CAMP SITE / HEADING 135° / 160 YARDS LEG 2 = 235° / 60 YARDS N LEG 3 = 100° / 175 YARDS MINER CAVE BACK HEADING TO CAMP 315° / 160 YARDS
PART 4 Expert Land Navigation Supplement PLOTTER NOTE UNITS = yards or meters UNITS = miles or kilometers UNITS = foot steps or clock time UNITS = any measurement desired • PLOTTER being used… • 1. To draw PATH TRAVELED • Draw lines to UNITS OF MEASURE SCALE • Use Lensatic Compass for HEADINGS and ruler to draw straight UNITS OF MEASURE lines. • Write information about lines. • ROUTE = 135° / 160 YARDS ( 16 UNITS ) • LEG 1 = 190° / 50 YARDS ( 5 UNITS ) • LEG 2 = 235° / 60 YARDS ( 6 UNITS ) • LEG 3 = 100° / 175 YARDS ( 17.5 UNITS ) • Add any other information on the sheet. • Left / Right turns • Elapse Time • Notes • Symbols 5 25 30 0 10 15 20 UNITS OF MEASURE SCALE LEG 1 = 190° / 50 YARDS ROUTE = CAMP SITE / HEADING 135° / 160 YARDS LEG 2 = 235° / 60 YARDS N CLIFF panorama view of the valley below. MINER CAVE BACK HEADING TO CAMP 315° / 160 YARDS LEG 3 = 100° / 175 YARDS
PART 4 Expert Land Navigation Supplement 0 PLOTTER 4 4 NOTE UNITS = yards or meters UNITS = miles or kilometers UNITS = foot steps or clock time UNITS = any measurement desired 10 2 16 12 6 2 0° 6 8 12 14 18 18 14 8 10 16 20 20 350° 10° 340° 20° V + V + 18 18 5 25 30 0 10 15 20 330° UNITS OF MEASURE SCALE H – H + 30° 16 16 320° 40° 14 14 START = FORK IN TRAIL Travel plan 142° / 250 Yards 310° 50° 12 12 LEG 1 = 100° / 50 YARDS 300° ° 10 10 60° LEG 2 = 135° / 70 YARDS 8 8 290° LEG 3 = 270° / 120 YARDS 70° DISCOVERED POND WITH FISH 6 6 ° ° N 4 4 5 280° 80° ° ° LEG 4 = 163° / 60 YARDS CROSSED SWAMP ( bush too thick to go around / swamp ankle deep ) 2 2 LEG 5 = 40° / 40 YARDS 3 LEG 6 = 107° / 150 YARDS ° 0 0 270° ° 90° ° 1 ° 2 2 DISCOVERED WATERFALL ( took 30 min rest ) 260° LEG 7 = 190° / 70 YARDS 4 100° 4 6 ° ° 2 4 ° 6 6 7 ° 110° 250° 8 ° 8 10 10 240° 120° FINISH = CAMP SITE Heading = 142° from trail Distance = 250 YARDS ( 25 units of measurement ) 12 12 230° 130° 14 14 220° 140° 16 16 * YPH = Yards Per Hour V – V – 210° 18 18 150° H – H + ° 200° 160° 10 190° 2 16 12 6 2 6 8 12 14 18 18 14 8 10 16 170° 20 20 180° 4 4 0 -19 CAMP SITE / HEADING FROM TRAIL 142° / 250 YARDS 15.5 FINISH POINT = V ____ , H ____ / LOCATION : __________________________________________________________________ V = ____, ____, ____, ____, ____, ____, ____, ____, ____, ____, ____, ____, ____, ____, ____, ____, ____, ____, ____, ____ = ____ H = ____, ____, ____, ____, ____, ____, ____, ____, ____, ____, ____, ____, ____, ____, ____, ____, ____, ____, ____, ____ = ____ NOTES : ____________________________________________________________________________________________________ ____________________________________________________________________________________________________________ ____________________________________________________________________________________________________________ ____________________________________________________________________________________________________________ ____________________________________________________________________________________________________________ ____________________________________________________________________________________________________________ ____________________________________________________________________________________________________________ ____________________________________________________________________________________________________________ ____________________________________________________________________________________________________________ ____________________________________________________________________________________________________________ - 0.8 - 4.7 0 - 5.6 - 19 3.1 - 4.2 - 6.9 5 5 -12 1.8 15.5 2.6 14.3 - 1.2 20 18 17 16 15 19 13 12 11 10 14 9 8 3 2 4 5 6 7 1 Intermediate Landmarks used to stay on course. Speed was calculated as group speed ( 3 people in group ). Pond from camp is 168° / 130 yards. EXAMPLE