Bellwork:Thurs. Aug. 23, 2018
470 likes | 504 Views
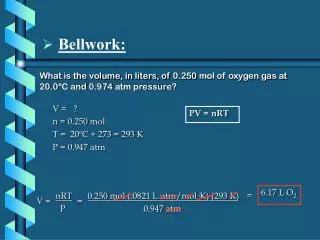
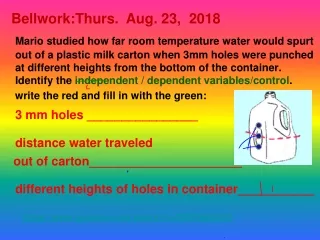
Bellwork:Thurs. Aug. 23, 2018. Mario studied how far room temperature water would spurt out of a plastic milk carton when 3mm holes were punched at different heights from the bottom of the container. Identify the independent / dependent variables/control .

Bellwork:Thurs. Aug. 23, 2018
E N D
Presentation Transcript
Bellwork:Thurs. Aug. 23, 2018 Mario studied how far room temperature water would spurt out of a plastic milk carton when 3mm holes were punched at different heights from the bottom of the container. Identify the independent / dependent variables/control. write the red and fill in with the green: 3 mm holes ________________ distance water traveled out of carton______________________ different heights of holes in container___________ https://www.youtube.com/watch?v=2tBWfqKA0Tk
Responding variable Manipulated variable Question:
Oil Immersion objective Do not use!!!!
X the eyepiece
Now, about the magnification… Low power Medium power High power Oil immersion objective which you DO NOT USE
Notes: draw this little table… 40X 100X 400X
How to Focus Your Microscope • ALWAYS start with lowest power (red) objective lens While looking from the side, move the lens down as close to the specimen as possible without touching it. • Look through eyepiece lens and focus upward only until the image is sharp. If you can't get it in focus, repeat the process again.
Move to the next highest objective Focus medium power objective (yellow) with fine adjustment only. If you need more adjustment, once again move the lens down as close to the specimen as possible without touching it, and look through the eyepiece lens and focus upward only until the image is sharp. If you can't get it in focus, repeat the process again.
turn to the “blue” objective, only use the fine focus (small knob with this objective. You must be very careful not to crack the slide Now to Change to the High Power Objective…
AND DONT USE THE Longest Objective (grey or white) Oil immersion objective it will break the slide and the lens and you will have to pay for damages
Adjusting the Diaphragm • : adjust to allow the amount of light to enable you to see the specimen the best
Lower a clean cover slip over the drop at a 45 degree angle as though it were hinged on one side. e e
Air Bubble this is what an edge of bubble looks like
Explain How to Make a Wet Mount Slide: • Put tiny amount of specimen on slide • Add drop of water to slide • Drop cover slip on from side at 45 degree angle
Bellwork: Mon. Aug. 27, 2018 • Low power objective AKA the ________________ objective & its stripe is _________. • Medium power has magnification of ___________ & a __________ stripe. • High power has magnification of ___________ & a __________ stripe. • The objective you don’t use is the _____________ & it has a ____________ stripe.
https://www.youtube.com/watch?v=9va0KPrVExs • https://www.youtube.com/watch?v=8-oCZ_JEgbM
Scanning electron microscope • https://www.youtube.com/watch?v=GY9lfO-tVfE
Transmission electron microscope • https://www.youtube.com/watch?v=j2A6KeWrqeM
40X 100X 400X
In your first non-living circle: This is a picture of a letter e shown at 40X. This slide was set up with the letter in the correct orientation. Notice that it appears upside down when viewed under the microscope.
40X 100X 400X
This is a picture of the letter "e" shown at 100X. Notice, that as you increase the power of the lens, your field of view gets smaller
40X 100X 400X
1. 2. 3. scanning 40X red 100X low yellow high 400X blue • Does your diaphragm have numbers? NO
First, make your yeast slide… Put a very small drop of yeast/sugar/water on your slide
Lower a clean cover slip over the drop at a 45 degree angle as though it were hinged on one side.
The finished slides should look like this. Always hold a slide by the sides so you do not get fingerprints all over your specimen you want to view!
Bellwork:Tues. Aug. 28, 2018 For the lab scanning – 40X (red stripe) “low” – 100X (yellow stripe) AND the “diaphragm on our scopes Do NOT have numbers!! • What objective do you start with when focusing on a specimen?_____________ • Total magnification is the ___________ X the _____________ • Name some things that could make things blurry and unable to focus: • What objective do you leave the microscope on before putting the plastic cover back on it? ________________ https://www.youtube.com/watch?v=bA9npPr2NJI
After the “e” get two slides from the “common things” trayAnd… I already made the thread slides they are up front in the second tray!!
Draw what you see under Medium and High Power Then describe what you see, and answer the analysis questions
40X 100X 400X
1. Did the letter appear in the same orientation when viewed through the microscope as viewed without the microscope? 2. When you move the slide to the right what direction does it appear to move under the microscope? 3. What happened to the image when you switched objectives?